Author: Shaheer Akram

  • What’s the Latest Android Update in 2026?

    What’s the Latest Android Update in 2026?

    When your phone just pinged you with a software update notification and now you’re wondering, is this the big one? Or maybe you’ve been hearing buzz about Android 17 and Gemini Intelligence and you’re not sure what any of it means for your device. Either way, you landed in the right place.

    Android is moving faster than ever in 2026, and keeping up honestly feels like a part-time job. Let’s break it all down in plain language: what’s out, what’s coming, what’s cool, and whether your phone is even going to get any of it.

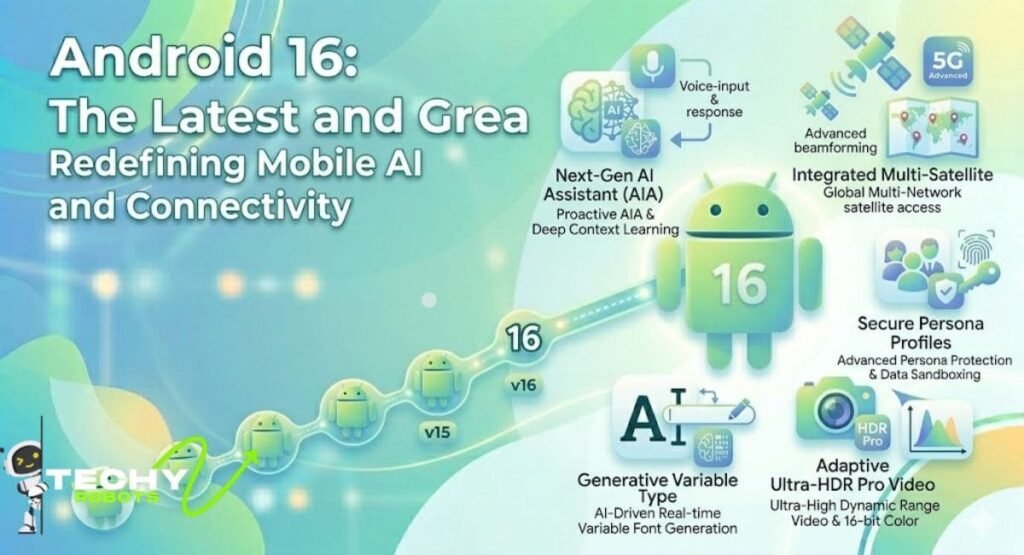
    Android 16: The Update That Already Changed Everything

    Android 16 is the current stable version of Android, and it’s the most widely used Android version on the planet at this moment. As of March 2026, over 21% of all active Android devices are running it, which makes it the top version across the entire ecosystem. That’s a big deal when you consider how fragmented Android has historically been.

    What made Android 16 stand out immediately wasn’t just its new features, but the earlier launch timeline. Instead of waiting until late summer or fall, Google pushed the release forward to the second quarter of 2025.

    The strategy was simple: help smartphone brands launch new devices with the latest Android version already installed. Because of that shift, the Google Pixel 10 arrived in August 2025 running Android 16 out of the box instead of an older release.

    When Did Android 16 Actually Come Out?

    The stable version of Android 16 officially launched on June 10, 2025. But the journey started much earlier; the first developer preview dropped back in November 2024, followed by a series of betas running through early 2025. The platform hit stability in March 2025 with Beta 3, which is when developers started publishing their updated apps to the Play Store.

    The codename? Baklava. And yes, that’s a departure from the old alphabetical dessert tradition Android used to follow. Google’s shift toward the “Trunk Stable Project” is what brought that naming change; it’s more of an internal development philosophy than something that affects users, but it signals that Google is treating Android updates more like a living, evolving platform now rather than a once-a-year event.

    What’s New in Android 16: The Features Worth Knowing

    Android 16 came in quietly but packed a serious punch underneath the hood. The changes touch notifications, design, multitasking, AI, privacy, and even how your phone handles video. Here’s a look at the features that actually matter to real users.

    Live Updates Notifications

    Android 16 introduces “Live Updates,” showing real-time progress directly in the notification panel. You can track rides, food deliveries, or navigation without opening apps. It keeps important updates visible and reduces constant app switching.

    Material 3 Expressive Design

    Google refreshed Android’s design with “Material 3 Expressive,” focusing on smoother animations, vibrant colors, and fluid blur effects. It also improves dark mode, adaptive theming, and wallpaper-based icon styling. Pixel devices started receiving it in late 2025 updates.

    Desktop Mode for Tablets

    Android 16 adds a desktop-style mode for tablets with resizable windows, keyboard, and mouse support. It makes tablets feel closer to a laptop experience, similar to Samsung DeX. The feature debuted in beta on Pixel Tablet devices.

    AI-Powered Notification Summaries

    Android 16 can now summarize long notification threads using on-device AI. It turns busy group chats and alerts into short, readable summaries. This keeps things private while making notifications easier to manage.

    Which Phones Are Getting Android 16?

    Great features mean nothing if your phone isn’t getting them. Here’s the realistic picture of who’s getting Android 16 and when.

    Google Pixel Devices

    As always, Pixel phones were first. All eligible Pixel smartphones had received Android 16 by January 2026, going back as far as the Pixel 6 series. If you own a Pixel 6, 7, 8, or 9 series device, you’re already running it or have the option to update. The Pixel 10 series launched with Android 16 already onboard.

    Samsung Galaxy Updates

    Samsung was the first non-Google manufacturer to ship Android 16, bundling it with One UI 8. The Galaxy S25 series led the charge, and Samsung moved fast by the end of 2025, they had pushed the update to most eligible devices, including budget and mid-range phones. If you’re on a Galaxy S25, S24, or even some older A-series models, you’ve likely already got Android 16 sitting in your software version. One UI 8 brought a redesigned notification panel, a refreshed recent apps interface, and updated system apps alongside the Android 16 base.

    OnePlus, Motorola, and Other Brands

    OnePlus shipped Android 16 as OxygenOS 16, starting with the OnePlus 13 and 12 series in early November 2025. By the time that rollout finished, the Nord series and OnePlus Open also had their updates.

    Motorola has been slower but consistent Edge 50 and 60 families, the Razr lineup, and recent G-series phones are all in the update pipeline, with rollouts happening region by region through early 2026.

    Xiaomi brought Android 16 through HyperOS 3, covering the Xiaomi 15, 14, and 13 series, along with the Redmi Note 14 and several POCO devices. OPPO and OnePlus shared the Android 16 rollout in many markets since they share the same parent company.

    Android 17: The Next Big Thing Is Almost Here

    Now here’s where things get genuinely exciting. Android 17 is coming, and it might be the most significant Android release in years not because of flashy redesigns or new emoji packs, but because of what it means for how AI works on your phone.

    Android 17 Release Date: What to Expect

    Android 17 is expected to arrive in stable form in June or July 2026. A public beta has been available since February 2026 for those who want to try it early. The first phones to get the stable release will be the Samsung Galaxy S26 and Google Pixel 10, with other manufacturers following in the months after. As with any Android update, exact dates depend on each company’s timeline for adapting the OS to their own software skin.

    Gemini Intelligence: Android’s Biggest AI Leap Yet

    Google announced something called Gemini Intelligence on May 12, 2026, at The Android Show: I/O Edition, and the reaction was immediate. This isn’t just another AI assistant update it’s Google essentially saying Android is no longer just an operating system. It’s becoming an intelligence layer that sits underneath everything you do on your phone.

    The concept is that Gemini stops being an app you open and starts being something that runs in the background, understanding context and completing tasks on your behalf. Google described it as a shift from reactive smartphone usage to predictive, agentic AI experiences. And the demos backed that up in a compelling way.

    Multi-Step App Automation

    Gemini Intelligence can complete multi-step tasks across apps using a single prompt. For example, it can find emails in Gmail, identify needed items, add them to a shopping cart, and wait for final user confirmation before checkout. It can also process real-world inputs like images and complete bookings across apps such as Expedia. These actions run on-device using Gemini Nano v3, requiring flagship phones like Pixel 10 and Galaxy S26.

    Create My Widget

    This feature lets users generate Android widgets just by describing them in plain language. You can request things like a countdown timer, weather card, or stock tracker, and Gemini instantly builds it. No third-party apps or coding is required. It simplifies widget creation and removes one of Android’s long-standing usability gaps.

    Rambler: Smarter Voice Dictation

    Rambler improves voice typing by allowing natural, imperfect speech instead of strict grammar. It can handle mid-sentence corrections, filler words, and even mixed-language conversations. Built into Gboard, it cleans up speech into clear text automatically. This is especially useful for multilingual users who switch languages while speaking.

    Intelligent Autofill

    Intelligent Autofill expands beyond basic saved data like names and addresses. It can pull relevant information from Gmail, Photos, and Google Wallet to fill forms automatically. For example, it can extract passport details from an image and insert them into a visa form. The feature is opt-in, giving users full control over what data is accessed.

    Android Security Patches and Why They Matter More Than You Think

    A lot of people ignore the monthly security update notifications, assuming they’re minor and unimportant. They’re not. Android security patches are one of the most important things keeping your phone safe, and Google has been consistent about delivering them monthly especially for Pixel devices and recent Samsung flagships.

    These patches close vulnerabilities in Android’s core, in Google Play services, and in components like Android WebView, which is what millions of apps use to display web content inside themselves. A missed security patch can leave open a door that attackers are actively walking through. If your phone supports monthly patches, applying them promptly is genuinely worth the two minutes it takes.

    Beyond monthly patches, Google ships quarterly platform releases (QPRs) for Android that bring both bug fixes and feature additions without waiting for a full major version. Android 16’s QPR updates have been rolling through 2026, adding improvements to battery management, system stability, and visual refinements.

    Samsung Galaxy S26 and Pixel 10: The First Android 17 Phones

    When Android 17 officially drops this summer, two devices will be front of the line. The Samsung Galaxy S26 and the Google Pixel 10 are expected to be the first phones to receive the stable Android 17 update, and both are already positioned as the primary hardware for Gemini Intelligence features.

    The Galaxy S26 actually got something of an early advantage Samsung’s Galaxy S26 family received some Gemini Intelligence-related features ahead of the broader Android 17 rollout, which is a sign of how tightly Google and Samsung have been collaborating on AI features this generation. For anyone thinking about upgrading their phone in 2026, these two devices represent the clearest window into where Android is heading.

    The Pixel 10 series, which launched in August 2025 with Android 16 pre-installed, will be among the first to receive Android 17 and the full Gemini Intelligence suite. The Galaxy Z Fold 8, expected in July 2026, is also expected to be an early recipient.

    Android Update Tracker: How to Know if Your Phone Is Eligible

    Not sure if your phone is getting Android 16 or Android 17? Here’s the simplest way to check.

    Go to Settings → About Phone → Android Version to see what you’re currently running. Then go to Settings → System → System Update to check if an update is available. For most mainstream phones from Samsung, Google, OnePlus, Motorola, or Xiaomi from the last three years, Android 16 should already be available or incoming.

    For Android 17, eligibility generally comes down to whether your phone is a current-generation flagship or a recent high-end model with committed software support. Google’s Pixel 6 and newer are confirmed. Samsung’s Galaxy S-series and some A-series models will get it. OnePlus 12 and newer are in line. Budget phones and older mid-range devices may stop at Android 16.

    One helpful rule of thumb: if your manufacturer promised four or more years of OS updates, you’re likely in good shape for Android 17. Google now offers seven years of updates for Pixel devices from the Pixel 8 onwards, and Samsung offers seven years on Galaxy S-series flagship models.

    The Future of Android: On-Device AI and Privacy

    The biggest story in the Android ecosystem right now isn’t a single feature, it’s a philosophy shift. Google is moving Android toward a world where AI is woven into the operating system itself, not bolted on as a separate app. Gemini Intelligence is the most visible sign of that.

    What makes this interesting from a privacy standpoint is that a lot of the processing is happening on-device. Contextual suggestions, notification summaries, and the Gemini Nano-powered automation in Android 17 all run locally on the phone rather than sending your data to remote servers. That’s a meaningful change from how many AI features have worked in the past.

    Android’s privacy controls have also grown significantly across 16 and 17. You get more granular control over what apps can access, better visibility into when permissions are being used, and clearer signals about when AI features are drawing from your personal data. The opt-in design of Intelligent Autofill is a good example Google is trying to make power features available without forcing them on users who would rather keep their data siloed.

    The Android ecosystem is also expanding outward. Wear OS 7, announced alongside Android 17 at Google I/O 2026, brings the Android 17 platform to smartwatches with a 10% improvement in battery efficiency and support for Live Updates on your wrist. Android Auto is getting deeper Gemini integration and a refreshed interface. The Android experience is no longer just a phone thing, it’s a connected platform spanning phones, tablets, cars, and wearables.

    Conclusion

    Android in 2026 is genuinely exciting and that’s not something people say about every software cycle. Android 16 quietly transformed how notifications work, how the OS looks, and how tablets and large-screen devices are treated. It did all of that without breaking anything, which is harder to pull off than it sounds.

    Android 17 is about to raise the stakes further. The Gemini Intelligence announcement feels like a real turning point not just for Android, but for what smartphones are supposed to do. If multi-step AI automation actually works the way it was demoed, a lot of the tedious, repetitive tasks that currently eat your time could become genuinely hands-free.

    The Android OS upgrade path in 2026 rewards people who bought flagship or recent mid-range phones from major manufacturers, especially Samsung and Google. If your device is a year or two old, there’s a good chance Android 16 is either already on it or coming soon. Android 17 will follow the same pattern starting at the top and working its way down. Either way, it’s worth checking your system update settings today.

    FAQs

    1. What is the latest version of Android right now? 

    The current stable version is Android 16, released on June 10, 2025. Android 17 is in beta and expected to launch as a stable release in June or July 2026.

    2. Which phones will get Android 17 first? 

    The Samsung Galaxy S26 and Google Pixel 10 series are expected to be among the first devices to receive Android 17 when it officially launches. The Galaxy Z Fold 8 is also expected to follow shortly after.

    3. What is Gemini Intelligence on Android 17? 

    Gemini Intelligence is Google’s umbrella branding for a set of proactive AI features in Android 17. It includes multi-step app automation, Create My Widget, Rambler voice dictation, and Intelligent Autofill all designed to help your phone complete tasks for you with minimal input.

    4. Is my older Android phone still getting security updates? 

    Most phones released in the last two to three years from major brands still receive monthly or quarterly security patches even if they don’t qualify for the latest Android version. Check your manufacturer’s support page to confirm your device’s update end date.

    5. How do I check if my phone has the latest Android update? 

    Go to Settings → System → System Update on your Android device. The phone will check for any available updates automatically. If you own a Pixel, you can also visit the Android Beta Program page to opt into pre-release builds.

  • Latest Android Version 2026: New Features, Updates Revealed

    Latest Android Version 2026: New Features, Updates Revealed

    If you have ever scrolled through your phone settings and wondered what all those Android version numbers actually mean, you’re not alone. Android has gone through an incredible journey since it first launched back in 2008, and keeping track of everything can feel like reading a history book. 

    But here’s the thing: understanding the Android version history isn’t just for tech nerds. It actually helps you know what your phone can do, how secure it is, and whether you’re getting the most out of it.

    So let’s break it all down together, starting from the very beginning and working our way up to the latest Android version in 2026.

    What Is the Latest Android Version Right Now?

    As of 2026, the latest Android version is Android 16, which Google officially announced and began rolling out to compatible devices. Before that, Android 15 was the current stable release for most users. 

    Android 16 brings a whole wave of new features focused on smarter notifications, stronger security, better multitasking, and accessibility improvements that genuinely make a difference in everyday use.

    If you’re running Android 14 or Android 15, you might already be eligible for an update, depending on your device brand and model. More on that later.

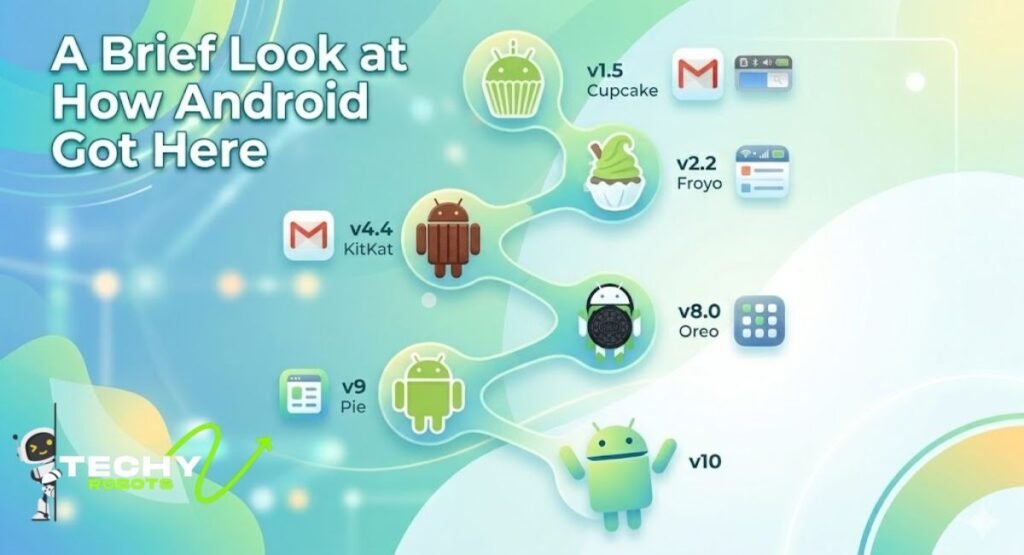
    A Brief Look at How Android Got Here

    Android didn’t start off as the polished, feature-rich operating system it is today. It started humble, grew fast, and kept reinventing itself with every major release. Let’s take a quick trip through the Android OS timeline.

    The Early Days: Android 1.0 to Froyo

    Android 1.0 launched in September 2008 on the HTC Dream. It was basic by today’s standards, but it was a genuine smartphone OS that could browse the web, run apps, and sync with Google services. That alone felt revolutionary at the time.

    Android 1.5 (Cupcake) came soon after, introducing the on-screen keyboard and video recording. Then came Donut (1.6), which added support for CDMA networks and a proper search function. Eclair (2.0/2.1) introduced live wallpapers, Google Maps navigation, and a redesigned UI.

    Froyo, short for Frozen Yogurt (2.2), was a huge deal. It brought performance improvements through JIT compilation, support for Adobe Flash, and the ability to install apps directly to an SD card. Suddenly, Android felt much snappier and more capable.

    Sweet Names and Big Leaps: Gingerbread to Jelly Bean

    Gingerbread (2.3) polished the platform further and introduced NFC support, which later became the backbone of contactless payments. Honeycomb (3.0) was designed specifically for tablets, introducing a completely different UI with the action bar and a more desktop-like experience.

    Ice Cream Sandwich (4.0) was the version that truly unified Android for phones and tablets, bringing a cleaner Material-style design before Material Design was even a thing. It also introduced Face Unlock, which felt almost sci-fi at the time.

    Jelly Bean (4.1 to 4.3) brought Project Butter, which targeted 60 fps performance to make Android feel as smooth as butter, hence the name. Expandable and actionable notifications also debuted here, giving users quick controls without opening apps.

    The Golden Era Begins: KitKat to Marshmallow

    KitKat (4.4) was a turning point. Google made Android leaner so it could run well even on low-end devices with just 512 MB of RAM. It was Google’s way of saying, “Android is for everyone,” not just flagship phones.

    Lollipop (5.0) introduced Material Design, the visual design language that completely transformed how Android looked and felt. It was colorful, animated, and elegant. Battery performance improved with Project Volta, and notifications showed up on the lock screen for the first time.

    Marshmallow (6.0) brought Doze mode, which put the phone into a deep sleep when inactive, saving battery life significantly. App permissions were overhauled so users could choose what each app could access, a feature we now take for granted.

    Modern Android Takes Shape: Nougat to Pie

    Nougat (7.0) introduced split-screen multitasking, letting you run two apps side by side on your phone. It also marked the debut of Google Assistant as a core feature, accessible with a long press on the home button.

    Oreo (8.0) added picture-in-picture mode, notification channels, and significantly improved boot times. Autofill support made password management much more seamless.

    Pie (9.0) was the first version to fully embrace gesture navigation, moving Android closer to a swipe-based interface. It also introduced Adaptive Battery and Adaptive Brightness, using machine learning to optimize performance based on your habits.

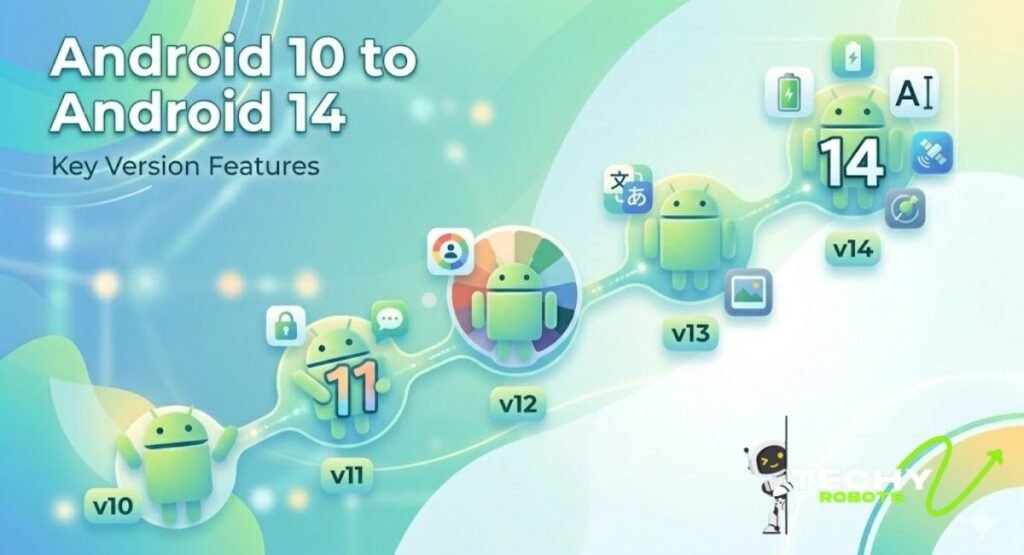
    Android 10 to Android 14: The Numbered Era

    Starting with Android 10, Google dropped the dessert naming convention for the public releases (though they still use it internally). The shift was partly to avoid alphabet confusion globally, since some letters and their associated words don’t translate the same way in every language.

    Android 10 and 11: Refinement and Control

    Android 10 brought a proper system-wide dark mode, improved location permissions (now you can share location only while using an app), and full gesture navigation became the default. Live captions, which transcribed audio in real time, were a standout accessibility win.

    Android 11 built on that with a dedicated conversation section in the notification shade, one-time permissions for sensitive data, a media player in the quick settings panel, and screen recorder support built right into the OS.

    Android 12 and 13: Material You and More Privacy

    Android 12 was a design overhaul. Material You let Android dynamically generate a color palette from your wallpaper and apply it across the entire system. It was a personal touch that made Android feel uniquely yours. Privacy was also a big theme here, with a privacy dashboard showing which apps had accessed your camera, microphone, or location.

    Android 13 went deeper into personalization, allowing per-app language settings so you could use, say, French for one app and English for another. It also tightened photo and media permissions, giving apps access only to the specific photos or videos they needed rather than your entire gallery.

    Android 14: Performance, Personalization, and Camera

    Android 14 focused heavily on customization and efficiency. Lock screen customization got richer, with more font and shortcut options. Larger text scaling was supported for accessibility. The camera improvements were notable, with Ultra HDR support delivering more vibrant photos with better contrast.

    Flash notifications for accessibility let the camera or screen flash when a notification arrives. Health Connect became a central hub for health and fitness data across apps, and Android 14 started laying the groundwork for better large-screen experiences.

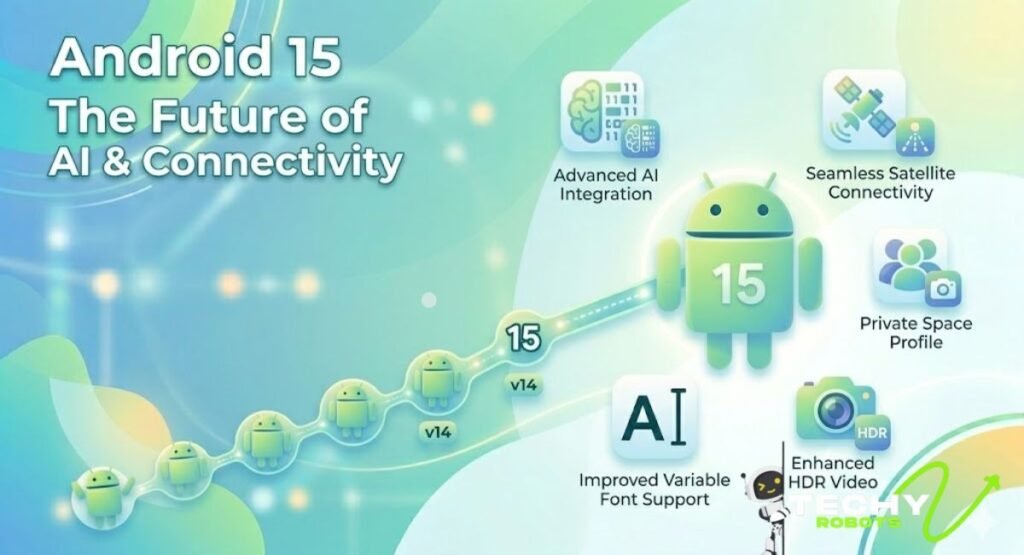
    Android 15: What Changed Before Android 16

    Android 15 served as an important stepping stone before the major changes in Android 16. It wasn’t a flashy release, but it packed in meaningful improvements that everyday users noticed.

    Notification Improvements in Android 15

    Android 15 improved how notifications were presented, especially for apps that hadn’t updated their notification styles. Silent notifications became easier to manage, and Android’s notification system started to feel less cluttered overall.

    Security Upgrades in Android 15

    Theft detection lock was introduced, using AI to recognize if your phone was suddenly grabbed and bolted at pace, automatically locking the screen. Offline device lock ensured the phone locked after extended disconnection, preventing someone who stole it from staying offline to avoid a remote wipe.

    Private Space was another big addition, letting users create a separate, locked-down area of their phone for sensitive apps, requiring a separate authentication to access.

    Android 16: The Latest and Greatest

    Android 16 is where things get genuinely exciting. Google packed this release with features that feel less like incremental updates and more like thoughtful improvements to how you actually use your phone day to day.

    Smarter Notifications with Live Updates and Auto-Grouping

    One of the most practical additions in Android 16 is live updates in notifications. Think of it like a live activity on your lock screen that gives you real-time progress, like a food delivery getting closer, a ride on its way, or a package being sorted at the facility. You no longer need to open the app every two minutes to check.

    Auto-grouping is the other half of this story. Android 16 automatically bundles notifications from the same app or conversation thread, so your notification shade doesn’t turn into a wall of text. It’s something people have wanted for years, and it finally works the way it should.

    Desktop Windowing for Power Users

    Android 16 brings proper desktop windowing to supported devices. This means you can run multiple apps in resizable windows, just like on a computer. This is huge for productivity, especially on foldable phones and tablets. You can move windows around, resize them, minimize them, and switch between tasks in a way that’s genuinely efficient rather than just cosmetic.

    It’s the closest Android has come to feeling like a true desktop-class OS, and with more people using their phones as their primary work device, the timing makes complete sense.

    Predictive Back Gesture

    The predictive back gesture previews where you’ll land before you fully swipe back. So if you’re in an app and you start swiping from the edge, you’ll see a peek of the previous screen or the home screen before completing the gesture. It sounds like a small thing, but in practice it makes navigation feel more intentional and less accidental.

    Adaptive Refresh Rate Battery Savings

    Android 16 gets smarter about display refresh rates, automatically dropping to lower rates during static content like reading an article or looking at a photo. 

    This preserves battery life without making your screen feel sluggish during interactions where high refresh rates matter. It’s the kind of background optimization you don’t notice until you check your battery at the end of the day and realize you’ve got more left than usual.

    Accessibility Features Worth Talking About

    Android 16 made some genuinely impactful accessibility changes that deserve their own spotlight.

    Hearing Aid Support

    Android 16 significantly improves Bluetooth hearing aid integration. Users with hearing aids can now stream audio directly from the phone with better latency and connection stability. Audio routing between hearing aids and speakers is smoother, and controls in the accessibility menu are more straightforward than ever before.

    Phone as Microphone Input

    This one is clever. Android 16 lets compatible hearing aid users use their phone as a remote microphone. You put your phone near someone speaking, say across a table at a restaurant, and the audio feeds directly into your hearing aids. It turns your Android phone into an assistive listening device without any extra hardware.

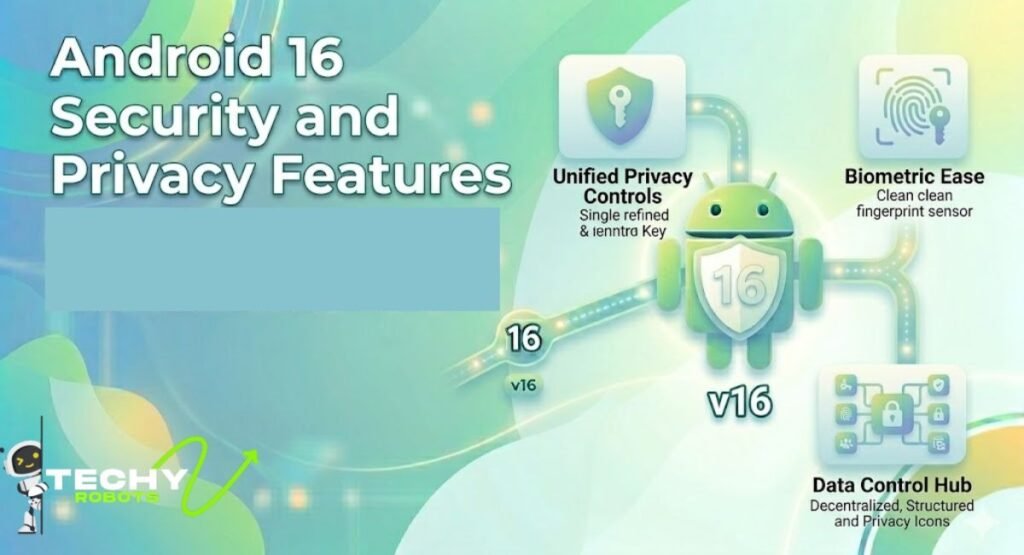
    Android 16 Security and Privacy Features

    Security got a serious upgrade in Android 16, and it shows in several areas.

    Identity Check and Advanced Protection Mode

    Identity Check is a feature that requires biometric authentication before allowing changes to critical settings when you’re in an untrusted location. So if someone gets your PIN but takes your phone to an unfamiliar place, they still can’t change your recovery email or turn off Find My Device without your face or fingerprint.

    Advanced Protection Mode takes security even further, designed for high-risk users like journalists, activists, or executives. It enables stricter controls over app permissions, blocks sideloading of unverified apps, and ties in tighter with Google’s threat intelligence. It’s basically maximum-security mode without needing a separate enterprise device.

    Trade-In Mode Explained

    Trade-In Mode is a thoughtful addition for anyone upgrading their phone. It locks the device to a simplified interface that lets a buyer or trade-in evaluator check the phone’s basic functions, such as screen, cameras, and buttons, without being able to access personal data or settings. Once the evaluation is done, you can exit the mode and complete the factory reset yourself, keeping your data under your control throughout the process.

    Android 16 Multitasking and Productivity

    Beyond desktop windowing, Android 16 improves multitasking across the board. App pairs, where you save two apps as a single split-screen shortcut, become more reliable and easier to access from the recent screen. Drag and drop across apps works more consistently, making it easier to move content between apps without jumping through hoops.

    The taskbar on larger screens and foldables is more customizable, letting you pin your most-used apps for quick switching. For someone using a foldable device as a laptop replacement, Android 16 closes a lot of the gaps that made previous versions feel half-finished.

    Foldable and Tablet Improvements in Android 16

    Foldable phones and tablets are no longer an afterthought in Android 16. Google worked closely with device makers to ensure apps behave properly in all orientations and window sizes. App continuity, meaning your open app seamlessly transitions from one screen to another when you unfold or fold the device, is smoother and more reliable.

    Tablet-optimized layouts are more common now because Google pushed developers harder to support larger screens. The result is that more apps actually take advantage of the extra real estate instead of just stretching a phone interface across a bigger display.

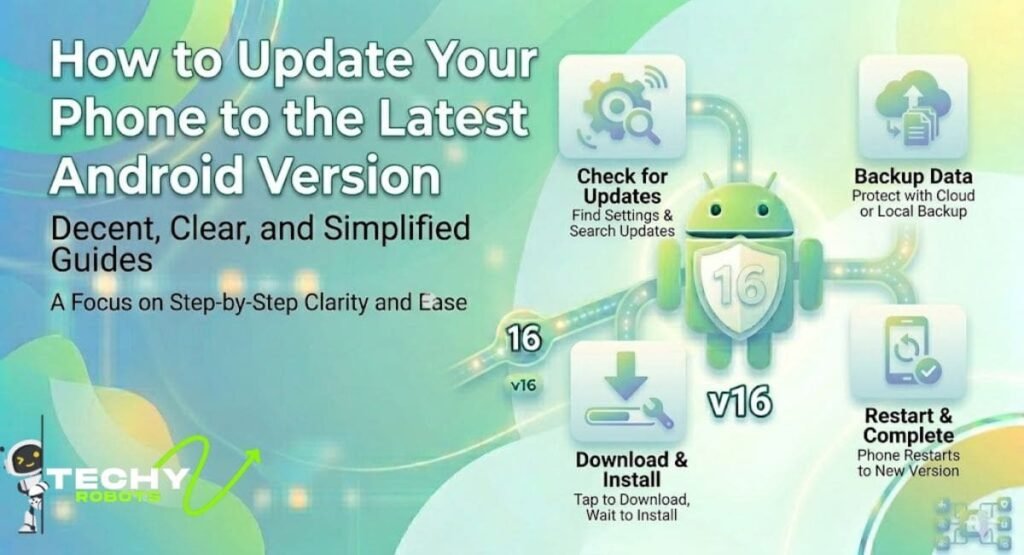
    How to Update Your Phone to the Latest Android Version

    Getting the latest Android version is usually straightforward, though availability depends on your device brand and model.

    To check for updates, go to Settings, then scroll down to System, and tap System Update or Software Update. If an update is available, your phone will guide you through the installation process. Make sure your battery is above 50 percent and you have a stable Wi-Fi connection before starting.

    If you’re on a Google Pixel, you’ll typically get Android updates first, often on the same day Google releases them. Samsung, OnePlus, and other major brands usually follow within a few weeks to a few months, depending on how much customization they add to their Android skin.

    If your device is older and no longer supported by the manufacturer, you may not receive Android 16 even if it’s technically capable of running it. In that case, it might be worth looking at whether a third-party ROM is an option for your device.

    Android vs iOS: Where Does Android Stand Today?

    Android continues to dominate the global smartphone market with a significant share compared to iOS. The flexibility, open ecosystem, and range of price points mean Android reaches users across every income level in every country.

    iOS still has an edge in terms of update consistency, since Apple pushes updates to all supported devices simultaneously. But Android has narrowed that gap considerably, especially with Google’s own Pixel line and its partnership program with select manufacturers to guarantee faster updates.

    What Android brings to the table is genuine choice. You can buy a budget phone with solid Android performance, a flagship with cutting-edge hardware, a foldable with a unique form factor, or a tablet that can run a desktop-like experience. iOS doesn’t offer that range. And with Android 16 pushing harder on security, privacy, and desktop-class multitasking, the platform has never been more capable.

    Conclusion

    Android has come an incredibly long way from the simple, text-heavy interface of version 1.0 to the powerful, intelligent, and personalized operating system it is today. 

    Android 16 is genuinely the most complete version of the platform yet, hitting the right notes across productivity, security, accessibility, and everyday usability. Whether you’re using a budget phone or a high-end foldable, there’s something in this release that improves how you interact with your device each day.

    For most users, the jump to Android 16 will feel natural and rewarding. The features aren’t just technically impressive on paper but actually useful in real life. Live notifications, desktop windowing, stronger privacy controls, and better accessibility support all point to a platform that’s maturing with real intention.

    If you haven’t checked for an update recently, now’s a good time to do it. Your phone experience might be about to get noticeably better.

    FAQs

    1. What is the latest Android version in 2026? 

    The latest Android version in 2026 is Android 16, which Google began rolling out to Pixel devices and other supported phones. It brings improvements in notifications, security, multitasking, and accessibility.

    2. How do I update my Android phone to Android 16? 

    Go to Settings, tap System, then System Update or Software Update. If your device supports Android 16 and your manufacturer has released the update, you’ll see it here. Keep your battery above 50 percent and connect to Wi-Fi before updating.

    3. What are the biggest new features in Android 16? 

    Android 16’s standout features include live notification updates, auto-grouping of notifications, desktop windowing for tablets and foldables, the predictive back gesture, Identity Check for security, Advanced Protection Mode, and Trade-In Mode.

    4. Will my older Android phone get the Android 16 update? 

    It depends on your device brand and how old your phone is. Google Pixel phones from the Pixel 6 series onward are typically supported. Other brands like Samsung and OnePlus release updates for their recent flagship and mid-range phones, usually within a few months of Google’s release.

    5. What is the difference between Android 15 and Android 16? 

    Android 15 focused on theft detection, Private Space, and notification refinements. Android 16 goes further with desktop windowing, live notification updates, better hearing aid accessibility, stronger biometric security, adaptive refresh rate optimization, and improved foldable and tablet support.

  • How to AirDrop on Android for Fast Wireless Sharing 2026

    How to AirDrop on Android for Fast Wireless Sharing 2026

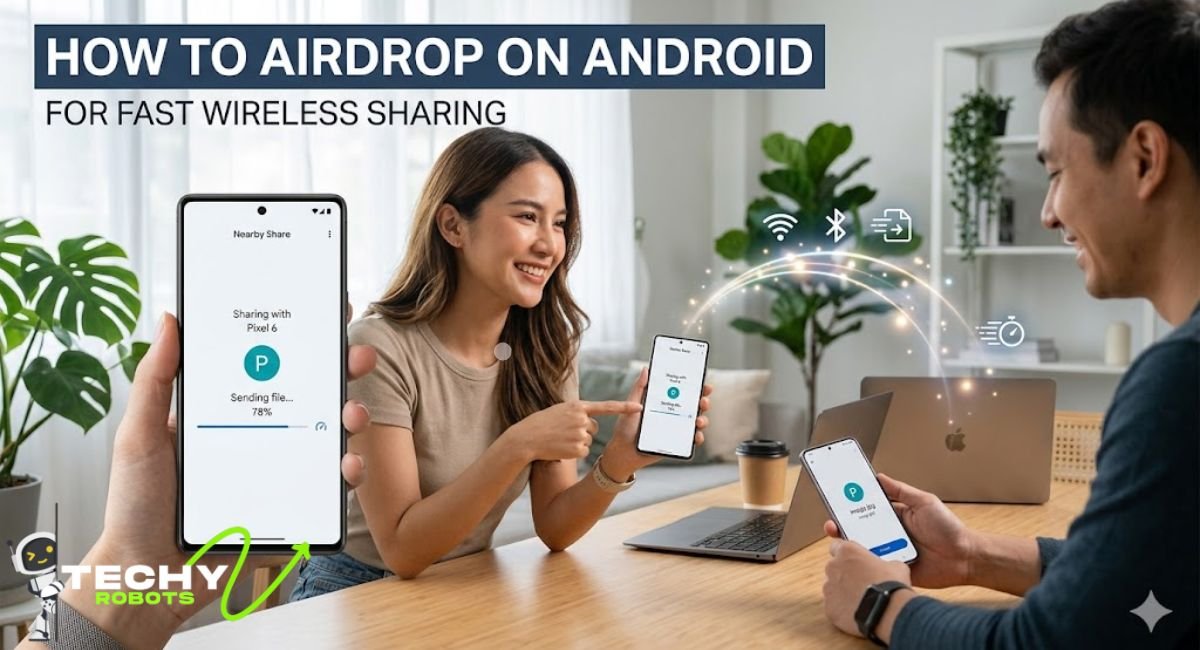
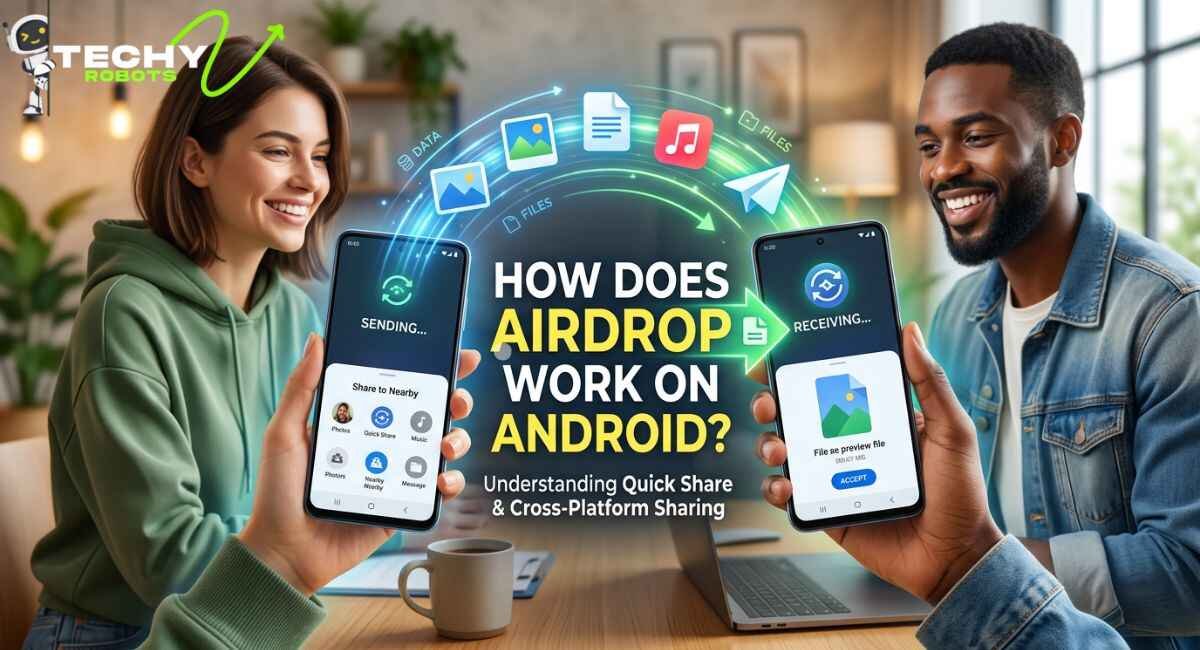
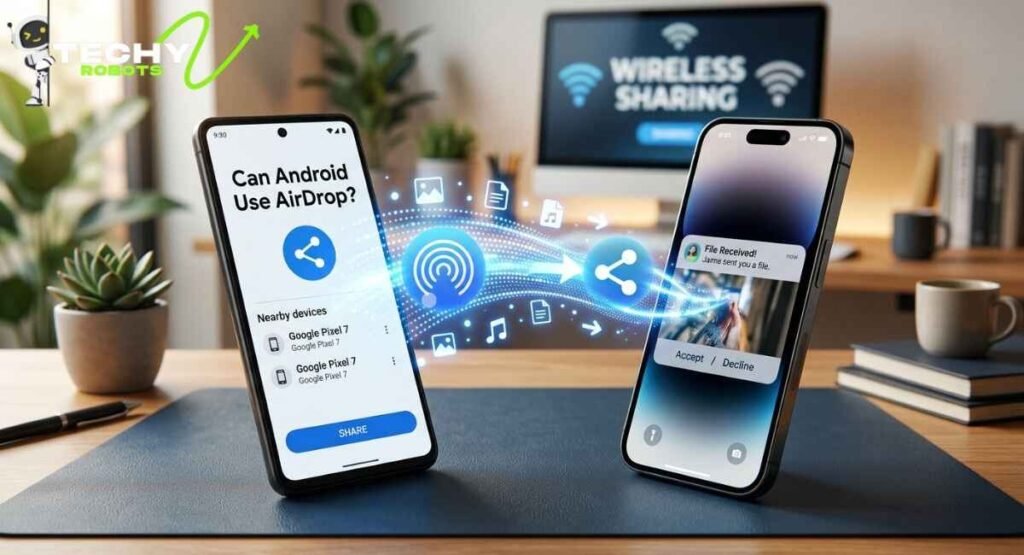
    When you just switched from an iPhone, or maybe your friend has a Samsung and you want to share a video with them quickly. You’ve heard of AirDrop and you’re wondering if Android has something like that? The short answer is yes, absolutely. Android has its own built-in wireless sharing tool that works just as smoothly, and in some cases even better.

    This guide moves towards what Quick Share actually is, to how you can use it to send and receive files between Android phones, and even across Android and iPhone. Whether you’re using a Google Pixel 10, a Samsung Galaxy S25, or any other Android device, this is your one-stop reference.

    What Is AirDrop and Why Android Users Want It

    If you’ve ever watched an iPhone user tap a button and instantly send a file to another iPhone nearby, that’s AirDrop. It uses a combination of Bluetooth and Wi-Fi Direct to create a peer-to-peer connection between Apple devices. No internet needed. No cables. Just a tap and the file moves.

    The appeal is obvious. It’s fast, it’s secure, and it feels almost like magic. Naturally, Android users wanted something similar. And while Google took a while to get there, the Android ecosystem now has a wireless sharing feature that gives AirDrop a real run for its money.

    Does Android Have AirDrop? Here’s the Truth

    Android does not support Apple AirDrop directly. AirDrop uses a proprietary Apple protocol called AWDL (Apple Wireless Direct Link), which is baked into iOS and macOS hardware. Android devices simply don’t run that protocol so you can’t use AirDrop natively on an Android phone.

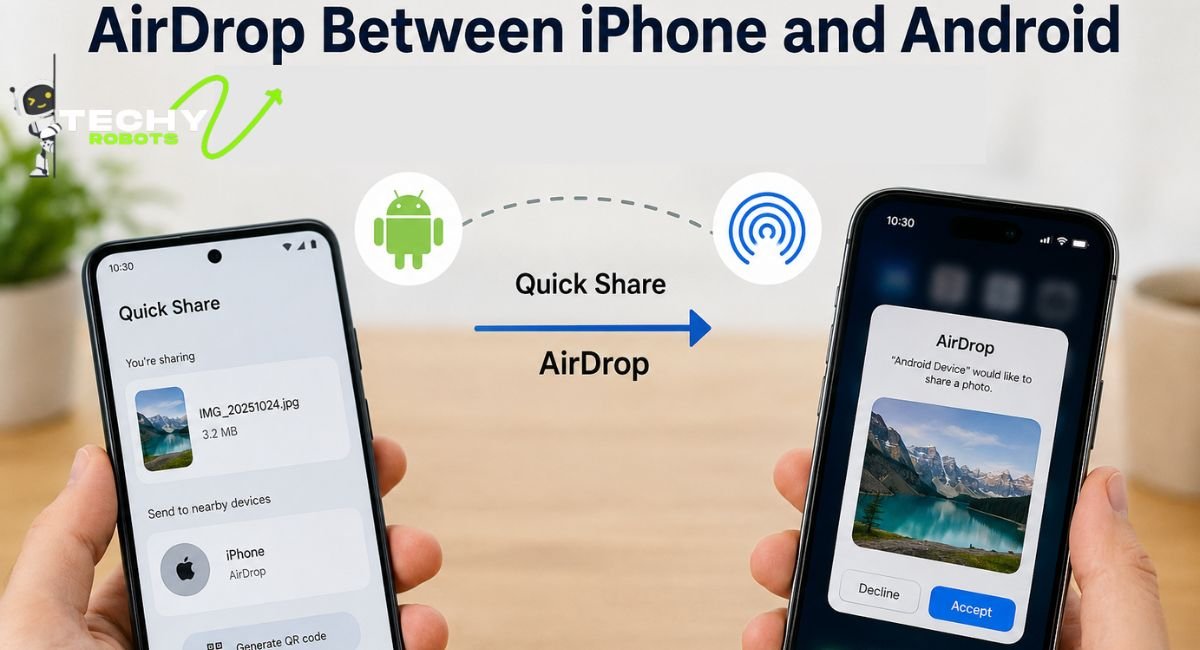
    But here’s the thing you don’t need to do. Android has Quick Share, which is powered by Google and pre-installed on most modern Android phones. It does everything AirDrop does, and it even supports cross-platform sharing in certain situations.

    Quick Share: Google’s Answer to AirDrop

    Quick Share was originally called Nearby Share when Google launched it back in 2020. Google later rebranded it to Quick Share and partnered with Samsung to unify the feature across both Google Pixel and Samsung Galaxy devices. Today, Quick Share is the default wireless file sharing feature on Android, and it comes pre-installed — no download required.

    It uses a mix of Bluetooth, Wi-Fi Direct, and sometimes even WebRTC (for cloud-based transfers) to send files between nearby devices. You can share photos, videos, documents, contacts, links, and even apps all without needing an internet connection in most cases.

    How Quick Share Compares to Apple AirDrop

    Let’s put them side by side for a moment. AirDrop is fast and reliable, but it only works between Apple devices. If you want to send a file from an iPhone to a MacBook, great. iPhone to Android? That’s where it hits a wall.

    Quick Share, on the other hand, works across Samsung, Google Pixel, OPPO, OnePlus, Xiaomi, HONOR, Vivo, and many other Android devices. It also supports QR code sharing and cloud-based transfers, which AirDrop doesn’t offer natively. So while AirDrop might feel more polished within the Apple bubble, Quick Share is arguably more versatile in the real world.

    How to Use Quick Share on Android (Step-by-Step)

    Let’s get practical. Here’s exactly how to send and receive files using Quick Share on your Android phone.

    Sending a File Using Quick Share

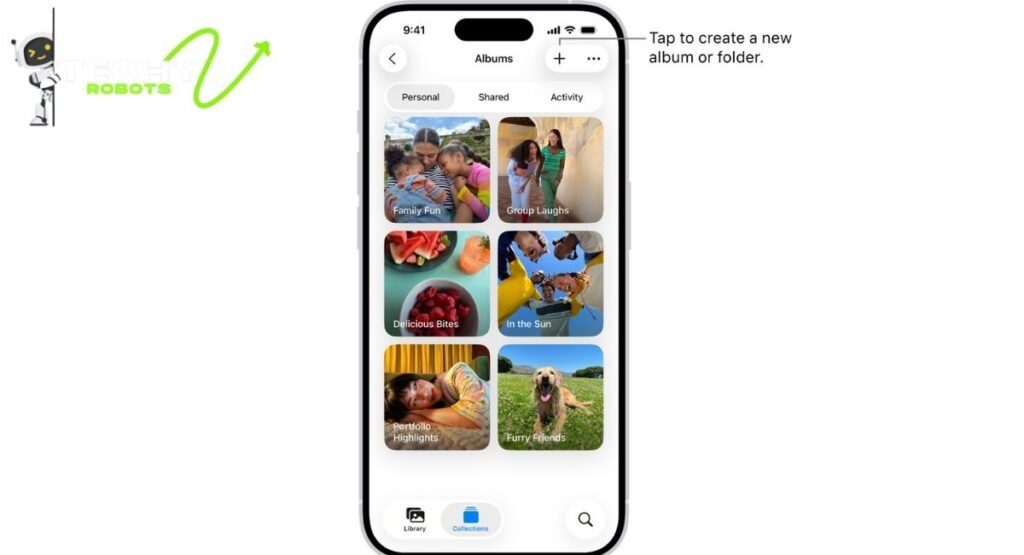
    1. Open your Photos app or File Manager and select the file you want to share.
    2. Tap the Share button (the icon that looks like three connected dots or an arrow pointing up).
    3. From the share sheet, tap Quick Share.
    4. Your phone will scan for nearby devices. Make sure the recipient’s phone has Quick Share visible (either set to “Everyone” or “Contacts”).
    5. When their device appears on your screen, tap on it.
    6. The recipient will get a notification to accept the file. Once they do, the transfer begins instantly.

    The whole process takes about 10 to 15 seconds for most files. For larger videos or document batches, it takes a bit longer, but the speed is comparable to AirDrop in most real-world scenarios.
    Receiving a File Using Quick Share

    1. Open your phone’s Settings and search for Quick Share, or swipe down the notification shade and look for the Quick Share toggle.
    2. Turn it on and set your visibility to Everyone (if you want anyone nearby to send you files) or Contacts (if you prefer to limit it to people in your address book).
    3. Wait for the sender to find your device and initiate the transfer.
    4. You’ll see a notification pop up asking you to accept. Tap Accept.
    5. The file saves directly to your Downloads folder or Photos app, depending on the file type.

    That’s it. Clean, simple, no account login needed.

    Android AirDrop Support in 2026: What’s New

    The Android file sharing landscape has changed quite a bit heading into 2026. Google and Samsung have both pushed meaningful updates that make Quick Share faster, more reliable, and more compatible with non-Android devices.

    Google Pixel 10, Pixel 9 Series, and Pixel 8a Support

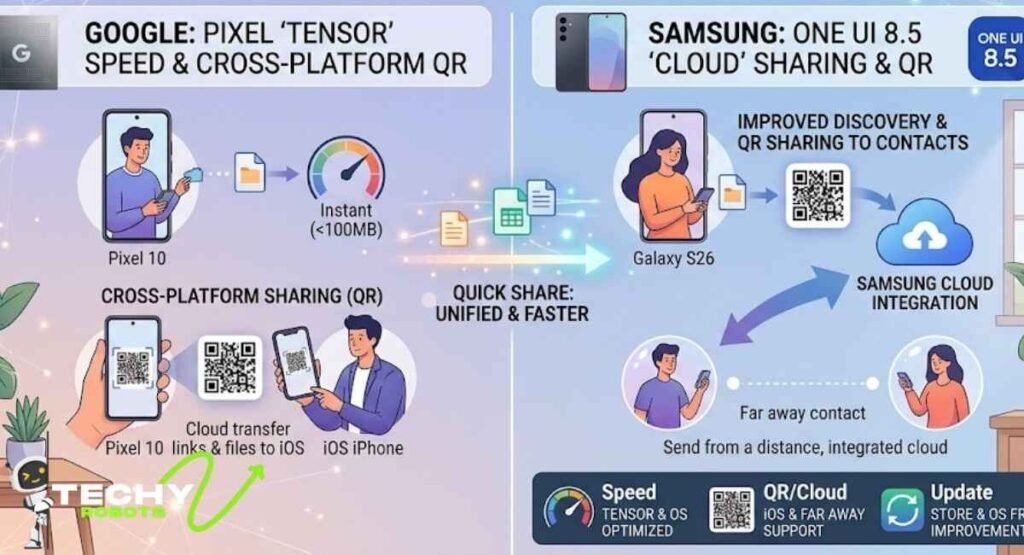
    Google’s latest Pixel lineup including the Pixel 10, Pixel 9 series, and Pixel 8a comes with Quick Share baked deeply into the operating system. These devices benefit from Google’s Tensor chipsets, which optimize wireless connectivity and make transfers noticeably snappier. On a Pixel 10 running the latest Android version, Quick Share feels almost instantaneous for files under 100MB.

    Google has also been quietly working on cross-platform sharing improvements, which means Pixel users can now share links and certain file types more easily to iOS users through Quick Share’s cloud transfer option.

    Samsung Galaxy S26, S25, and One UI 8.5 Updates

    Samsung rolled out One UI 8.5 with significant Quick Share improvements across the Galaxy S26, Galaxy S25, Galaxy Z Fold 7, and Galaxy Z Flip 7. The One UI 8.5 beta program gave early access to features like improved device discovery speed and better support for sharing to contacts using QR codes.

    Samsung’s version of Quick Share also integrates with Samsung Cloud, meaning you can send files to someone even if they aren’t physically nearby, a feature Apple hasn’t fully brought to AirDrop yet. The Galaxy Store received app updates that enhance the Quick Share framework in the background, making it more stable on One UI devices.

    How to AirDrop from iPhone to Android

    This is the big one. You can’t use AirDrop directly to send from iPhone to Android, but you can work around it fairly easily.

    Using Quick Share to Receive Files from iPhone

    The cleanest method right now is using a shared link or cloud transfer. Here’s how it works:

    1. On the iPhone, select the file you want to share.
    2. Tap Share and choose Google Drive, iCloud Drive, or any cloud service you both have access to.
    3. Upload or copy the shareable link.
    4. Send that link via iMessage, WhatsApp, email, or any messaging app to the Android user.
    5. The Android user opens the link and downloads the file.

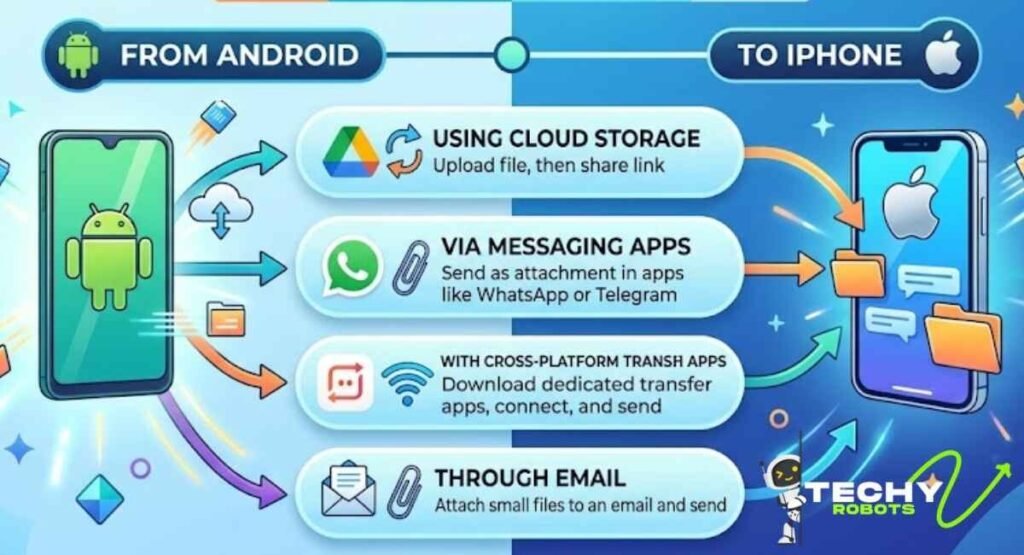
    It’s not as seamless as one tap, but it gets the job done. For people who do this regularly, setting up a shared Google Drive folder is the most practical long-term solution.

    Third-Party Apps for iPhone to Android Transfer

    If you want something closer to the AirDrop experience for cross-platform sharing, a few apps do a solid job. SHAREit, Xender, and Send Anywhere all work on both iOS and Android and use Wi-Fi Direct for fast local transfers without internet. The transfer speeds are genuinely impressive, often faster than Bluetooth-based methods.

    Snapdrop is another option that works right in a browser. Both devices visit the same website on the same Wi-Fi network, and you can drag and drop files between them. No app install required, which is great for one-off situations.

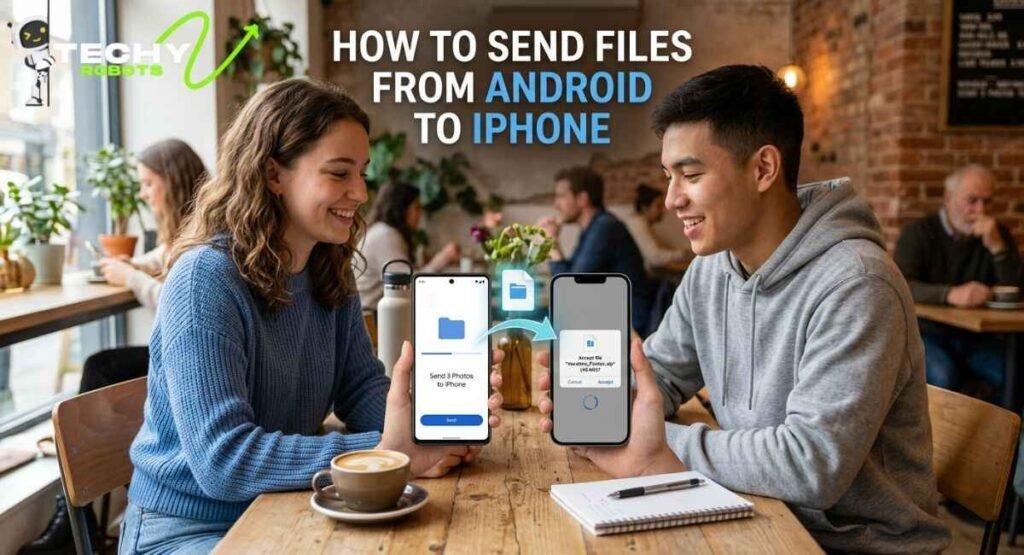
    How to AirDrop from Android to iPhone

    Going the other direction Android to iPhone follows the same logic. Quick Share won’t directly push a file to an iPhone, but cloud-based and web-based solutions bridge the gap well.

    For photos and videos specifically, Google Photos is probably the easiest path. Install it on both devices, enable shared albums, and anyone you invite can view and download your content regardless of what phone they’re using.

    If you want true near-field transfers without the internet, Send Anywhere generates a six-digit key that the recipient types in on any platform to download the file. It expires quickly, which keeps things secure, and the transfer happens over a direct encrypted connection.

    QR Code Sharing with Quick Share

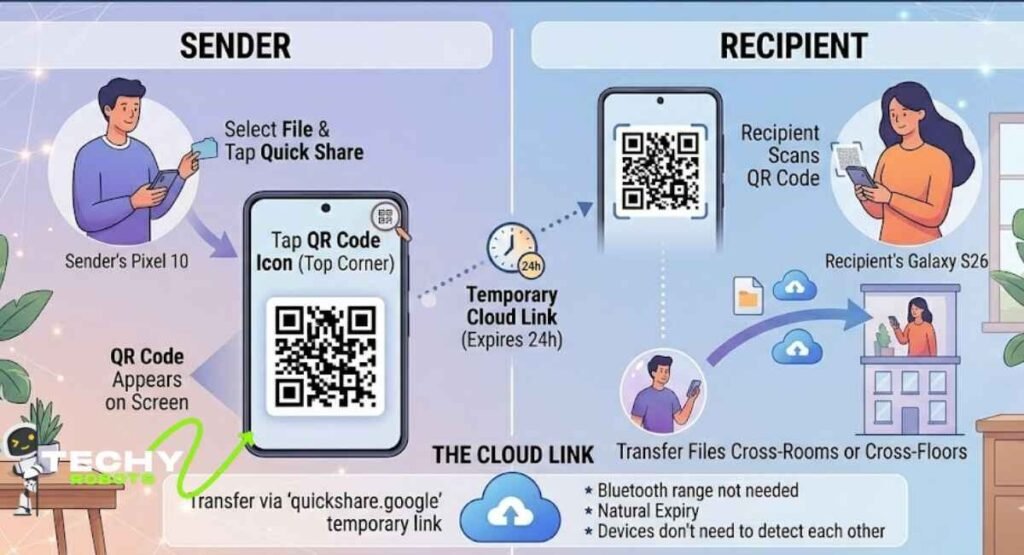
    One of Quick Share’s most underrated features is QR code sharing. Instead of searching for a nearby device, you can generate a QR code that the recipient scans to receive your file even if they’re a few rooms away or on a different floor of a building.

    Here’s how to use it:

    1. Select your file and tap Quick Share.
    2. Instead of waiting for a nearby device to appear, tap the QR code icon in the top corner.
    3. A QR code appears on your screen.
    4. The recipient opens Quick Share on their device and taps Scan QR code.
    5. They scan your code and the file transfer begins through a temporary cloud link at quickshare.google.

    The cloud link is only active for 24 hours, so there’s a natural expiry built in. This makes QR code sharing great for situations where Bluetooth range is limited or the devices can’t directly detect each other.

    Cloud-Based Sharing: Another Way to Transfer Files Wirelessly

    Beyond Quick Share, Android’s cloud sharing options are genuinely excellent. Google Drive, Google Photos, and even WhatsApp’s file sharing tool have all become reliable ways to move content across devices without any cables or proximity requirements.

    For larger files, Google Drive lets you create shareable links with custom permissions view only, comment, or edit. You can share a link with anyone, on any device, and they’ll get access instantly. This works beautifully for documents, presentations, large videos, and project folders.

    Google Photos even has a free tier that handles unlimited photo and video backup at standard quality, making it the easiest way to share entire albums across iPhone and Android users without worrying about file sizes or transfer limits.

    Supported Android Brands for Quick Share

    One of Quick Share’s biggest strengths is how widely it’s supported across the Android ecosystem. It’s not just a Google thing anymore. Here’s a breakdown of the major brands that support it:

    • Samsung — Full integration starting from Galaxy S21 and newer, with deep One UI support
    • Google Pixel — Native support across all Pixel devices from Pixel 6 onward
    • OPPO and OnePlus — Added Quick Share support through software updates in 2024
    • Xiaomi — Compatible through third-party Quick Share client
    • HONOR — Joined the Quick Share ecosystem in 2024
    • Vivo — Partial support with ongoing rollout

    The goal is to make Quick Share as universal on Android as AirDrop is on Apple devices. The ecosystem is getting there fast, and the 2026 updates have brought more brands into the fold than any previous year.

    Security and Encryption in Android File Sharing

    If you’re worried about someone intercepting your files mid-transfer, don’t be. Quick Share uses end-to-end encryption for device-to-device transfers. This means only the sender and the recipient can access the file content; nobody in between can read it, not even Google.

    For cloud-based transfers through the QR code method, files are uploaded to a temporary encrypted space on Google servers and automatically deleted after 24 hours. You can also revoke the link before it expires if you change your mind.

    The visibility settings also give you real control over who can find your device. Setting Quick Share to Contacts only means random people nearby can’t see your device at all — it only appears on phones belonging to people already in your Google Contacts. This is a smart privacy feature that AirDrop’s “Contacts Only” mode also uses, so the two are closely matched on security.

    Troubleshooting Quick Share and Nearby Share Issues

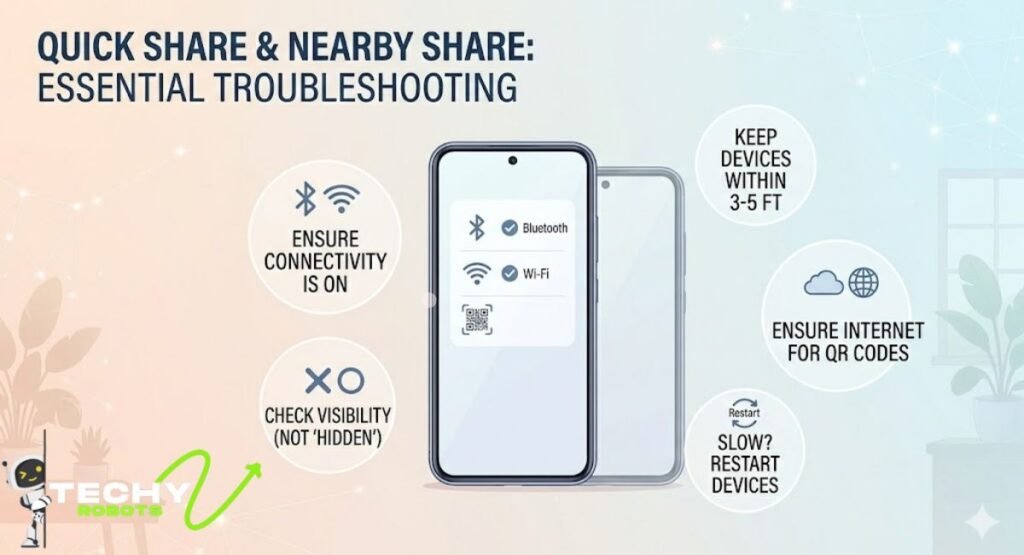
    Quick Share usually works without a hitch, but when it doesn’t, here are the most common fixes:

    • Device not appearing? Make sure both phones have Bluetooth and Wi-Fi turned on. Quick Share requires both to function. Also check that your visibility setting isn’t set to “Hidden.”
    • Transfer keeps failing? Try moving the two phones closer together. Distance matters — for best results, keep devices within 3 to 5 feet of each other during the transfer.
    • QR code transfer not working? Check that both devices have a working internet connection for the cloud-based part of the transfer, and make sure the QR code hasn’t expired.
    • Quick Share missing from your phone? It may be named differently depending on your phone’s brand. On older Samsung devices, look for “Nearby Share” or check in the Settings under “Connected Devices.”
    • Slow transfer speed? If Wi-Fi Direct isn’t connecting, Quick Share may fall back to Bluetooth, which is significantly slower. Restarting both phones usually forces a fresh connection that picks up Wi-Fi Direct properly.

    Conclusion

    Android may not have AirDrop, but it doesn’t really need it. Quick Share is a genuinely capable wireless file sharing tool that covers most of what AirDrop does and goes a few steps further with cross-platform support and QR code transfers. 

    Whether you’re sending photos to another Android phone or bridging the gap between Android and iPhone, there’s always a reliable way to get the job done.

    The 2026 updates from Google and Samsung have made Quick Share faster and more universally supported than ever before. As more Android brands join the ecosystem, the experience keeps getting smoother. Give Quick Share a proper try, and you might find you don’t miss AirDrop at all.

    FAQs

    1. Can Android phones use AirDrop directly? 

    No, Android phones cannot use Apple AirDrop because AirDrop relies on Apple’s proprietary AWDL protocol, which only runs on Apple hardware. The Android equivalent is Quick Share, which works similarly and is available on most modern Android devices.

    2. What is the best AirDrop alternative for Android? 

    Quick Share is the best built-in option because it comes pre-installed on most Android phones and supports fast, encrypted transfers. For cross-platform transfers between Android and iPhone, apps like Send Anywhere or the web-based Snapdrop tool work very well.

    3. How do I turn on Quick Share on my Samsung Galaxy phone? 

    Swipe down on your notification shade to access Quick Settings, then look for the Quick Share tile. If it’s not there, go to Settings, search for “Quick Share,” and enable it. Set visibility to “Everyone” or “Contacts” depending on your preference.

    4. Can I send files from Android to iPhone wirelessly? 

    Yes, but not through Quick Share directly. The easiest methods are cloud services like Google Drive or Google Photos, or cross-platform apps like Send Anywhere. Both options work without cables and transfer files quickly over Wi-Fi.

    5. Is Quick Share safe to use? 

    Yes, Quick Share uses end-to-end encryption for direct device transfers, and cloud-based transfers are stored in a temporary encrypted space that expires after 24 hours. You can also control who can discover your device through the visibility settings, which gives you solid privacy control.

  • Android 16 Update Features: Make Your Phone Faster & Safer 

    Android 16 Update Features: Make Your Phone Faster & Safer 

    Android 16 update is shaping up to be one of the most exciting Android releases in years. Google has focused on making Android smarter, safer, smoother, and more productive for everyday users. Whether you love customization, multitasking, photography, gaming, or privacy, Android 16 introduces meaningful upgrades that improve the overall experience.

    Unlike smaller Android updates from the past, this version feels more refined and practical. Many of the changes are designed to solve real-world frustrations. Notifications are cleaner, multitasking is easier, battery management is smarter, and security protections are stronger than ever.

    If you have been wondering what is new in the Android 16 update, this guide explains everything in detail in simple language.

    Android 16 Release Date and Rollout Schedule

    Google usually releases major Android versions in the second half of the year. The Android 16 release date is expected to follow a staged rollout pattern, beginning with Google Pixel devices before expanding to Samsung, Xiaomi, OnePlus, Oppo, and other Android brands.

    Pixel phones typically receive updates first because Google develops Android directly for its own hardware. Samsung users may receive the One UI version based on Android 16 shortly afterward.

    The rollout schedule depends on:

    • Device compatibility
    • Manufacturer testing
    • Regional availability
    • Carrier approval

    Older devices may not receive the update, especially entry-level models with limited software support periods.

    Android 16 New Features Overview

    The biggest reason people are excited about Android 16 is the sheer number of usability improvements. Instead of focusing only on visual redesigns, Google concentrated on making Android smarter behind the scenes.

    Some of the most talked-about Android 16 features include:

    • Desktop windowing mode
    • Live updates notifications
    • Better multitasking tools
    • Advanced privacy protections
    • Bluetooth audio sharing
    • Improved accessibility support
    • Predictive back navigation
    • Adaptive layouts
    • Performance enhancements
    • Stronger scam protection

    These upgrades improve both smartphones and larger-screen Android devices like tablets and foldables.

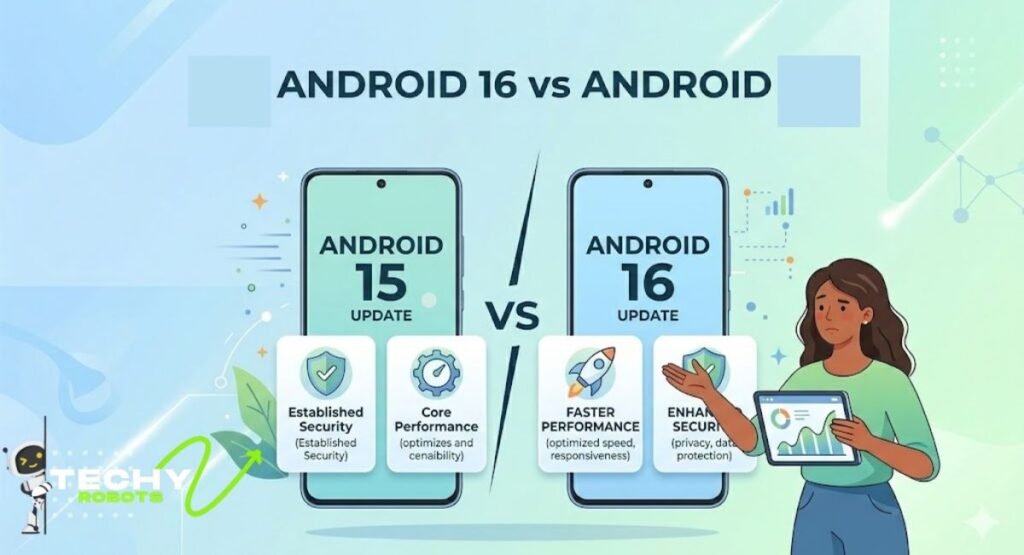
    Android 16 vs Android 15

    Performance Comparison

    One major difference between Android 16 and Android 15 is efficiency. Android 16 includes deeper Android runtime improvements and smarter background process management.

    Apps launch faster, animations feel smoother, and background tasks consume less battery power.

    Google also improved JobScheduler optimization, helping apps complete tasks more efficiently without draining the battery.

    UI and Design Changes

    Android 16 introduces subtle but effective design improvements. The interface feels cleaner and more responsive.

    Users will notice:

    • Smoother transitions
    • Improved gesture navigation
    • Better edge-to-edge visuals
    • Cleaner notification layouts
    • Enhanced haptic feedback sliders

    The operating system now feels more polished and modern.

    Privacy and Security Improvements

    Privacy is one of the strongest focuses in Android 16. Google expanded app permission control and introduced safer intent protections to prevent malicious app behavior.

    The new identity check feature helps reduce unauthorized access attempts and protects sensitive information.

    Battery and Efficiency Upgrades

    Battery optimization Android tools now work more intelligently in the background. Android 16 studies usage patterns more effectively and limits unnecessary power consumption.

    Heavy apps no longer waste battery when inactive.

    Android 16 System UI Changes

    Edge-to-Edge UI Enforcement

    Apps now take full advantage of the display area with better edge-to-edge rendering. This creates a more immersive experience while watching videos, gaming, or browsing.

    The interface looks cleaner and more premium.

    Automatic Themed Icons

    Android 16 expands support for themed icons, making home screens look more consistent and visually balanced.

    More apps automatically adapt to wallpaper colors without requiring third-party launchers.

    Improved Animations and Transitions

    Animations are smoother and more responsive in Android 16. Opening apps, switching tasks, and navigating menus feel faster and more fluid.

    Even small visual details feel refined.

    Predictive Back Gesture Improvements

    The predictive back gesture system now gives users a preview before exiting an app or returning to a previous page.

    This small change improves navigation confidence and reduces accidental exits.

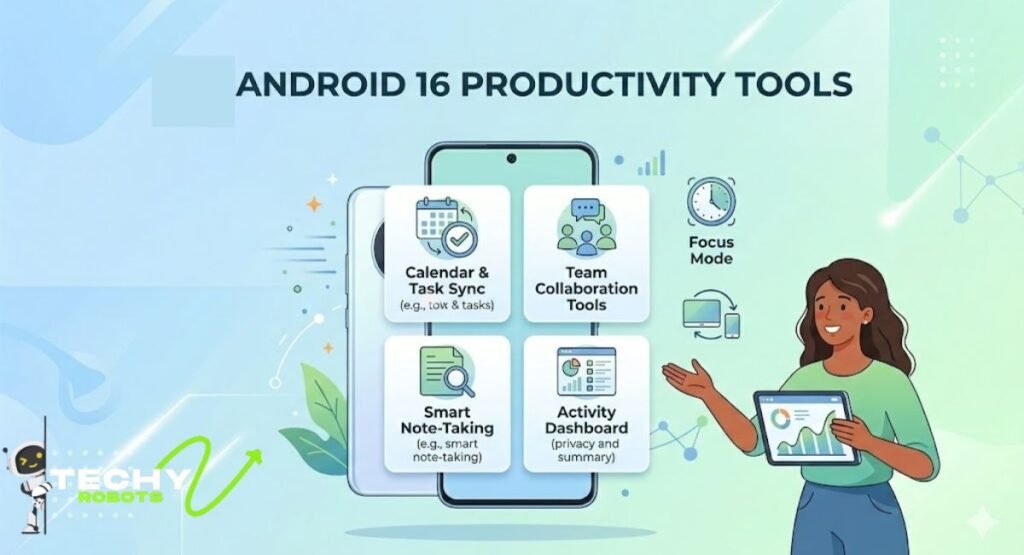
    Android 16 Productivity Tools

    Desktop Windowing Mode

    One of the biggest multitasking features in Android 16 is desktop windowing support.

    Users can:

    • Resize app windows
    • Open multiple apps simultaneously
    • Use tablet-like desktop workflows
    • Improve productivity on larger screens

    This feature pushes Android closer to a true desktop experience.

    Multitasking Features for Tablets

    Android tablets receive major improvements with adaptive layouts and better task management.

    Users can drag, resize, and organize apps more efficiently than before.

    Custom Keyboard Shortcuts

    Android 16 introduces more advanced keyboard shortcut support for external keyboards.

    This is especially useful for professionals, students, and tablet users.

    Adaptive Layouts for Larger Screens

    Apps now scale better across foldables, tablets, and large-screen devices.

    Adaptive layouts improve usability and eliminate awkward app stretching.

    Android 16 Notification and Interaction Upgrades

    Live Updates Feature

    The new live updates feature in Android 16 provides real-time tracking directly in notifications.

    Users can monitor:

    • Food delivery progress
    • Ride-sharing status
    • Navigation updates
    • Sports scores
    • Package tracking

    Without constantly opening apps.

    Notification Grouping System

    The improved Android 16 notification grouping system automatically organizes alerts more intelligently.

    This reduces clutter and improves readability.

    Progress-Centric Notifications

    Progress notifications display live information dynamically instead of static alerts.

    This helps users stay informed without interruption.

    Notification Cooldown Feature

    Android 16 reduces repetitive notification sounds during message floods.

    This prevents constant buzzing and improves focus.

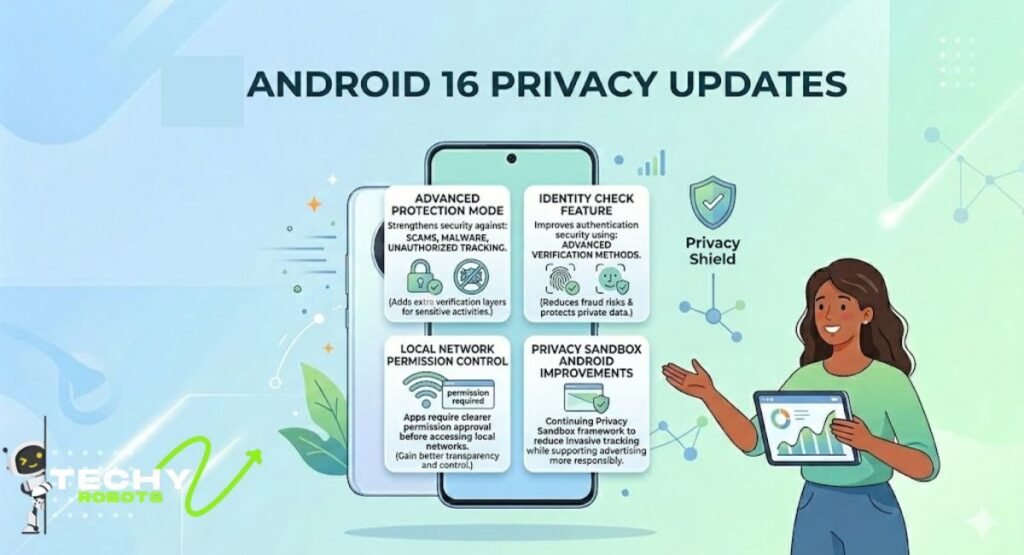
    Android 16 Privacy Updates

    Advanced Protection Mode

    The new advanced protection mode strengthens device security against scams, malware, and unauthorized tracking.

    It adds extra verification layers for sensitive activities.

    Identity Check Feature

    The identity check feature improves authentication security using advanced verification methods.

    This reduces fraud risks and protects private data.

    Local Network Permission Control

    Apps now require clearer permission approval before accessing local networks.

    Users gain better transparency and control.

    Privacy Sandbox Android Improvements

    Google continues improving the Privacy Sandbox Android framework to reduce invasive tracking while supporting advertising systems more responsibly.

    Android 16 Security Features

    Intent Redirection Protection

    Android 16 blocks suspicious intent redirects that malicious apps sometimes use to trick users.

    This greatly improves app safety.

    Safer Intents System

    The safer intents system prevents apps from abusing internal communication mechanisms.

    This makes Android more secure at the system level.

    Media Store Lockdown

    The new media store lockdown limits unauthorized media access by apps.

    Your photos and videos receive stronger protection.

    Scam and Fraud Protection Enhancements

    Google added stronger scam detection tools to help identify suspicious activities and harmful apps faster.

    These upgrades are especially important for online banking and digital payments.

    Android 16 Accessibility Features

    LE Audio Hearing Aid Support

    The improved LE Audio hearing aids support delivers clearer sound quality and lower latency.

    Users with hearing devices get a much better experience.

    Phone as Microphone Input

    Android 16 allows phones to function as microphone inputs for hearing devices in certain situations.

    This improves communication in noisy environments.

    Ambient Sound Control

    Users can better manage environmental audio levels through accessibility controls.

    This helps during conversations and public settings.

    TalkBack Improvements

    TalkBack becomes smarter, faster, and easier to use with improved voice feedback and gesture handling.

    Accessibility APIs Android enhancements also help developers create more inclusive apps.

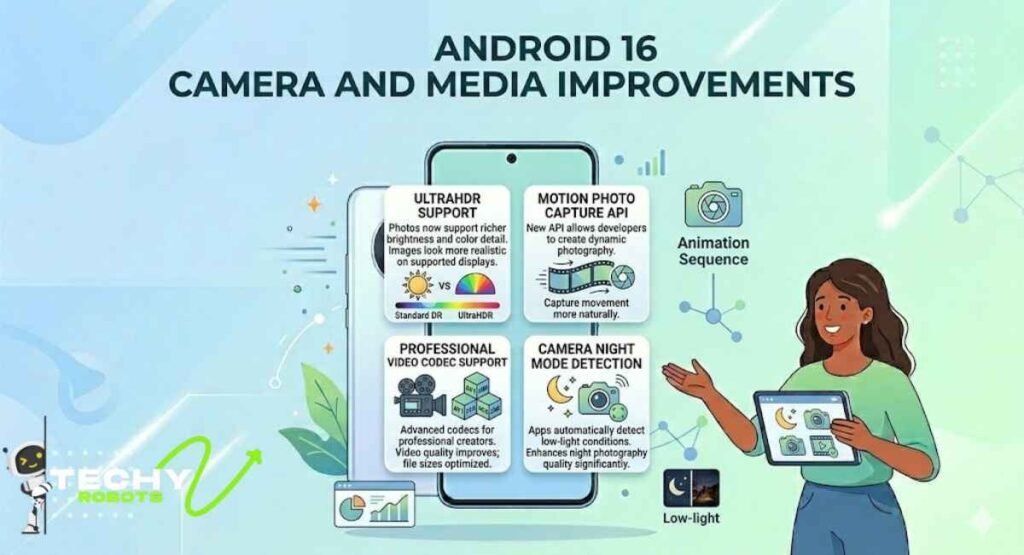
    Android 16 Camera and Media Improvements

    UltraHDR Support

    Photos now support richer brightness and color detail using UltraHDR support.

    Images look more realistic on supported displays.

    Motion Photo Capture API

    The new motion photo capture API allows developers to create more dynamic photography experiences.

    Users can capture movement more naturally.

    Professional Video Codec Support

    Android 16 introduces support for more advanced video codecs aimed at professional creators.

    Video quality improves while file sizes remain optimized.

    Camera Night Mode Detection

    Apps can now detect night mode conditions automatically for better low-light photography performance.

    This enhances photo quality significantly.

    Android 16 Connectivity and Bluetooth Features

    Bluetooth Audio Sharing

    One exciting feature is Bluetooth audio sharing, which allows multiple users to listen to the same audio stream simultaneously.

    Perfect for travel, movies, or music sessions.

    Wi-Fi 6 Ranging Security

    Android 16 improves Wi-Fi 6 ranging security for more accurate and safer distance detection.

    This supports smart home and connected device functionality.

    Device Proximity Detection

    The new proximity tools improve interactions between nearby devices.

    Connected ecosystems become smoother and more responsive.

    BLE Connection API Improvements

    Developers gain more reliable BLE connection APIs for better wearable and accessory integration.

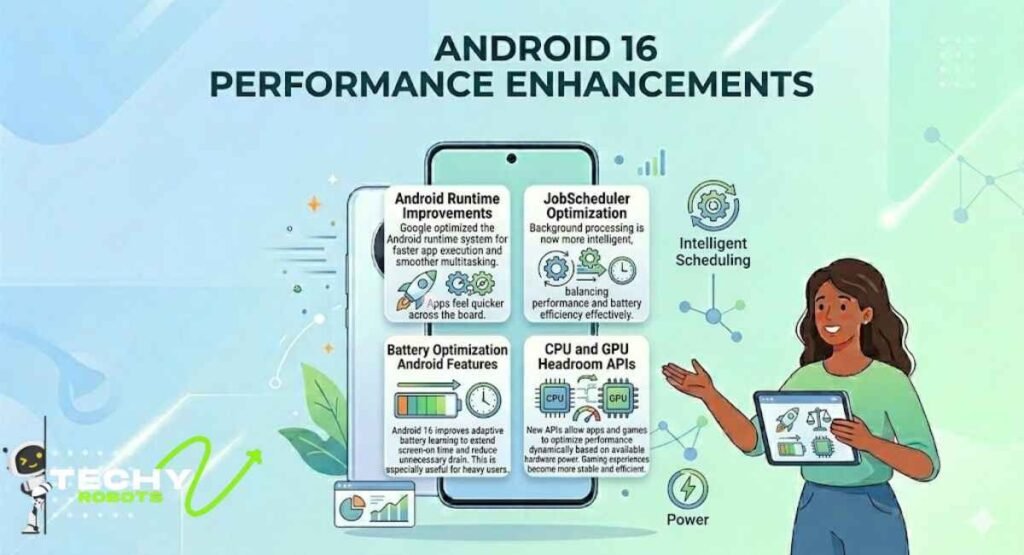
    Android 16 Performance Enhancements

    Android Runtime Improvements

    Google optimized the Android runtime system for faster app execution and smoother multitasking.

    Apps feel quicker across the board.

    JobScheduler Optimization

    Background processing is now more intelligent, balancing performance and battery efficiency effectively.

    Battery Optimization Android Features

    Android 16 improves adaptive battery learning to extend screen-on time and reduce unnecessary drain.

    This is especially useful for heavy users.

    CPU and GPU Headroom APIs

    New APIs allow apps and games to optimize performance dynamically based on available hardware power.

    Gaming experiences become more stable and efficient.

    Android 16 Developer Features

    Android 16 APIs

    Developers receive new APIs for:

    • Performance tuning
    • Accessibility
    • Camera controls
    • Connectivity
    • Media quality

    These tools help create smarter apps.

    Camera2 API Updates

    The updated Camera2 API gives developers greater control over professional camera features.

    Photography apps become more powerful.

    System Triggered Profiling

    Developers can now identify performance bottlenecks more efficiently through automated profiling systems.

    MediaQuality Framework

    The new MediaQuality framework improves audio and video consistency across apps and devices. 

    Hidden Features You Should Know

    Some of the best Android 16 hidden features are small improvements users discover over time.

    These include:

    • Smarter clipboard protection
    • Better app archive controls
    • Improved themed widgets
    • Faster app installs
    • Enhanced haptic tuning
    • Smoother gesture responsiveness

    These little details quietly improve daily phone usage.

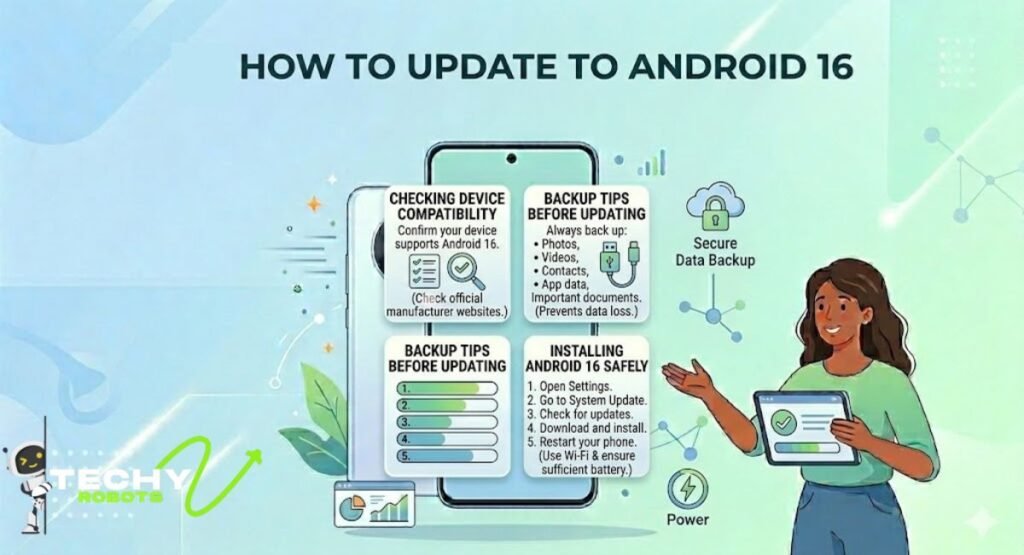
    How to Update to Android 16

    Checking Device Compatibility

    Before updating, confirm whether your device supports Android 16.

    Manufacturers usually publish compatibility lists on official websites.

    Installing Android 16 Safely

    To install Android 16:

    1. Open Settings
    2. Go to System Update
    3. Check for updates
    4. Download and install
    5. Restart your phone

    Use Wi-Fi and ensure sufficient battery before starting.

    Backup Tips Before Updating

    Always back up:

    • Photos
    • Videos
    • Contacts
    • App data
    • Important documents

    This prevents accidental data loss.

    Is Android 16 Worth Upgrading To?

    For most users, the answer is yes.

    Android 16 feels smarter, smoother, and more practical than previous Android versions. The update focuses heavily on real usability improvements instead of flashy gimmicks.

    People who care about multitasking, privacy, security, accessibility, and battery life will notice major benefits immediately.

    Tablet and foldable users may benefit the most because Android 16 introduces serious productivity improvements that finally make larger-screen Android devices feel fully optimized.

    Conclusion

    Android 16 is more than just another yearly Android update. It introduces meaningful improvements that make devices feel faster, safer, and easier to use every day. From desktop windowing and live updates to stronger privacy controls and accessibility upgrades, nearly every part of the operating system feels more polished.

    The update also shows Google’s bigger vision for Android. Phones, tablets, foldables, wearables, and smart devices are becoming more connected, more intelligent, and more adaptive to how people actually use technology.

    If your device supports Android 16, upgrading will likely give you a smoother experience, better battery efficiency, smarter multitasking, and stronger protection against modern security threats. It may easily become one of the most useful Android releases in recent years.

    FAQs

    What is new in the Android 16 update?

    Android 16 introduces desktop windowing, live updates notifications, improved privacy controls, Bluetooth audio sharing, adaptive layouts, stronger security protections, and better multitasking features.

    Which phones support Android 16?

    Google Pixel devices usually receive Android updates first, followed by Samsung, OnePlus, Xiaomi, Oppo, and other supported brands, depending on their update policies.

    Is Android 16 better than Android 15?

    Yes. Android 16 improves battery optimization, multitasking, privacy, security, animations, accessibility, and overall performance compared to Android 15.

    Does Android 16 improve battery life?

    Yes. Android 16 includes smarter background processing, adaptive battery learning, and JobScheduler optimization to reduce unnecessary battery drain.

    How safe is Android 16?

    Android 16 includes advanced protection mode, identity verification tools, safer intents, media store lockdown, and scam prevention features that significantly improve overall device security.

  • AirDrop Not Working on Mac: Step-by-Step Fix Guide for 2026

    AirDrop Not Working on Mac: Step-by-Step Fix Guide for 2026

    There is nothing more frustrating than trying to send a file from your iPhone to your Mac using AirDrop, only to sit there watching it spin endlessly with “Waiting…” on your screen. AirDrop is supposed to make wireless file transfer feel effortless, and most of the time it does. But when AirDrop is not working on Mac, it can feel like the whole Apple ecosystem has just let you down.

    The good news? In most cases, the fix is surprisingly simple. You just need to know where to look. This guide walks you through every possible reason AirDrop might be failing on your Mac and gives you real, working solutions, not vague advice like “try restarting.”

    What Makes AirDrop Such a Big Deal?

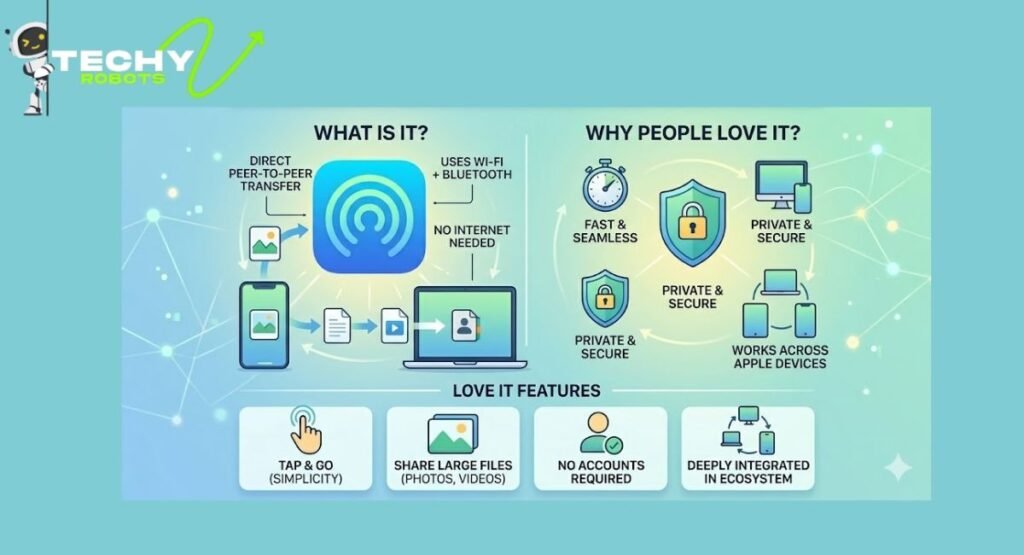
    AirDrop is one of those features that quietly changed the way people use Apple devices. Before it existed, sending a photo from your iPhone to your MacBook meant emailing it to yourself, plugging in a cable, or fumbling with third-party apps. Now it is just a tap and a click.

    It works using a combination of Bluetooth and Wi-Fi. Bluetooth handles the discovery of nearby Apple devices while Wi-Fi creates a peer-to-peer connection for the actual transfer. That is why both need to be active at the same time. If either one goes down, the whole thing falls apart.

    AirDrop works across iPhone, iPad, Mac, and even iPod touch (5th generation or later). It has been around since OS X Yosemite and iOS 7, so most people with a relatively modern device should have access to it. The problem is not usually a lack of support, it is usually a small setting that is quietly turned off or conflicting with something else.

    Why Is AirDrop Not Working on Your Mac?

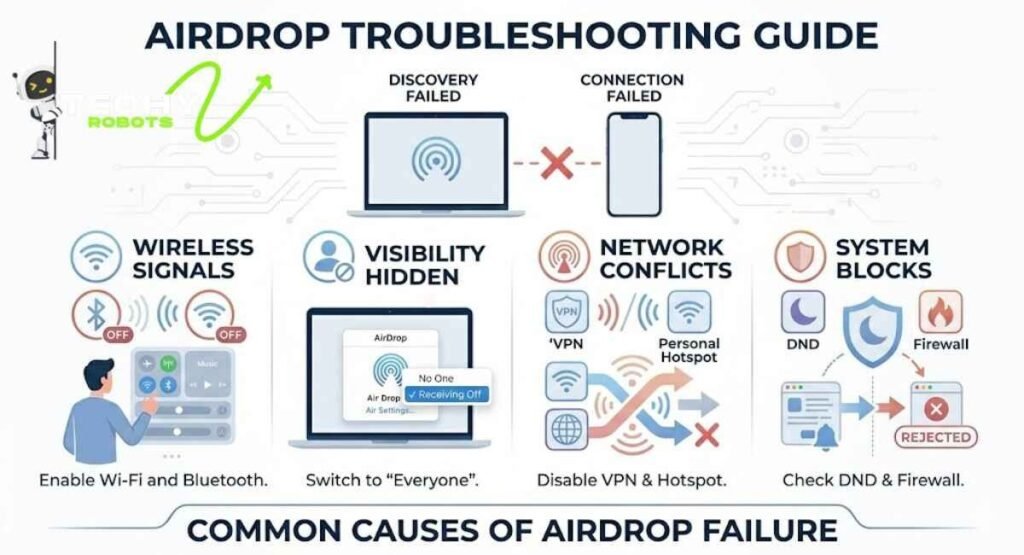
    Before jumping into fixes, it helps to understand what is actually going wrong. AirDrop failures tend to fall into a few categories: discovery issues (your Mac cannot find the other device), connection issues (the devices see each other but the transfer fails), and setting conflicts (something in your system is blocking the transfer without you realizing it).

    The Most Common Culprits Behind AirDrop Issues

    Here is a quick look at what tends to cause AirDrop problems most often:

    Bluetooth or Wi-Fi being turned off is the number one cause. Since AirDrop needs both, even having just one disabled breaks everything. Beyond that, your AirDrop receiving setting might be set to “Receiving Off,” meaning your Mac is essentially invisible to other devices. Personal Hotspot is another sneaky one when it is active on your iPhone, it can block AirDrop from working properly. 

    Do Not Disturb and Focus Mode on either device can also silently reject incoming AirDrop requests. And on Mac specifically, the firewall or a running VPN can block the peer-to-peer connection that AirDrop relies on.

    Now let us go through each fix one by one.

    Step 1: Check If Bluetooth and Wi-Fi Are Both On

    This sounds almost too obvious, but you would be surprised how often this is the issue. AirDrop requires Bluetooth to discover nearby devices and Wi-Fi to carry out the actual transfer. If either is off, AirDrop simply will not work — no error message, no explanation, just silence.

    How to Verify Your Wireless Settings on Mac

    On your Mac, look at the menu bar in the top right corner. You should see a Bluetooth icon and a Wi-Fi icon. If either looks grayed out or has a slash through it, click on it and turn it on. You can also go to System Settings (or System Preferences on older macOS versions) and check both Bluetooth and Wi-Fi from there.

    On your iPhone, swipe down from the top right corner to open the Control Center. Make sure both the Bluetooth and Wi-Fi tiles are highlighted in blue. If they are white or grayed out, tap them to enable them. Keep in mind that turning Wi-Fi off in the Control Center does not always fully disable it but it is worth toggling both off and on again just to make sure they are working properly.

    Step 2: Make Sure AirDrop Is Set to the Right Discovery Mode

    One of the most overlooked AirDrop settings is discoverability. Your Mac could have AirDrop receiving turned off entirely, which means other devices cannot even see it. This is a privacy feature, but it quietly breaks AirDrop for a lot of people.

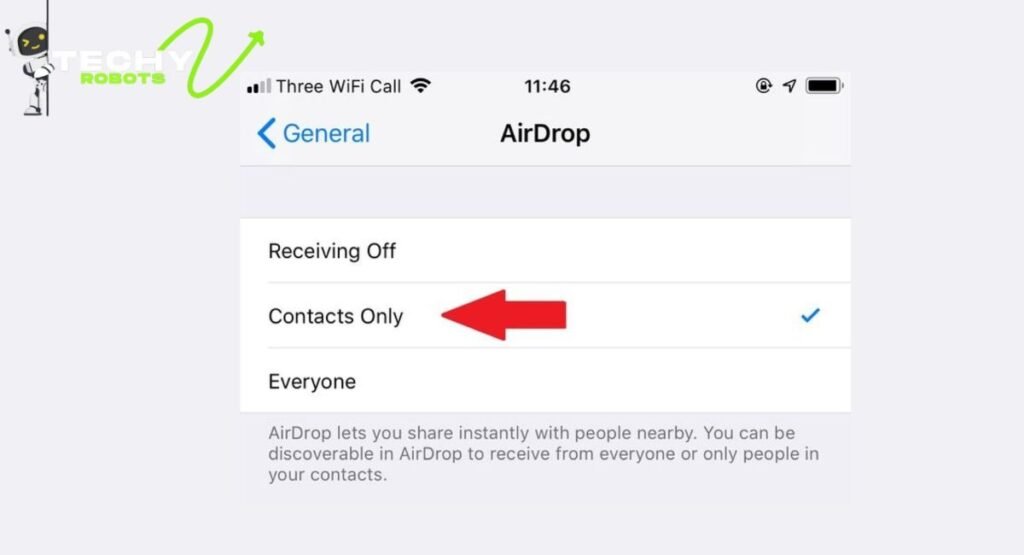
    Contacts Only vs. Everyone for 10 Minutes

    On Mac, open Finder and click on AirDrop in the sidebar. At the bottom of the AirDrop window, you will see a dropdown that says “Allow me to be discovered by.” You have three options: No One, Contacts Only, and Everyone. If it is set to No One, nothing can find your Mac. Set it to “Everyone” if you are having trouble you can always switch it back to “Contacts Only” after the transfer is done.

    On iPhone, go to Settings, then General, then AirDrop. Select “Everyone for 10 Minutes.” This gives your device full discoverability for a short window, which is usually enough to complete the transfer without leaving your device permanently open to strangers.

    Step 3: Bring Your Devices Closer Together

    AirDrop uses Bluetooth for its initial connection, and Bluetooth has a limited range typically around 30 feet or so under ideal conditions. Walls, interference from other devices, and even the orientation of your devices can shorten that range significantly.

    If you are trying to send a file from across the room or from another floor, your devices might not be able to establish a solid connection. Move your iPhone and Mac within a few feet of each other and try again. It sounds simple, but physical proximity genuinely makes a difference, especially in environments with a lot of wireless activity.

    Step 4: Turn Bluetooth Off and Back On

    Sometimes Bluetooth gets into a weird state where it is technically “on” but not functioning properly. The easiest fix for this is a simple toggle: turn it off, wait about ten seconds, and turn it back on.

    On Mac, click the Bluetooth icon in the menu bar and select “Turn Bluetooth Off.” Wait a moment, then turn it back on. On an iPhone, do the same from Control Center or from Settings. This forces Bluetooth to reset its connections and can often clear up AirDrop discovery issues instantly.

    Step 5: Disable Do Not Disturb and Focus Mode

    This one catches a lot of people off guard. When Do Not Disturb or any Focus Mode is active on your iPhone or Mac, it can block incoming AirDrop requests without showing you any notification. Your Mac might receive the transfer request but silently reject it in the background.

    Why Focus Mode Quietly Kills AirDrop

    Focus modes are designed to filter out interruptions, and Apple treats AirDrop requests as interruptions. So if you have Work Focus, Sleep Focus, or a custom Focus mode running on either device, turn it off before trying to AirDrop something.

    On Mac, click the Control Center icon in the menu bar, then click Focus, and turn off any active modes. On the iPhone, swipe down to open the Control Center and tap the Focus tile to disable it. Once both devices are free of any Focus restrictions, try the transfer again.

    Step 6: Turn Off Personal Hotspot

    If your iPhone’s Personal Hotspot is turned on, AirDrop will not work from that device. This is a known limitation and it is one that Apple has never made particularly obvious to users.

    How Personal Hotspot Interferes with AirDrop

    When Personal Hotspot is active, your iPhone switches its Wi-Fi chip into a mode that broadcasts a hotspot signal rather than connecting to a local network. This conflicts with the peer-to-peer Wi-Fi connection that AirDrop relies on.

    To fix this, go to Settings on your iPhone and tap Personal Hotspot. Toggle it off. Now try AirDrop again in many cases, this alone solves the problem immediately.

    Step 7: Check Your Mac’s Firewall Settings

    macOS has a built-in firewall, and depending on how it is configured, it can block incoming AirDrop connections. This is more common on work-managed Macs or devices where the firewall has been customized.

    How to Allow AirDrop Through Your Firewall

    Go to System Settings on your Mac, then click Privacy and Security, then Firewall. If the firewall is on, click “Firewall Options” and make sure “Block all incoming connections” is not checked. You can also look for AirDrop-related services in the list and make sure they are set to allow incoming connections. Turning off the firewall temporarily just for testing can help you confirm whether it is the cause of your AirDrop problem.

    Step 8: Disable VPN While Using AirDrop

    VPNs route your internet traffic through external servers, and this can interfere with the local peer-to-peer connection that AirDrop uses. Even though AirDrop is supposed to work on your local network, some VPN configurations disrupt it entirely.

    If you are running a VPN app on your Mac whether it is a work VPN, ClearVPN, or any other service try disconnecting it and then attempting the AirDrop transfer. You can reconnect once the file has been sent. If AirDrop works after turning off the VPN, you know exactly where the conflict was coming from.

    Step 9: Restart Both Devices

    A restart clears out temporary files, resets wireless connections, and gives everything a fresh start. It is not the most exciting solution, but it genuinely works more often than people expect.

    Shut down your Mac properly through the Apple menu. On your iPhone, hold the side button and a volume button until you see the slider, then slide to power off. Turn both devices back on and try AirDrop again. Many users have found that a single restart resolved an AirDrop issue that had been bugging them for days.

    Step 10: Reset Network Settings

    If nothing has worked so far, resetting your iPhone’s network settings is worth trying. This clears out all saved Wi-Fi passwords, Bluetooth pairings, VPN configurations, and other connectivity settings essentially wiping the network slate clean.

    What Happens When You Reset Network Settings?

    On your iPhone, go to Settings, then General, then Transfer or Reset iPhone, then Reset, and finally Reset Network Settings. You will need to reconnect to your Wi-Fi network afterward and re-pair any Bluetooth devices. But if there was a corrupted network configuration causing your AirDrop issues, this will fix it.

    Note that there is no equivalent “Reset Network Settings” on Mac, but you can manually remove and re-add your Wi-Fi network, or delete Bluetooth preferences from the Library folder if needed.

    Step 11: Check AirDrop Compatibility

    Not every Apple device supports AirDrop, and if you are working with older hardware, compatibility might be the actual issue rather than a setting problem.

    Which Devices Actually Support AirDrop?

    For transferring between iPhone and Mac specifically, you need an iPhone 5 or later running iOS 7 or higher, and a Mac from 2012 or later running OS X Yosemite or above. MacBook Pro models from 2012 onward support AirDrop over Wi-Fi between Macs, but AirDrop between iPhone and Mac (via personal hotspot-free connection) requires the newer infrastructure introduced in Yosemite.

    If you have a MacBook Pro from around 2011 or earlier, you may find that AirDrop does not support cross-device transfers with iPhones at all, only Mac-to-Mac. In that case, you would need to use an alternative method.

    Step 12: Fix AirDrop from Finder on Mac

    Sometimes the issue is specific to how AirDrop shows up in Finder on your Mac. If the AirDrop window is not loading properly or seems stuck, there is a quick way to refresh it.

    Using Command + Shift + R to Refresh Finder

    Open Finder and navigate to the AirDrop section. Then press Command + Shift + R on your keyboard. This forces Finder to refresh its AirDrop view and can fix issues where nearby devices are not showing up. You can also try right-clicking in the AirDrop window and selecting “Look for an old Mac” if you are trying to connect to an older Apple computer.

    AirDrop Over Cellular, What You Need to Know

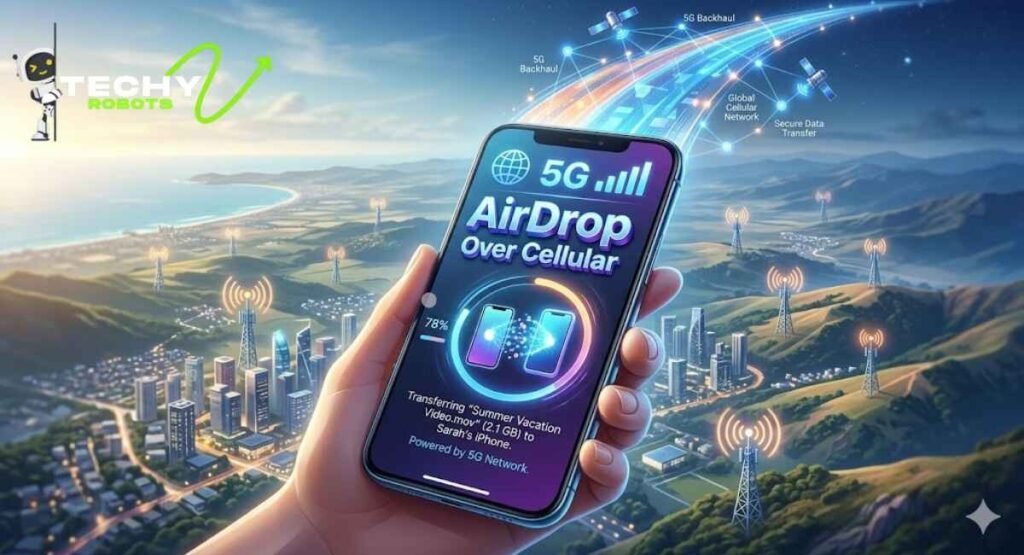
    Starting with iOS 17, Apple introduced the ability to use AirDrop over cellular data. This means that even if you move out of Bluetooth and Wi-Fi range during a transfer, it can continue over mobile data rather than failing mid-way through.

    To enable this, go to Settings on your iPhone, tap General, then AirDrop, and toggle on “Use Mobile Data.” Keep in mind this uses your data allowance, so it is worth being mindful of file size. This feature is particularly useful for large transfers or when you step away from your device unexpectedly.

    What to Do When AirDrop Transfer Keeps Failing

    If AirDrop finds the device but the transfer itself keeps failing or getting stuck, the problem is usually with the file or the connection stability rather than the discovery settings.

    AirDrop Slow Transfer Fixes

    Slow AirDrop speeds are often tied to Wi-Fi signal quality. Even though AirDrop creates a peer-to-peer connection, the quality of your surrounding Wi-Fi environment still matters. You can use a tool like NetSpot on your Mac to check for Wi-Fi congestion and interference.

    Try moving both devices away from microwaves, cordless phones, and other devices that broadcast on the 2.4GHz band. Switching your router to 5GHz if both devices support it can also dramatically speed up AirDrop transfers. For very large files, you might find it faster to use iCloud Drive or a USB cable while you troubleshoot the AirDrop connection.

    AirDrop Alternatives Worth Trying

    If you have tried everything and AirDrop is still giving you grief, there are solid alternatives that can fill the gap.

    iCloud Drive lets you upload from your iPhone and download on your Mac seamlessly as long as you are signed into the same Apple ID. Google Drive and Dropbox work across platforms and devices without any Bluetooth or Wi-Fi pairing required. 

    For frequent large transfers, Dropshare is a popular Mac app that makes cloud-based sharing much faster. And of course, a Lightning or USB-C cable connected to your Mac gives you a direct, no-fuss transfer option that bypasses wireless entirely.

    Conclusion

    AirDrop not working on Mac is genuinely annoying, but almost every case comes down to something fixable: a setting that got toggled off, a feature running in the background, or two devices that just need a restart to rediscover each other. The key is to go through these fixes methodically rather than randomly poking at settings hoping something sticks.

    Start with the basics: check Bluetooth and Wi-Fi, check your AirDrop discoverability setting, and turn off Personal Hotspot and Focus Mode. Those four things alone solve the majority of AirDrop issues. If those do not do it, work through the firewall, VPN, and network settings steps. And if all else fails, iCloud Drive and a USB cable are always there to get the job done while you figure out the rest.

    The Apple ecosystem is genuinely great at making devices talk to each other. AirDrop just occasionally needs a little nudge to remember that.

    FAQs

    1. Why does AirDrop say “Waiting” and never complete the transfer? 

    This usually happens because Bluetooth or Wi-Fi dropped during the transfer, the receiving device moved out of range, or the receiving device had Do Not Disturb or Focus Mode active that silently rejected the request. Try toggling Bluetooth off and on, bring the devices closer, and make sure Focus Mode is turned off on both ends.

    2. Why can’t my Mac find my iPhone in AirDrop? 

    The most likely reason is that your iPhone’s AirDrop discoverability is set to “Receiving Off” or “Contacts Only” and your Apple ID is not in your own contacts. Go to Settings, then General, then AirDrop on your iPhone and change it to “Everyone for 10 Minutes.” Also make sure Personal Hotspot is turned off.

    3. Does AirDrop work with non-Apple devices? 

    No, AirDrop is exclusive to the Apple ecosystem. It only works between iPhones, iPads, Macs, and iPod touches. If you need to transfer files to a Windows PC or Android device, use Google Drive, Dropbox, or a USB cable instead.

    4. Why does AirDrop work sometimes but not other times?

    Inconsistent AirDrop behavior is often caused by interference from other wireless devices, Bluetooth range limitations, or background processes like VPNs and Focus modes that activate without you noticing. Keeping your devices updated to the latest version of macOS and iOS also helps, as Apple regularly patches AirDrop bugs.

    5. Can AirDrop transfer large video files? 

    Yes, AirDrop has no official file size limit and handles large video files well under good conditions. If transfers are slow or failing on large files, make sure both devices are close together, Wi-Fi signal is strong, and you have enough storage space on the receiving device. Using iOS 17’s AirDrop over cellular feature can also help complete large transfers if you step out of range.

  • iPhone AirDrop History: Can You Really See What Was Shared?

    iPhone AirDrop History: Can You Really See What Was Shared?

    If you have ever sent a photo to a friend standing right next to you using AirDrop, you already know how satisfying that little whoosh sound is. It is fast, wireless, and feels almost like magic. But here is something that trips a lot of people up: what happens after the file is sent? Is there a log somewhere? Can you go back and check your AirDrop history on your iPhone? These are fair questions, and you are not alone in asking them.

    Let us walk through everything you need to know about iPhone AirDrop history, where your files end up, and what Apple actually does (and does not) track.

    What Is AirDrop and Why Do People Love It?

    AirDrop is Apple’s built-in wireless file sharing system that works across iPhones, iPads, and Macs. It uses a combination of Bluetooth and Wi-Fi to create a direct connection between devices, so you do not need the internet, a cable, or even a third-party app. You just tap, confirm, and the file moves over in seconds.

    Think of it like passing a note in class except instead of a folded piece of paper, you are sending a high-resolution video, a PDF, or a contact card. The transfer is peer-to-peer, which means the file goes directly from your device to theirs without hitting any server in between.

    This is exactly why people love it. It is private, fast, and deeply woven into the Apple ecosystem. Whether you are sharing a meme with your sister or sending a presentation to your colleague, AirDrop just works most of the time.

    The Big Question — Does iPhone Keep AirDrop History?

    Honestly no, the iPhone does not keep an AirDrop history or transfer log. Apple has not built a native feature that records what you sent, what you received, when it happened, or who was involved. There is no hidden menu, no secret log file, and no way to pull up a list of your past AirDrop activity directly from your iPhone settings.

    This surprises a lot of people, especially when they are trying to remember which file they sent last week, or when they are worried someone might have received something they did not mean to share.

    Why Apple Chose Not to Log AirDrop Activity

    Apple’s approach here is intentional. The company has long positioned itself as a privacy-first brand, and not storing transfer logs is part of that philosophy. If Apple kept a detailed record of every file shared via AirDrop including who sent what to whom and when that data could become a liability. It could be subpoenaed, breached, or misused.

    By not logging AirDrop transfers at all, Apple removes that risk entirely. The transfer happens, the file moves, and the system forgets it ever occurred. It is a clean slate by design.

    What This Means for Everyday Users

    For most people, this is not a problem. You send a file, the other person gets it, and life goes on. But for people trying to figure out “did I already send that document?” or “where did that photo go after I received it?” The lack of a log can be genuinely frustrating.

    The good news is that while AirDrop itself keeps no record, the files it delivers do leave a trail in other parts of your phone.

    Where Do AirDrop Files Actually Go?

    Even though there is no AirDrop transfer history on iPhone, the files themselves land somewhere specific depending on the file type. Knowing where to look is the next best thing to having a proper log.

    AirDrop Photos and Videos — Check Your Photos App

    If someone sends you a photo or video via AirDrop and you accept it, it goes straight into your Photos app. Simple as that. Open Photos, and the image will appear in your main library sorted by the date it was received.

    There is also a handy album called “Imported” that you can check. This album groups photos and videos that came from an external source including AirDrop transfers. So if you are trying to figure out what photos you received recently, that album is your starting point.

    AirDrop Documents — The Files App Is Your Friend

    For documents, PDFs, zip files, and other non-photo content, AirDrop sends them to the Files app. They typically land in the “On My iPhone” section under a folder related to the app they are associated with, or sometimes directly in the root of On My iPhone storage.

    If you received a Word document, it might open in Pages or Microsoft Word and save there. The behavior depends a bit on what apps you have installed and what the file type is. Either way, the Files app is the place to dig.

    AirDrop Files on Mac — Look in Your Downloads Folder

    On a Mac, AirDrop received files are easier to track because they always land in one consistent spot: your Downloads folder. Open Finder, click on Downloads, and sort by date any AirDropped file will show up there with its received date and time. This makes Mac AirDrop history slightly easier to manage than on iPhone, even if there is still no formal log.

    How to Find Recently Received AirDrop Files on iPhone

    So you received something via AirDrop but you cannot remember where it went. Here is a step-by-step way to track it down.

    Using the “Imported” Album in the Photos App

    Open the Photos app and scroll down in the Albums tab until you see “Imported.” This album is automatically populated with photos and videos that came from outside your device AirDrop is one of those sources. It is not a perfect AirDrop log, but it gives you a visual record of images you received.

    Searching Through the Files App

    Open the Files app and tap the search icon at the top. If you remember anything about the file, a word in its name, the format, even a rough date you can search for it here. You can also browse “Recents” to see files that were recently accessed or added, which can point you toward something you received via AirDrop.

    Can You Track AirDrop Sent Files?

    This is where things get even more limited. If you are trying to figure out what files you have sent via AirDrop there is basically no built-in way to do that on an iPhone.

    Sent Files and the Lack of a Log

    When you send a file through AirDrop, your iPhone does not make a copy of it or note that it was sent. The original file stays in your Photos app, your Files app, or wherever it lives but there is no “Sent” folder like you would find in an email client.

    If you are worried about whether a specific file was sent to someone, the only real way to verify is to check with the recipient or look at the original file on your phone and try to remember the context yourself.

    AirDrop Privacy Settings You Should Know About

    Even though Apple does not give you a transfer log, it does give you solid control over who can find and contact you via AirDrop. This is worth understanding, especially from a security standpoint.

    Contacts Only vs. Everyone Mode

    In your iPhone settings under General > AirDrop, you will find three options: Receiving Off, Contacts Only, and Everyone. The “Contacts Only” mode is the smart default for most people; it means only people in your contacts list can send you files via AirDrop. Strangers nearby cannot see your device at all.

    “Everyone for 10 Minutes” is a newer option Apple introduced in iOS 16 and later. It lets you be discoverable to everyone briefly, which is useful when you are trying to receive something from someone not in your contacts, without leaving yourself permanently exposed.

    Receiving Off — When to Use It

    If you are in a crowded public place, a concert, an airport, or a busy mall turning AirDrop off entirely is a smart move. It means no one can send you anything, wanted or unwanted, until you turn it back on. It takes two seconds to toggle and gives you complete peace of mind.

    AirDrop Security Concerns — Should You Be Worried?

    AirDrop security has been a topic of real conversation over the years. You might have heard stories about people receiving unsolicited photos from strangers in public, or worried that someone could access your phone through AirDrop. Let us sort out the facts.

    Can Someone Hack You Through AirDrop?

    The short answer is no, not in the traditional sense. Accepting an AirDrop request does not give someone access to your phone, your data, or your accounts. The worst-case scenario is that you accept a file you did not want. That is it.

    However, there have been documented vulnerabilities in older iOS versions where AirDrop could be exploited to reveal phone numbers and email addresses of nearby devices, even without accepting a transfer. Apple has since patched many of these issues, but it is a reminder to keep your iOS updated.

    How to Protect Yourself from Unwanted AirDrop Requests

    The simplest protection is to keep your AirDrop setting on “Contacts Only” in most situations. If you receive an AirDrop request from an unknown device, simply decline it and do not accept files from people you do not know. If a request feels suspicious, declining it is always the right call.

    AirDrop Not Working? Here’s What to Try

    Sometimes AirDrop just refuses to cooperate. Before you panic, here are a few quick fixes that solve most AirDrop problems.

    Make sure both Bluetooth and Wi-Fi are turned on. AirDrop needs both, even if you are not connected to a Wi-Fi network. Check that Personal Hotspot is turned off, since it can interfere with AirDrop. Make sure the other device is unlocked and within about 30 feet. Restart both devices if nothing else works.

    Also double-check the AirDrop visibility setting. If your reception is set to “Off,” no one will be able to send you anything, and AirDrop transfers will fail silently.

    AirDrop vs. Other File Sharing Options

    AirDrop is great, but it is not the only game in town. Knowing your alternatives helps you pick the right tool for the right situation.

    AirDrop vs. AirDroid

    AirDroid is a third-party app that lets you transfer files between Android and other devices wirelessly. Unlike AirDrop, AirDroid does keep transfer logs and gives you a history of what was shared. If you need cross-platform file sharing, say, between an iPhone and an Android phone AirDroid fills the gap that AirDrop cannot.

    The trade-off is that AirDroid requires an app and an account, while AirDrop is completely native and seamless within Apple devices.

    Third-Party Apps That Can Help Track File Transfers

    If the lack of an AirDrop log genuinely bothers you, there are a few things you can do on the organizational side. Some cloud storage apps like Google Drive, Dropbox, or OneDrive keep detailed activity logs of files uploaded, shared, and downloaded. If you make it a habit to work out of one of these apps rather than relying purely on AirDrop, you will naturally have a better record of your file activity.

    There is no third-party app that can retroactively show you past AirDrop transfers since Apple does not expose that data but you can build better habits going forward by storing and sharing files through systems that do maintain history.

    Tips to Stay Organized with AirDrop Files

    Since AirDrop does not organize your files for you, a little personal discipline goes a long way.

    When you receive an important document via AirDrop, move it immediately to a labeled folder in your Files app so you know where to find it later. For photos, consider adding them to a specific album right after receiving them. If you send someone a file, drop a quick note in your Notes app or a task manager just “sent X to Y on this date” so you have a personal record.

    These small habits can save you a lot of confusion when you are trying to reconstruct what happened weeks later.

    Conclusion

    The truth about iPhone AirDrop history is simple: Apple does not keep one, and that is a deliberate choice rooted in privacy. Your transfers happen cleanly and quietly, with no log left behind. But the files themselves do land somewhere in Photos, Files, or on Mac in your Downloads folder and knowing those locations is genuinely useful.

    If you are managing important files regularly, building your own lightweight system for tracking transfers is the smarter move. Use cloud apps with activity logs, label your folders right away, and keep your AirDrop visibility settings tight so you are always in control of what comes in.

    AirDrop is one of the best things about the Apple ecosystem, and understanding both its strengths and its limits helps you use it with confidence.

    FAQs

    1. Can I see my AirDrop history on my iPhone? 

    No, the iPhone does not keep a native AirDrop transfer history. Apple does not log sent or received AirDrop files, so there is no built-in way to view past activity.

    2. Where do AirDrop files go on the iPhone? 

    It depends on the file type. Photos and videos go to the Photos app, while documents and other files land in the Files app under “On My iPhone.”

    3. Is there an “Imported” album for AirDrop photos? 

    Yes. The Photos app has an “Imported” album that includes images received from external sources, including AirDrop transfers. It is not a complete log, but it is a helpful starting point.

    4. Can someone access my iPhone through AirDrop? 

    No. Accepting an AirDrop file does not give anyone access to your device or personal data. It is safe to decline any request you are unsure about, and keeping your setting on “Contacts Only” reduces unwanted requests.

    5. How can I track files I have sent via AirDrop? 

    There is no native way to do this on iPhone. The original file stays on your device, but no record of the transfer is created. For better tracking, consider using cloud storage apps that maintain activity logs.

  • How Does AirDrop Work on Android? A Complete Guide for 2026

    How Does AirDrop Work on Android? A Complete Guide for 2026

    If you’ve ever stood next to an iPhone user and watched them wirelessly zap a photo to another Apple device in seconds, you’ve probably asked yourself can Android do that too? Can Android use AirDrop? The short answer is no, not directly. But the longer answer is actually way more interesting, especially in 2026, because the gap between Apple’s AirDrop and Android’s wireless sharing tools has shrunk dramatically.

    This guide breaks down exactly how AirDrop works, why it doesn’t natively function on Android, what Google has built as a real alternative, and the best ways to share files between Android and iPhone right now. Whether you’re a tech-savvy Pixel user or just someone tired of emailing yourself photos, this one’s for you.

    What Is AirDrop and How Does It Actually Work?

    AirDrop is Apple’s proprietary wireless file transfer system built exclusively into iOS and macOS devices. It uses a combination of Bluetooth and Wi-Fi to create a direct, peer-to-peer connection between two Apple devices, no internet connection required, no cables, no drama.

    When you send something via AirDrop, your iPhone uses Bluetooth to discover nearby Apple devices and then establishes a Wi-Fi Direct link to transfer the actual file. The data is encrypted during transfer, which makes it pretty secure for a quick, casual file share. It’s fast, it works for photos, videos, documents, contacts, links, and more, and it requires absolutely zero setup once your device is configured.

    The Technology Behind AirDrop

    AirDrop relies on a proprietary Apple protocol called AWDL Apple Wireless Direct Link. This is a peer-to-peer Wi-Fi protocol Apple designed in-house, and it operates on the 5GHz Wi-Fi band. AWDL is what makes AirDrop fast and reliable, but it’s also the reason Android phones can’t use it. Google and Samsung have no access to AWDL, and Apple has never opened it up to third-party operating systems.

    On top of AWDL, AirDrop uses Bonjour (Apple’s zero-configuration networking protocol) and TLS encryption to handle device discovery and secure the data transfer. This is a tightly integrated, closed-loop Apple system from start to finish.

    AirDrop Visibility Settings Explained

    One thing that trips people up is AirDrop’s visibility settings. You can set your device to be discoverable by “Everyone,” “Contacts Only,” or turn it off completely. Apple even introduced a setting where “Everyone” mode only stays active for 10 minutes before reverting to “Contacts Only” , a small security measure to prevent random strangers from spamming your device with files in public.

    If someone can’t seem to find your AirDrop, checking these settings is always the first troubleshooting step.

    Can Android Use AirDrop? Here’s the Real Answer

    No, Android phones cannot use Apple AirDrop directly. This is not a missing feature or an oversight. It’s a deliberate ecosystem boundary. Apple built AirDrop on AWDL, a protocol that only runs on Apple hardware and software. Android phones run Google’s Android OS, which simply doesn’t support AWDL.

    This means even if you have a brand new Samsung Galaxy or a Google Pixel 10, there is no way to send a file directly to an iPhone using AirDrop from your Android device. The two ecosystems speak different languages at the wireless protocol level.

    Why Apple Hasn’t Opened AirDrop to Android

    Apple has historically kept AirDrop as an Apple-only experience. Part of this is ecosystem strategy; the seamless handoff between Apple devices is a major selling point of the Apple ecosystem. Part of it is also the European Digital Markets Act (DMA), which has pushed Apple to open some features to competitors. However, as of 2026, AirDrop remains closed to Android.

    That said, Google hasn’t been sitting still.

    Google Quick Share: Android’s AirDrop

    Google’s answer to AirDrop is called Quick Share (previously known as Nearby Share). It’s baked right into Android devices, works without an internet connection, and uses a combination of Bluetooth, Wi-Fi Direct, and Wi-Fi Aware to transfer files between nearby Android devices.

    Quick Share works remarkably similarly to AirDrop in practice. You open the share menu, tap Quick Share, nearby compatible devices appear, you select one, and the file transfers wirelessly in seconds. It supports photos, videos, documents, links, apps, and more.

    How Quick Share Works on Android

    Here’s the step-by-step process for sending a file using Quick Share:

    Open the file you want to share on your Android device. Tap the Share button and select Quick Share from the options. Your phone will start scanning for nearby Android devices with Quick Share enabled. The recipient’s device gets a notification asking if they want to accept the file. Once accepted, the transfer begins over a direct Wi-Fi connection.

    The whole process takes about as long as AirDrop, usually just a few seconds for photos, slightly longer for large videos.
    Quick Share vs AirDrop: How Do They Compare?

    Both tools are fast, require no internet, and work wirelessly over a secure direct connection. AirDrop is exclusive to Apple devices. Quick Share works across Android devices from any manufacturer Samsung, Google Pixel, OnePlus, and more. Quick Share also works cross-platform with Windows PCs that have the Quick Share app installed, which is actually something AirDrop can’t do with non-Apple computers.

    One area where AirDrop still has an edge is the seamless iPhone-to-Mac experience. If you’re in the Apple ecosystem, AirDrop just works everywhere without thinking about it. Quick Share hasn’t quite reached that level of invisible integration yet, though it’s getting very close.

    The Pixel 10 and AirDrop: What Google Changed in 2026

    The Google Pixel 10 brought some notable improvements to Quick Share that directly narrowed the gap with AirDrop. Google has optimized Quick Share to feel more instant, with faster device discovery and snappier transfer initiation. The Pixel 10’s Wi-Fi 7 chip also means that large file transfers over Quick Share happen noticeably faster than on older Pixel models.

    There were rumors leading up to the Pixel 10’s release that Google might introduce some form of cross-platform AirDrop compatibility, potentially through integration with Apple’s framework under pressure from EU regulations. While that full cross-platform vision hasn’t fully materialized, Google has made Quick Share significantly more capable and has expanded it to work more smoothly on non-Pixel Android phones.

    Is There AirDrop for Android in 2026?

    Not natively from Apple, no. But if you’re asking whether Android has a feature that works just like AirDrop, the answer is yes Quick Share is essentially AirDrop for Android. The branding and protocols are different, but the user experience is nearly identical for Android-to-Android transfers.

    How to Send Files from Android to iPhone

    Here’s where things get genuinely tricky. Sending files between Android and iPhone is the cross-platform challenge that still requires a workaround in 2026. AirDrop won’t receive from Android. Quick Share won’t send to the iPhone. So what actually works?

    Use Google Photos or iCloud

    Both platforms support cross-ecosystem access. You can share a Google Photos album with an iPhone user or send an iCloud link to an Android user. This works great for photos and videos, though it does require an internet connection.

    Use a Third-Party App Like AirDroid

    AirDroid is one of the most popular apps for cross-platform wireless file sharing. It works over your local Wi-Fi network and allows you to transfer files between Android and iPhone, Android and PC, or Android and Mac without needing a USB cable. The interface is clean, it supports large files, and the basic version is free.

    Use Snapdrop or LocalSend

    Snapdrop and LocalSend are browser-based and app-based tools that create a local network file transfer session between any devices on the same Wi-Fi network, regardless of operating system. They’re like AirDrop for the entire internet, open, cross-platform, and surprisingly fast.

    Bluetooth File Sharing (Limited)

    Bluetooth file transfer between Android and iPhone is technically possible in some cases but painfully slow and unreliable in 2026 compared to Wi-Fi-based options. It’s really a last resort.

    Email or Messaging Apps

    For quick casual sharing a single photo, a document, a link just using iMessage, WhatsApp, Telegram, or plain email is still one of the most frictionless options. WhatsApp in particular supports large video files and compresses images automatically.

    Nearby Share and Its Role in Cross-Platform Sharing

    Nearby Share is the predecessor to Quick Share, and while the branding has evolved, the underlying technology remains central to Android’s wireless sharing strategy. Android’s Nearby Share used Wi-Fi Direct and Bluetooth Low Energy (BLE) to create peer-to-peer connections between devices.

    In 2023, Google and Samsung merged Nearby Share and Samsung’s Quick Share into a unified feature simply called Quick Share. This was a huge deal because it meant the two biggest Android manufacturers were no longer splitting their user bases between two different protocols.

    How to Enable Quick Share on Samsung

    On Samsung devices, Quick Share is already installed and accessible from the notification panel. Swipe down from the top of your screen and look for the Quick Share toggle. Tap it to enable it, and your device becomes discoverable to nearby Android phones. You can also manage who can see your device, anyone nearby, your contacts, or only your own devices signed into your Google account.

    Wi-Fi Direct and Wi-Fi Aware: The Tech That Powers Android Sharing

    You’ll hear these terms a lot when people talk about Android file transfer, so let’s quickly break them down.

    Wi-Fi Direct allows two Wi-Fi-enabled devices to connect directly to each other without needing a router in between. It’s what powers Quick Share’s fast transfer speeds. The connection is encrypted and operates on standard Wi-Fi frequencies.

    Wi-Fi Aware (also called Neighbor Awareness Networking) is a more advanced feature that lets devices discover each other and even share small amounts of data before a full Wi-Fi Direct connection is established. It’s more battery-efficient for discovery purposes and makes the “find nearby device” step faster.

    Together, these two technologies give Android a wireless transfer foundation that’s technically comparable to Apple’s AWDL, just not interoperable with it.

    Security in Wireless File Sharing

    One thing worth paying attention to is whether these wireless transfers are actually secure. Both AirDrop and Quick Share use encryption during the transfer process. AirDrop uses TLS encryption, and Quick Share uses end-to-end encrypted peer-to-peer connections.

    That said, AirDrop has had documented security vulnerabilities in the past, particularly around the “Everyone” visibility setting, which could expose device information to nearby strangers before a transfer was even accepted. Apple has patched these over time, but it’s a reminder that convenience and security sometimes pull in opposite directions.

    For sensitive files, always make sure your sharing visibility is set to Contacts Only (on AirDrop) or to a restricted audience (on Quick Share). Avoid leaving your device open to “Everyone” in crowded public spaces.

    Best Apps for Wireless File Transfer Between Android and iPhone in 2026

    If you’re regularly moving files between Android and iPhone, having a dedicated app makes life much easier. Here are the top options worth knowing:

    1. AirDroid has been around for years and remains one of the most feature-rich tools for cross-platform wireless sharing. It supports file transfer, screen mirroring, and even remote device management over local Wi-Fi.
    2. LocalSend is an open-source alternative that works on Android, iOS, Windows, Mac, and Linux. It’s fast, private (no accounts needed), and completely free. Many tech users consider it the best true AirDrop alternative for cross-platform sharing.
    3. Snapdrop works entirely in the browser, meaning you don’t even need to install an app. Just open the website on both devices connected to the same Wi-Fi, and you can drop files between them instantly.
    4. Google Drive and iCloud are cloud-based rather than direct wireless transfers, but they’re seamlessly integrated into their respective ecosystems and work for most everyday sharing needs.
    5. HONOR Share is worth mentioning for HONOR and Huawei device users, as it uses a similar peer-to-peer Wi-Fi architecture and has expanded cross-device support in recent years.

    How to Fix Common File Transfer Issues Between Android and iPhone

    Sometimes things just don’t work, so here’s a quick troubleshooting guide for when your wireless file transfer isn’t cooperating.

    Both devices need to be on the same Wi-Fi network for apps like LocalSend, Snapdrop, or AirDroid to work. If one device is on mobile data and the other is on Wi-Fi, the connection will fail.

    Make sure Bluetooth is enabled on both devices when using Quick Share or AirDrop, as Bluetooth handles the initial device discovery phase even when Wi-Fi handles the actual transfer.

    Check your visibility settings. On AirDrop, if your settings are on “Contacts Only” and the sender isn’t in your contacts, they won’t be able to find you. On Quick Share, the same principle applies.

    Restart both devices if transfers keep failing. A quick reboot clears any stuck Bluetooth or Wi-Fi states that might be blocking the connection.

    Update your OS. Both Apple and Google regularly push updates that fix wireless transfer bugs, so running outdated software can cause issues that are already resolved in newer versions.

    The Future of Android and AirDrop Cross-Compatibility

    The idea of true cross-platform AirDrop functionality where an Android user could send a file directly to an iPhone using the AirDrop protocol isn’t as far-fetched as it once seemed. The European Digital Markets Act continues to put pressure on Apple to open its ecosystem, and interoperability has become a regulatory priority across major markets.

    Google has already shown with Quick Share that they can build something technically on par with AirDrop. If Apple were ever required or incentivized to open the AWDL protocol, Android-to-iPhone wireless transfers could become seamless overnight. Whether that happens in 2026, 2027, or beyond is still an open question, but the momentum is pointing in that direction.

    Until then, Quick Share handles Android-to-Android perfectly, and tools like LocalSend and AirDroid fill the cross-platform gap with minimal friction.

    Conclusion

    AirDrop doesn’t work on Android at least not in the direct sense. It’s Apple’s proprietary system, and Apple built it to stay within the Apple ecosystem. But Android has Quick Share, which does the same job beautifully for Android-to-Android transfers. For cross-platform sharing between Android and iPhone, apps like LocalSend, AirDroid, and Snapdrop get the job done wirelessly and quickly without needing a cable or a cloud service.

    The file transfer landscape in 2026 is honestly better than it’s ever been. You’re no longer stuck emailing yourself photos or hunting for a USB-C to Lightning adapter. A solid wireless solution exists for almost every imaginable device combination.

    If you’re an Android user looking for a seamless AirDrop-like experience, Quick Share is already on your phone and ready to go. And if you’re frequently bridging the Android-iPhone divide, bookmark LocalSend it might just become your new favorite app.

    FAQs

    1. Can Android phones use AirDrop directly? 

    No. AirDrop is an Apple-exclusive feature that uses a proprietary protocol called AWDL, which only runs on Apple devices. Android phones cannot access or use AirDrop natively.

    2. What is the best AirDrop alternative for Android? 

    Quick Share (built into Android) is the best AirDrop alternative for Android-to-Android sharing. For cross-platform transfers between Android and iPhone, LocalSend and AirDroid are the top choices in 2026.

    3. How do I send a file from Android to iPhone wirelessly?

    The easiest way is to use an app like LocalSend or AirDroid on both devices while connected to the same Wi-Fi network. You can also use Google Photos, iCloud, or messaging apps like WhatsApp for casual sharing.

    4. Does Quick Share work between Android and iPhone?

    Quick Share works between Android devices only. It does not support direct transfers to the iPhone. For Android-to-iPhone sharing, you need a third-party app or cloud service.

    5. Is wireless file transfer between Android and iPhone secure? 

    Yes, when using reputable apps like LocalSend or AirDroid, transfers are encrypted. LocalSend in particular uses TLS encryption for all transfers. Always use trusted apps and avoid public Wi-Fi when transferring sensitive files.

  • Best Wireless Earbuds Under 200 Dollars: Top Picks You’ll Actually Love

    Best Wireless Earbuds Under 200 Dollars: Top Picks You’ll Actually Love

    There’s a reason the $200 range gets so much attention in the audio world. You’re past the budget tier where corners get cut, but you haven’t crossed into the territory of diminishing returns that marks premium flagship earbuds. Right in this sweet spot, you get real ANC, great sound, solid battery life, and features that actually work. Whether you’re looking for the best wireless earbuds under $200 for commuting, working out, or just listening to music at your desk, there’s something here for you.

    We’ve looked at what real testing labs and everyday users are saying, pulled together the strongest options, and laid it all out below. No fluff, just the picks that genuinely hold up.

    Why $200 Is the Sweet Spot for Wireless Earbuds

    Think of the wireless earbud market like a grocery store. Under $50, you’re getting the generic store brand. Spend $300 or more, and you’re paying a premium just for the label. But the $150 to $200 range? That’s the shelf with the good stuff at a fair price.

    At this price, brands compete hard. You get features like active noise cancellation that actually blocks noise rather than just dampening it slightly. You get LDAC or aptX codec support for higher quality audio. You get companion apps with real EQ options, not just three presets. And you get battery life that can carry you through a full workday.

    The best wireless earphones under $200 from 2026 prove this point clearly. Each one in this list brings something that used to cost twice as much just a few years ago.

    What to Look for Before You Buy

    Before jumping into specific models, it helps to know what actually matters when choosing the best earphones under $200.

    Sound Quality

    Sound quality is the obvious starting point, but it’s more nuanced than “does it sound good?” Look for earbuds with balanced tuning, decent bass extension, and clear mids. Some earbuds target bass-heavy listeners, others go for studio-flat responses. Neither is wrong, but knowing your preference saves you from buyer’s remorse.

    Active Noise Cancelling (ANC) Performance

    Not all ANC is equal. The best noise-cancelling earbuds under $200 can block 30 to 40dB of ambient noise. Budget ANC might muffle sound slightly, but fall flat against constant hum like air conditioning or engine noise. If you commute or work in noisy places, ANC quality should be near the top of your checklist.

    Battery Life and Charging

    Look for at least 6 hours of playtime on the earbuds themselves, with the charging case adding another 20+ hours. Fast charging is a big bonus. Five minutes on the charger giving you three to four hours of listening time can save you on rushed mornings.

    Comfort and Fit

    Ear tips matter more than most people realize. A poor seal means worse bass and weaker ANC. Look for models that include multiple ear tip sizes, or offer ear wings for sports use. The best earphones under 200 dollars will often include at least three tip sizes, sometimes more.

    Companion App and Customization

    A good companion app lets you adjust EQ, remap touch controls, set ANC levels, and run ear tip fit tests. This isn’t just a nice extra. It’s what separates a personalized listening experience from a one-size-fits-all one.

    Best Overall: Anker Soundcore Liberty 4 Pro

    The Soundcore Liberty 4 Pro from Anker is hard to beat when you factor in everything you’re getting for the price. This is the kind of earbud that makes you wonder why anyone spends more.

    Sound quality follows what most listeners prefer, with a slightly warm, bass-forward tuning that works across genres. Anker’s companion app (Soundcore) gives you granular EQ control, HearID sound personalization, and a wide range of customization. It’s one of the more feature-complete apps in this price range.

    Sound and ANC Performance

    In independent testing, the Liberty 4 Pro’s ANC cuts low-frequency noise by around 30dB. That’s genuinely impressive for a sub-$150 model. Transparency mode is equally solid, letting you hear conversations clearly without pulling the earbuds out.

    The sound profile leans slightly warm, with satisfying bass and clear enough treble. Vocal clarity is good, which makes these work well for podcasts and calls, not just music.

    Battery Life and Charging Case

    Battery life hits around 9 to 10 hours on the earbuds, with the case adding another 28 hours. The charging case itself is a talking point: it has a small touchscreen display that lets you adjust ANC, check battery, and toggle settings without reaching for your phone. It’s a novelty at first, but it does come in handy. Fast charging gives you four hours of playback from just five minutes of charging.

    Who Should Buy the Soundcore Liberty 4 Pro?

    If you want the most features per dollar and don’t want to pick between good sound, effective ANC, and a great app, this is your pick. It’s the best earbuds under $200 for people who want it all without overthinking it.

    Best Features for the Price: JBL Live Beam 3

    The JBL Live Beam 3 is the one to get if you love having control. JBL packed this with a smart charging case featuring a touch display, LDAC support, multiple ANC modes, and a clean companion app. It’s the most feature-dense option among the best wireless earbuds under 200 dollars in 2026.

    Smart Case and Customization

    The smart case is genuinely useful. You can control playback, switch ANC modes, and adjust settings from the case itself, no phone needed. For gym use or times when your phone is tucked away, that’s a practical win.

    Sound tuning leans consumer-friendly, with enhanced bass and crisp treble. JBL includes a “Studio” preset for a more neutral response, which audiophiles will appreciate. ANC performs well on low-frequency sounds, making it solid for flights, trains, and noisy offices.

    Who Should Buy the JBL Live Beam 3?

    Tech enthusiasts and power users who want maximum features in a true wireless earbud. If you love customization and want LDAC plus a smart case, this one’s built for you.

    Best Wireless Earbuds Under $200 for iPhone Users: Apple AirPods 4 with ANC

    Apple’s fourth-generation AirPods brought ANC to the standard model for the first time, and they pulled it off well enough to land on this list. If your entire life runs through an iPhone and iPad, these make more sense than anything else here.

    ANC and Transparency Mode

    The ANC on the AirPods 4 blocks around 20dB of noise, which is modest compared to Sony or Anker, but still useful for typical office noise or light street sound. The unsealed design means passive isolation is limited, but Apple compensates with clever processing.

    Adaptive Audio is the standout feature. It blends ANC and Transparency mode automatically based on what’s happening around you. Walk past a construction site and it softens the noise. Someone speaks to you, and it lowers your music automatically with Conversation Awareness. It’s the kind of integration that only works this smoothly inside Apple’s ecosystem.

    The H2 chip also enables Spatial Audio with dynamic head tracking, which is a genuinely immersive experience for compatible content on Apple devices.

    Who Should Buy the AirPods 4 with ANC?

    iPhone users who are already invested in the Apple ecosystem and want earbuds that just work without any setup friction. Less ideal for Android users, where most advanced features won’t function.

    Best Noise Cancelling Earbuds Under $200: Sony WF-C710N

    Sony has always punched hard in the ANC space, and the WF-C710N proves that a budget Sony can still outperform pricier competitors on noise isolation.

    Isolation and ANC Numbers

    The silicone ear tips on the WF-C710N alone block up to 40dB of high-frequency noise passively. Add ANC on top of that, and low-end sounds get reduced by another 30dB. The combined effect makes these among the most isolating earbuds in the best earbuds under $200 category.

    Sony’s LDAC support means you’re getting high-resolution audio streaming if your source device supports it. The companion app (Sony Headphones Connect) lets you customize EQ, ANC strength, and Ambient Sound levels.

    Battery life sits at around 9 hours per charge with ANC on, and the case holds another 18 hours. Not class-leading, but more than enough for daily use.

    Who Should Buy the Sony WF-C710N?

    Commuters, frequent flyers, and anyone who works in a loud environment. If blocking out the world is your primary goal, this is the best noise cancelling earbud under $200 you can buy right now.

    Best Sound Quality Earbuds Under $200: Creative Aurvana Ace 3

    The Creative Aurvana Ace 3 is the audio nerd’s pick. It uses xMEMS solid-state drivers, which are a fundamentally different technology from the typical dynamic or balanced armature drivers found in most earbuds. The result is faster transient response and finer detail retrieval.

    Mimi Sound Personalization runs a hearing profile test and adjusts the sound output to your unique hearing sensitivity. Combined with LDAC and aptX Lossless support, this is objectively the best sound quality earbud under $200 for listeners who care about resolution and detail.

    ANC is decent but not the main event here. If you’re buying these, you’re buying them for audio performance first.

    Who Should Buy the Creative Aurvana Ace 3?

    Audiophiles and music listeners who prioritize sound accuracy above everything else. These reward quality source material and careful listening.

    Best Comfort Pick: Nothing Ear 3

    Nothing has built a reputation for making earbuds that look different and feel great after hours of wearing. The Nothing Ear 3 continues that tradition with an updated design and some solid audio performance to match.

    The stem-style fit distributes weight well, and the ear tips create a gentle seal that doesn’t fatigue the ear canals over long sessions. Battery life is strong at around 9.5 hours on the earbuds, with the transparent case adding more. Clear Calls uses three microphones for clean voice pickup, which makes these a strong choice for remote workers.

    Who Should Buy the Nothing Ear 3?

    People who wear their earbuds for hours at a time and hate that “plugged” feeling that comes with aggressive seals. Also great for video calls and meetings.

    Best Wireless Earbuds Under $200 for Working Out: Beats Fit Pro

    The Beats Fit Pro sit right at the $200 ceiling and earn their spot through sheer workout functionality. The flexible wingtips lock these into your ears so well that even jumping, sprinting, or lifting won’t shake them loose.

    ANC works, transparency mode is clear, and the Apple H1 chip means quick pairing and solid call performance on iOS. They’re also compatible with Android through the Beats app, which covers the basics including EQ presets and firmware updates.

    IPX4 sweat resistance means you’re covered for intense workouts without worrying about moisture damage.

    Who Should Buy the Beats Fit Pro?

    Active users who need earbuds that stay in no matter what. Whether you run, lift, or do HIIT classes, these are built to move with you without falling out.

    Quick Comparison: Best Earbuds Under $200 at a Glance

    Here’s a simple summary to help you match each pick to your needs:

    ModelBest ForANCBattery (Buds)Codec
    Soundcore Liberty 4 ProOverall valueStrong (30dB)9-10 hrsLDAC
    JBL Live Beam 3Most featuresGood9 hrsLDAC
    Apple AirPods 4 (ANC)iPhone usersModerate (20dB)5 hrsAAC
    Sony WF-C710NNoise isolationExcellent (30dB+)9 hrsLDAC
    Creative Aurvana Ace 3Sound qualityDecent9 hrsaptX Lossless
    Nothing Ear 3Long-wear comfortGood9.5 hrsLDAC
    Beats Fit ProSports/workoutsGood7 hrsAAC

    Tips to Get the Most Out of Your New Earbuds

    Buying great earbuds is only half the equation. Here’s how to actually get the best out of them once they arrive.

    First, spend five minutes finding the right ear tip size. It makes a night-and-day difference for both sound quality and ANC effectiveness. A loose fit kills bass and lets noise in.

    Second, enable and test any EQ features in the companion app. The default tuning isn’t always the best the earbuds can sound. A small tweak to the midrange or a slight bass reduction can transform the experience.

    Third, update firmware right after unboxing. Brands push improvements through updates, and your earbuds on day one might sound and perform slightly worse than they will after a quick update.

    Finally, if your earbuds support multipoint connection, set it up. Being able to switch seamlessly between your phone and laptop without re-pairing is one of those features you’ll use constantly once you have it.

    Conclusion

    The best wireless earbuds under 200 dollars in 2026 are better than earbuds that cost twice as much just a few years ago. ANC has gone from a premium luxury to a standard expectation. Battery life has stretched to match full workdays. And companion apps have turned one-size-fits-all audio into something genuinely personal.

    If you want the safest overall buy, the Soundcore Liberty 4 Pro is hard to argue against. Sony WF-C710N wins for pure noise isolation. Apple AirPods 4 with ANC are the right call if you’re deep in the Apple ecosystem. And if sound quality is what drives your decision, the Creative Aurvana Ace 3 is in a class of its own at this price.

    No matter which you choose, you’re getting a genuinely excellent product. The market at this price point is competitive enough that any pick on this list will exceed expectations.

    FAQs

    1. Are wireless earbuds under $200 worth buying over budget options?

    Yes, significantly so. The jump from sub-$50 earbuds to the $150 to $200 range brings real ANC, high-resolution codec support, better build quality, and apps with actual customization. It’s a noticeable upgrade, not a marginal one.

    2. Which earbuds under $200 have the best noise cancellation?

    The Sony WF-C710N currently leads this category, combining passive isolation from its ear tips with strong active noise cancellation that together can reduce ambient noise by a substantial margin. For pure ANC performance, it’s the top pick among the best noise-cancelling earbuds under $200.

    3. Can I use AirPods 4 with an Android phone?

    You can connect them via Bluetooth and use basic playback controls, but features like Adaptive Audio, Spatial Audio, automatic ear detection, and Conversation Awareness only work on Apple devices. For Android users, the Soundcore Liberty 4 Pro or Sony WF-C710N are better choices.

    4. What does LDAC mean and why does it matter?

    LDAC is a high-resolution audio codec developed by Sony that transmits audio data at up to three times the bitrate of standard Bluetooth. In practical terms, it lets you stream music with more detail and clarity than standard SBC or AAC, provided your phone and streaming service support it. Many of the best wireless earphones under 200 now include LDAC support.

    5. How long should wireless earbuds last before replacing?

    Most quality earbuds hold up for two to three years with regular use. Battery capacity degrades over charge cycles, similar to a phone battery. Buying from brands with good warranty and support policies (like Sony, Apple, or Anker) gives you a better shot at a replacement or repair if something goes wrong within the first year or two.

  • AirDrop Between iPhone and Android What Actually Works in 2026

    AirDrop Between iPhone and Android What Actually Works in 2026

    If you have ever stood next to a friend trying to send them a photo, only to realize one of you has an iPhone and the other has an Android, you already know the frustration. It feels crazy, right? Two people standing inches apart, and the easiest solution involves either emailing the file, compressing it through WhatsApp, or downloading some random third-party app that neither of you fully trusts. That whole headache is now being solved, and the solution is more elegant than most people expected.

    Cross-platform file sharing between Android and iPhone using AirDrop-style technology is finally here, and it works better than you might think.

    The Dream That Finally Became Reality

    For years, iPhone users enjoyed AirDrop as one of those features that just worked. Drop a photo, a link, a document, whatever you wanted, and it reached another nearby Apple device in seconds. Android users had their own tools but nothing that talked to Apple’s ecosystem. The two platforms lived in separate bubbles.

    That wall is coming down.

    Why Cross-Platform Sharing Was Such a Pain Before

    The core issue was always that Apple and Google built their wireless sharing technologies on different foundations. AirDrop relies on a combination of Bluetooth for device discovery and Wi-Fi Direct for the actual transfer, wrapped in Apple’s proprietary protocols. Android had its own version of nearby sharing, but since the two systems never spoke the same language, files had nowhere to go across that divide.

    People turned to workarounds like Google Drive, WhatsApp, or email. These all worked, more or less, but they all introduced friction. Files got compressed, accounts were required, and the experience never felt seamless. Sharing a burst of 50 photos to someone standing right next to you should not require a cloud detour.

    What Changed and When

    Google made a significant move when it rebranded and overhauled its nearby sharing feature into what is now called Quick Share. The update brought much more than a name change. It introduced interoperability with Apple’s AirDrop, meaning Android devices running the updated Quick Share can now initiate wireless file transfers to iPhones, and iPhones can receive them using the native AirDrop framework. No third-party app required on either side.

    The rollout started making waves with the Pixel 9 series and has been expanding rapidly to other Android devices through software updates.

    What Is AirDrop and Why Does It Matter for Android Users?

    Before getting into how the cross-platform piece works, it helps to understand what AirDrop actually does and why Android users spent years wishing they had it.

    How AirDrop Works on Apple Devices

    AirDrop uses Bluetooth to let your device broadcast itself to nearby Apple devices and then switches to a direct Wi-Fi connection for the transfer itself. This two-step process means transfers are fast, local, and do not require an internet connection. The moment you share something, it travels directly from one device to another. Nothing passes through a server. Nothing gets stored in the cloud unless you explicitly put it there.

    What made it feel almost magical was the simplicity. Open your share sheet, tap AirDrop, see the person’s name pop up, tap it, done. The recipient gets a notification and accepts. It takes about ten seconds and works with photos, videos, documents, contacts, links, and more.

    Why Android Users Always Wanted the Same Thing

    Android has always had a more open and flexible ecosystem, but that openness sometimes meant fragmentation. Different manufacturers built different sharing tools, and none of them worked seamlessly with Apple. When Quick Share became the unified Android standard, the stage was set for something bigger. The collaboration between Google and Apple to enable this cross-platform feature is genuinely one of the more surprising partnerships in recent tech history.

    Google Quick Share: The Android Answer to AirDrop

    Quick Share is Google’s native wireless file sharing feature built into Android. Think of it as Android’s version of AirDrop but with a few tricks of its own that, honestly, might make you like it even more in certain situations.

    What Quick Share Actually Does

    Quick Share handles file transfers between Android devices using Bluetooth and Wi-Fi Direct, similar to how AirDrop works. You can share photos, videos, audio files, apps, and links. It lets you transfer up to 1,000 files per session and handle files as large as 10GB, which is genuinely impressive. For context, WhatsApp caps video transfers at a fraction of that size and compresses photos automatically.

    Quick Share also has flexible visibility settings. You can set your device to be discoverable by everyone nearby, just your contacts, or no one. When you want to receive something, you simply open up your discoverability.

    How Quick Share and AirDrop Now Work Together

    Here is where things get exciting. Google updated Quick Share so that when an Android user wants to send a file to an iPhone, the system generates a mechanism for the two platforms to communicate using AirDrop on the iPhone’s end. The Android device handles the initiation, the iPhone receives it through AirDrop, and the transfer happens over a direct Wi-Fi connection.

    The result is that you do not need to install anything on the iPhone. The person receiving just needs to have AirDrop enabled, which is a standard setting on every iPhone.

    The QR Code Magic Behind the Transfer

    One of the clever touches in this new system is the QR code handshake option. When you initiate a transfer from an Android device to an iPhone, the Android can display a QR code at quickshare.google. The iPhone user opens their camera, scans it, and the transfer kicks off through AirDrop automatically. It sounds like a few extra steps on paper but in practice takes about five seconds and completely sidesteps any need for both devices to find each other over Bluetooth.

    This QR-based approach is especially useful in noisy wireless environments, like a crowded event, where Bluetooth discovery can be unreliable.

    How to Send Files from Android to iPhone Right Now

    Enough background. Here is how you actually do it.

    Step-by-Step: Using Quick Share to Send to iPhone

    Start by making sure your Android device has the latest version of Quick Share installed. On most Pixel and Samsung devices running Android 12 or later, Quick Share is already built in and updates automatically.

    Open the file you want to share, whether it is a photo in your gallery, a document in your files app, or a link in your browser. Tap the share icon. You should see Quick Share as one of the options in the share sheet. Tap it.

    Your device will now look for nearby recipients. If the iPhone is nearby with AirDrop enabled, it may show up directly. If not, tap the option to generate a QR code. On the iPhone, open the Camera app, point it at the QR code, and tap the link that appears. This takes you to a quick web handshake page, and the transfer begins through AirDrop.

    The file will appear in the iPhone’s Files app or Photos app depending on what was shared.

    What Types of Files You Can Share

    The good news is that the format restrictions are minimal. You can send photos and videos in their original quality, no compression applied. Documents, PDFs, contacts, and plain links all work too. For the current version of this feature, files up to 10GB can be sent, and you can batch-send up to 1,000 files at once. That kind of capacity puts it miles ahead of what most people use WhatsApp or email for when it comes to bulk transfers.

    How to Receive Files on Your iPhone from Android

    The iPhone side of this equation is straightforward because it uses the native AirDrop infrastructure.

    Enabling the Right AirDrop Settings on iPhone

    On your iPhone, go to Settings, then General, then AirDrop. Here you will see three options: Receiving Off, Contacts Only, and Everyone for 10 Minutes. For receiving from an Android device, you need to be on either Contacts Only (if the sender is in your contacts) or Everyone for 10 Minutes.

    You can also access AirDrop settings from the Control Center by holding down the network tile in the top-left corner of the expanded control panel.

    Using the “Everyone for 10 Minutes” Mode

    The “Everyone for 10 Minutes” mode is worth knowing about because it is intentionally time-limited. Apple designed it this way to prevent your phone from being visible to random strangers indefinitely. When you enable it, your iPhone becomes discoverable to any nearby device for ten minutes, then automatically switches back to Contacts Only. This is the setting you will use most often when receiving from Android.

    Once the transfer request comes in from the Android device, you will see the usual AirDrop pop-up on your screen asking if you want to accept. Tap Accept, and the file lands in the appropriate app.

    Which Android Devices Support Cross-Platform AirDrop Sharing?

    The rollout of this feature is ongoing, and more devices are being added through software updates.

    Google Pixel 10 Series and Earlier

    The Pixel 10, Pixel 10 Pro, Pixel 10 Pro XL, and Pixel 10 Pro Fold all support the cross-platform Quick Share feature out of the box. Earlier Pixel devices including the full Pixel 9 series and Pixel 8a received the update through a software patch and support the feature as well.

    Samsung Galaxy Devices

    Samsung has integrated Quick Share across its recent flagship lineup. The Galaxy S26 series, Galaxy S25, Galaxy S24, Galaxy Z Fold series, and Galaxy Z Flip series all support the Android-to-iPhone sharing capability through Quick Share updates. Samsung was actually one of the early adopters of the Quick Share standard since it collaborated with Google on the original rebranding.

    Other Supported Android Brands

    The feature is not limited to Pixel and Samsung. Devices from Oppo, including the Find X9 and Find X8 series, the Vivo X300 Ultra, OnePlus 15, and Honor devices like the Magic V6 and Magic 8 Pro are either already supported or in the process of rolling out compatibility through system updates. Essentially, any Android device running a recent enough version of Quick Share and Android 12 or later should be able to participate.

    Security: Is This Kind of File Transfer Actually Safe?

    This is a fair question to ask. When two platforms from different companies start talking to each other wirelessly, security is worth thinking about.

    End-to-End Encryption Explained Simply

    Both AirDrop and Quick Share use end-to-end encryption for file transfers. What this means in practical terms is that the file is encrypted on the sending device before it leaves, and it is only decrypted on the receiving device. Nothing in the middle, not a server, not a router, not anyone standing nearby with packet-sniffing software, can read the file as it moves.

    Think of it like sending a locked box where only the recipient has the key. Even the companies involved, Google and Apple, cannot see what is being transferred.

    How the Peer-to-Peer Connection Works

    The transfer happens over a direct peer-to-peer Wi-Fi connection. Both devices connect to each other directly, bypassing the internet entirely. This is faster than cloud-based sharing and adds another layer of privacy since the data never touches an external server. Bluetooth is used for the initial device discovery and handshake, then Wi-Fi Direct takes over for the actual file movement, which is why transfers are so much faster than Bluetooth alone.

    AirDrop vs Quick Share: Which One Wins?

    Now that they work together, comparing them is less about picking a winner and more about understanding their strengths.

    Speed and File Size Limits

    For raw speed, both tools are comparable when working device-to-device since both rely on Wi-Fi Direct. Where Quick Share pulls ahead is in the file size limit. Quick Share supports transfers up to 10GB and up to 1,000 files at a time. AirDrop’s limits are less clearly defined and tend to vary, but for most everyday use cases both handle the job without trouble.

    For large batch transfers, Quick Share has a clear edge. For quick, casual sharing within the Apple ecosystem, AirDrop’s integration feels slightly more refined.

    Ease of Use and Setup

    AirDrop wins on familiarity for iPhone users since it has been around since 2011 and requires no setup beyond making sure it is turned on. Quick Share has caught up considerably in terms of simplicity and the cross-platform QR code flow is clever enough that most people figure it out on the first try.

    The setup burden is genuinely low on both sides, which is what makes this cross-platform solution feel like it should have existed years ago.

    Why This Is Better Than WhatsApp or Cloud Storage

    A lot of people default to messaging apps or cloud services for sharing files between platforms. Both are fine tools, but they come with trade-offs that direct wireless sharing avoids entirely.

    The Problem with WhatsApp File Compression

    WhatsApp is probably the most common workaround people use for cross-platform sharing, and it works well enough for casual use. But here is the catch: WhatsApp compresses photos and videos automatically. A photo you shoot at 12 megapixels might arrive at half that quality or less. Videos get downsized. For anything where the original quality matters, sharing through WhatsApp is a quiet downgrade.

    With Quick Share to AirDrop, the file travels exactly as it was. What you send is what they receive.

    No Cloud, No Account, No Problem

    Cloud storage services like Google Drive work across platforms but require both parties to have accounts, both devices to have internet access, and a round trip through a server. If your Wi-Fi is slow or you are somewhere with limited data, transfers slow to a crawl. Direct wireless transfer sidesteps all of this. No login, no upload time, no download time from a server. Just a direct connection between two devices in the same room.

    What to Expect Next: The Future of Cross-Platform Sharing

    The collaboration between Apple and Google on this feature suggests both companies understand that users are tired of being penalized for not living entirely in one ecosystem. Most people own devices from different brands or have friends and family on different platforms, and forcing them into clunky workarounds just makes both products look worse.

    Expect to see the supported device list expand steadily. The foundation is already in place, and as both companies push updates, more Android brands will be added to the compatibility roster. There is also a reasonable chance the feature will become smoother and more automatic over time, possibly to the point where the QR code step is not always necessary and direct discovery just works between the two ecosystems the way it does within each one today.

    RCS messaging, which also recently became a cross-platform standard after Apple adopted it, shows that Apple and Google can work together when it benefits their shared user base. Cross-platform file sharing feels like the next piece of that puzzle.

    Conclusion

    For a long time, the gap between iPhone and Android felt intentional, like each company was nudging you to stay inside its walls. The arrival of cross-platform AirDrop-style sharing through Quick Share is a genuine step in a different direction. It treats users as people who just want their devices to work together, regardless of who made them.

    Whether you are sending vacation photos to a friend, sharing a work document with a colleague who uses a different phone, or just trying to move a file between your own devices, the process is now clean, fast, and private. No compression, no accounts, no apps to install.

    The tech has always been there. It just took the two biggest players in mobile deciding to point it at each other.

    FAQs

    1. Can I use AirDrop directly from Android without any extra steps? 

    Not through AirDrop itself, since AirDrop is an Apple feature. But through Google’s Quick Share, you can initiate a transfer that arrives on an iPhone via AirDrop. The process is seamless from the user’s perspective and requires no third-party app on either device.

    2. Does the iPhone need any special app installed to receive files from Android? 

    No. The iPhone receives the file using its built-in AirDrop capability. As long as AirDrop is enabled on the iPhone and set to receive from everyone or contacts, it works without any additional software.

    3. What is the maximum file size I can send from Android to iPhone this way? 

    Through Quick Share, you can send files up to 10GB in size, and up to 1,000 files per session. This makes it well-suited for large video files, photo dumps, or document packages that would be impossible to send through messaging apps.

    4. Is the file transfer encrypted and private? 

    Yes. Both Quick Share and AirDrop use end-to-end encryption and establish a direct peer-to-peer Wi-Fi connection between devices. The file never passes through a server, meaning neither Google nor Apple can see what you are transferring.

    5. Which Android devices currently support cross-platform sharing with iPhone? 

    Devices from Google (Pixel 8a and later), Samsung (Galaxy S24 series and later, Z Fold and Z Flip series), OnePlus 15, Oppo Find X8 and X9 series, Vivo X300 Ultra, and Honor Magic V6 and Magic 8 Pro are among the supported devices. The list is growing as manufacturers push Quick Share updates through their Android software pipelines.

  • How to Change Your Name for AirDrop: Step-by-Step Guide 2026

    How to Change Your Name for AirDrop: Step-by-Step Guide 2026

    If your AirDrop is showing the wrong name, you are not alone. Many iPhone, iPad, and Mac users notice that even after changing their device name, AirDrop still displays the old or incorrect one. This can make it hard for friends or coworkers to find your device when sharing files. The good news is that fixing the problem is usually simple. 

    In this guide, you’ll learn how to change your AirDrop name correctly and what to do if the new name does not appear right away.

    Why Your AirDrop Name Actually Matters

    Imagine you’re in a meeting, trying to send a file to a colleague via AirDrop, and instead of seeing their name pop up on your screen, you see something like “iPhone (3)” or “MacBook Pro.” Confusing, right? Now flip it around. What does your device show up as when someone tries to send you something?

    Your AirDrop name is essentially your digital identity in the Apple ecosystem, at least when it comes to wireless file sharing. It’s the label other Apple devices see when you’re within Bluetooth range. A clear, recognizable device name makes the whole experience smoother, faster, and less awkward, whether you’re sharing vacation photos with family or sending work documents to a coworker.

    The good news? Changing your AirDrop name is genuinely simple once you know where to look. It’s not buried in some obscure settings menu. Let’s walk through the whole thing.

    What Controls Your AirDrop Name?

    Before jumping into the steps, it helps to understand one key thing: AirDrop does not have its own separate name setting. There’s no “AirDrop preferences” panel where you type in a custom label. Instead, AirDrop pulls its display name directly from your device’s name. Change the device name, and your AirDrop name updates automatically.

    It’s All Tied to Your Device Name

    Your iPhone, iPad, or Mac all have a system-level name. On an iPhone, for example, this is usually something like “John’s iPhone” by default. That name is what shows up when someone nearby opens AirDrop and looks for devices to send a file to. So renaming your device for AirDrop is really just renaming the device itself.

    How iCloud Plays a Role

    If you’ve ever noticed your device listed inside iCloud with a certain name, that’s the same name AirDrop uses. Apple keeps these tied together across the ecosystem, which means your AirDrop name might also reflect changes across your Apple ID linked devices. Good to keep in mind if you manage multiple Apple products.

    How to Change Your AirDrop Name on iPhone and iPad

    This is probably the most common scenario since iPhones are everywhere, and AirDrop usage on iOS is incredibly frequent. Thankfully, the process takes less than a minute.

    Step-by-Step: Rename Your iPhone for AirDrop

    1. Open the Settings app on your iPhone or iPad.
    2. Tap General.
    3. Tap About.
    4. At the very top, you’ll see your current device name. Tap on it.
    5. Clear the existing name and type in whatever you want your AirDrop name to be.
    6. Tap Done on the keyboard to save it.

    That’s genuinely all there is to it. No restart required, no confirmation screen. Your new name will show up immediately when someone looks for your device via AirDrop.

    Worth noting: the same steps work for iPad. The menu path is identical since iPadOS and iOS share the same Settings layout. If you’re on an older version of iOS, the steps are essentially the same, just navigate to Settings > General > About > Name.

    What Happens After You Save the New Name?

    The change takes effect almost instantly. If you want to verify it worked, you can open the Control Center, long-press on the connectivity cluster (where Bluetooth and Wi-Fi icons are), and tap on AirDrop. Your device should now be broadcasting under the new name you just set. Anyone nearby with an Apple device will see your updated name.

    How to Change Your AirDrop Name on Mac

    The process on a Mac is just as easy, though it lives in a slightly different spot in System Settings.

    Step-by-Step: Rename Your Mac for AirDrop

    1. Click on the Apple menu in the top-left corner of your screen.
    2. Select System Settings (on macOS Ventura and later) or System Preferences on older versions.
    3. Click on General.
    4. Select About (on newer macOS) or look for Sharing on older versions.
    5. At the top of the About screen, you’ll see your Mac’s name. Click on it to edit.
    6. Type your new name and press Enter or Return to confirm.

    Your Mac’s AirDrop name will now reflect the change. No restart needed.

    Finding the Sharing Settings on Older macOS Versions

    If you’re running an older version of macOS, the device name might be found under System Preferences > Sharing. At the top of that window, there’s a field labeled “Computer Name.” That’s the one you want to edit. Change it there, and your AirDrop identity updates to match.

    AirDrop Not Showing the Correct Name? Here’s Why

    Sometimes people change their device name and then get frustrated because AirDrop still seems to show the old one. This is more common than you’d think, and it usually comes down to one of two things.

    Cache and Refresh Issues

    Apple devices sometimes cache nearby device information for a short period. Think of it like your phone holding onto old contact card data before it refreshes. If someone saw your old AirDrop name just before you made the change, their device might still display the previous name for a bit. This usually resolves itself within a few minutes as the cache clears.

    If you’re testing it yourself on a separate device and still seeing the wrong name, try toggling Bluetooth off and back on. That often forces a refresh of the nearby device list, and your new name should appear.

    The Restart Fix That Actually Works

    There’s a classic reason restarts exist. If your AirDrop name still isn’t updating correctly after toggling Bluetooth, a full device restart typically solves it. When your iPhone or Mac boots back up, it broadcasts the new device name fresh, and any lingering cache from the old name gets wiped out. It’s a simple fix, but it works.

    How to Make Your AirDrop Visible to the Right People

    Changing your name is one thing. Making sure you’re visible to the right people is another layer of the AirDrop experience that’s worth understanding.

    Contacts Only vs. Everyone Mode

    AirDrop has two main visibility settings beyond simply being off:

    • Contacts Only: Only people in your contacts can see your device when they try to AirDrop something to you. This is the safer, more private option.
    • Everyone: Any nearby Apple device, even strangers, can see your device name and send you a request. You still have to accept it, but your name is visible to anyone around you.

    For everyday use, Contacts Only is usually the smarter pick. If you’re at an event or need to receive files from someone not in your contacts, you can temporarily switch to Everyone and switch back afterward.

    AirDrop Discoverability Tips

    Make sure both Bluetooth and Wi-Fi are turned on. AirDrop uses both to function. You don’t need to be on the same Wi-Fi network, but Wi-Fi needs to be enabled. Also, make sure your screen is unlocked when someone is trying to send you a file, as a locked screen can sometimes prevent the AirDrop request from coming through properly.

    Common AirDrop Name Problems and How to Fix Them

    Even with the right steps, AirDrop can occasionally behave in frustrating ways. Here are some of the most common name-related issues and what to do about them.

    AirDrop Showing an Old Name

    If your device was recently renamed but still shows up under the old name to other devices, the fastest fix is toggling AirDrop off and on again. You can also toggle Bluetooth off and on, or just restart the device. These actions force the system to broadcast the refreshed device name.

    AirDrop Not Appearing on Nearby Devices

    This one’s slightly different. If your device isn’t showing up at all (name or no name), check that:

    • AirDrop is set to Contacts Only or Everyone, not Off.
    • Bluetooth and Wi-Fi are both enabled.
    • You’re within range. AirDrop works best within about 30 feet.
    • Personal Hotspot is turned off. An active hotspot can interfere with AirDrop discoverability.
    • Your iOS or macOS is up to date. Running older software can cause compatibility issues with nearby devices running newer versions.

    Choosing the Right AirDrop Name

    This might seem like a small thing, but your AirDrop name is the first thing someone sees when you show up on their screen. It’s worth putting a little thought into it.

    Professional vs. Personal Device Names

    If you use your iPhone primarily for work, something like “Alex’s Work iPhone” or even just your full name makes a lot of sense. It’s immediately recognizable and professional. On the flip side, if it’s your personal device, something simple like “Sarah’s iPhone” or even a nickname works perfectly fine.

    Avoid super generic names like “iPhone” or “My Phone.” These are nearly impossible to distinguish in a crowd of Apple devices, and they make AirDrop transfers unnecessarily confusing for everyone involved. A little specificity goes a long way.

    How AirDrop Works in the Apple Ecosystem

    AirDrop is Apple’s peer-to-peer wireless file transfer system. It uses a combination of Bluetooth and Wi-Fi to create a secure, direct connection between two Apple devices. No internet is required. Files are encrypted during transfer, which makes it one of the more secure ways to share data wirelessly.

    It works across iPhones, iPads, and Macs, as long as both devices have the feature enabled and are within range of each other. The name you set on your device is the only identifier the other person sees, which is why getting it right actually matters for a smooth experience.

    When someone sends you a file via AirDrop, you get a pop-up asking if you want to accept or decline. Photos go straight to your Photos app, while other file types typically land in your Downloads folder or open in an appropriate app.

    AirDrop Troubleshooting Tips Beyond the Name

    If AirDrop is giving you grief beyond just the name issue, here are a few extra things to try:

    • Update your software. A lot of AirDrop issues are resolved in iOS and macOS updates. Head to Settings > General > Software Update on iPhone, or System Settings > General > Software Update on Mac.
    • Sign out and back into iCloud. This can refresh your device’s identity across Apple’s services.
    • Reset network settings on iPhone. This is a more aggressive fix but can resolve persistent AirDrop connection problems. Go to Settings > General > Transfer or Reset iPhone > Reset > Reset Network Settings.
    • Check for interference. Microwaves, crowded Wi-Fi environments, and some Bluetooth accessories can interfere with AirDrop’s signal. Moving to a different spot sometimes helps.

    FAQs

    1. Does changing my device name change my AirDrop name automatically?

    Yes, it does. AirDrop pulls your display name directly from your device’s system name. There’s no separate AirDrop name setting. As soon as you update the name in Settings > General > About on iPhone, or in System Settings > General > About on Mac, the AirDrop name updates to match.

    2. Can I have a different name for AirDrop than my device name?

    No, not natively. Apple doesn’t offer a way to set a separate AirDrop-specific name. The name other devices see in AirDrop is always your device’s name. If you want a custom label just for AirDrop purposes, you’d need to change the actual device name.

    3. Why is my AirDrop showing someone else’s name?

    This can happen if you’re using a device that was previously set up by or for someone else, and the device name was never changed. Head to Settings > General > About > Name on iPhone and update it to reflect the current owner. It’s a quick fix.

    4. Will changing my AirDrop name affect anything else on my device?

    Mostly no. The device name also shows up in iCloud, iTunes, Finder (when connected to a Mac), and your Personal Hotspot network name. So if you change it, those other places will reflect the new name too. Nothing breaks. It’s just something to be aware of.

    5. How do I know if my new AirDrop name is working?

    Open Control Center on your iPhone, press and hold the connectivity panel, then tap AirDrop. Your device is now broadcasting. Ask someone nearby with an Apple device to open AirDrop on their end. They should see your updated name in the list. You can also check this yourself using a second Apple device.

    Conclusion

    Changing your AirDrop name is one of those simple tweaks that makes a surprisingly big difference in everyday use. Whether you’re trying to avoid confusion in a room full of iPhones or just want your device to look a little more polished, knowing how to update your device name gives you full control over how you appear to others in the Apple ecosystem.

    The process is quick whether you’re on an iPhone, iPad, or Mac, and the change takes effect almost immediately. A clear, recognizable name saves time, avoids awkward mix-ups, and just makes the whole AirDrop experience feel more intentional.

    So go ahead, open your settings and give your device a name that actually reflects who’s holding it. It takes less than a minute, and you’ll probably wonder why you didn’t do it sooner.