If “glaadvoice.com” showed up in your search results, you were likely looking for GLAAD, the LGBTQ+ media advocacy organization. Here’s the short answer, then the longer one.
First, No: Glaadvoice.com Is Not GLAAD
GLAAD is a US nonprofit founded in 1985 that pushes for fair, accurate media representation of LGBTQ people and runs the GLAAD Media Awards. Its real site is glaad.org. Glaadvoice.com is a completely separate, unaffiliated domain. There’s no shared ownership, no cross-linking between the two, and no advocacy mission behind the .com version. If you wanted the actual organization, go to glaad.org directly. Everything past this point is about the unrelated content site.
What Glaadvoice.com Actually Is
Once you set the name confusion aside, glaadvoice.com functions as a general-interest content site. It publishes across a mix of categories, commonly cited as business, technology, health, lifestyle, and current news or policy topics, in a standard blog/news format: browse by category, click into individual articles.
This is a common site model. Instead of building deep authority in one subject, these sites cast a wide net across many search-friendly topics to pull in traffic from all directions. That’s not inherently a problem, but it changes what the site is good for. A site writing about eight unrelated subjects can’t realistically go as deep on any one of them as a site built entirely around that subject.
Can You Trust What It Publishes?
Here’s the honest answer: probably fine for casual reading, not something to lean on for anything that actually matters.
What supports some trust:
The site is live, active, and appears regularly indexed
No evidence of malware, phishing, or outright fabricated content
Coverage of verifiable topics (policy, general news) that can be cross-checked elsewhere
What should make you cautious:
No clearly documented editorial team, named authors with checkable credentials, or published editorial standards
Broad topic coverage without visible depth or sourcing in any single area
A name that closely resembles a well-known, trusted organization, which is worth noticing regardless of intent
None of that makes it a scam. It makes it a site you should treat the way you’d treat any blog you’ve never heard of before: fine for a quick overview, not a source you cite or act on without checking further.
Quick Credibility Checklist
Run through this in under two minutes before trusting any article on the site:
Does the article name a real author, and can you find them anywhere else online?
Is the claim specific enough to check against an established source (AP, Reuters, a government site)?
Does the site link out to any sources for its claims, or just assert them?
Is the topic something where being wrong actually costs you (health, legal, financial), or just general interest reading?
If you answer “no” to the first three and “yes” to the fourth, verify before you act on anything you read there.
Is It Open to Guest Posts or Contributors?
If you’re a writer, marketer, or SEO professional rather than a casual reader, you may be here because you’ve seen references to submission or contributor opportunities connected to this domain. Sites built on this broad-content model frequently do accept guest content or paid placements as part of how they fund publishing. If that’s what you’re looking for, check the site directly for a “Write for Us” or contact page rather than relying on secondhand mentions, since submission policies and contact details change without notice on sites like this.
When to Read It, When to Skip It
Fine to use it for: casual browsing, general awareness of a topic, seeing how a broad-content site structures and covers a subject.
Skip it for: health decisions, legal questions, financial choices, academic citations, or anything where you need a verifiable, expert-backed source. For those, go to an established outlet or a specialist site in that exact field.
How to Judge Any Site Like This One
The same five-minute check works for glaadvoice.com or any other unfamiliar domain you land on:
Check the About and Contact pages for real names and real ways to reach someone
Search the site name plus “reddit” or “review” to see what other people have said
Notice whether the site corrects itself or shows any sign of editorial oversight, versus content that reads like it was produced purely to fill a keyword gap
Confirm you’re not confusing the domain with a more established name it happens to resemble
Building that habit matters more than any single verdict on one site, because you’ll run into dozens of domains like this one.
5. FAQs
Is glaadvoice.com owned by or affiliated with GLAAD?
No. GLAAD is the LGBTQ+ media advocacy nonprofit at glaad.org. Glaadvoice.com is a separate, unrelated content site with no documented connection.
Is glaadvoice.com safe to visit?
There’s no indication it’s malicious. Standard browsing precautions apply, but the bigger question is accuracy, not safety, so verify specific claims before relying on them.
What kind of content does glaadvoice.com publish?
General-interest articles across categories like business, technology, health, lifestyle, and news or policy topics, in a typical blog-style format.
Can I submit a guest post to glaadvoice.com?
Possibly. Broad-content sites like this often accept contributions or paid placements. Check the site directly for current submission guidelines rather than relying on outdated mentions elsewhere.
Should I cite glaadvoice.com in research or professional work?
Not as a primary source. Use it for general orientation, then confirm anything important against an established, verifiable source in that specific field.
Conclusion
Glaadvoice.com has nothing to do with GLAAD, the actual LGBTQ+ media advocacy organization, despite the near-identical name. Instead, it’s a broad, general-content site: fine for casual reading, but not a source to rely on for health, legal, financial, or academic decisions without independent verification. If you’re a writer looking to contribute, check the site directly for current guidelines. If you wanted GLAAD itself, go to glaad.org.
If you searched “quikconsole.com” hoping for a quick, clear answer, you may have noticed something odd: different sites describe it in completely different ways. That’s worth addressing head-on rather than pretending it isn’t happening.
Why You’re Seeing Conflicting Descriptions of Quikconsole.com
Domain names get reused, repurposed, or written about by multiple unrelated content mills, sometimes producing articles that don’t match the site’s actual current purpose. It’s also common for a site to change direction over time (starting as one thing, relaunching as another), or for automated content farms to generate generic “what is X” articles about a domain without ever actually checking what’s live on it.
Whatever the reason, the practical takeaway is simple: don’t trust a description of a site you haven’t verified yourself. Here’s what’s circulating, and how to check which one (if either) still applies.
The Two Versions Floating Around
Version 1: A Content and Knowledge Site
Several sources describe quikconsole.com as an informational blog or “knowledge hub” covering tech, gaming, cybersecurity, business, finance, education, and lifestyle topics. Under this version, it functions like a general-interest publishing site: articles, guides, and explainers aimed at everyday readers looking for plain-language answers.
Version 2: A Business Dashboard Tool
Other sources describe quikconsole.com as a SaaS-style product: an “all-in-one” business dashboard that consolidates project management, team communication, analytics, and workflow automation into a single login, aimed at businesses, developers, and solopreneurs trying to cut down on tool sprawl.
These are not the same thing, and no reliable source ties both descriptions together into one coherent explanation. That’s a sign that at least one of these descriptions is outdated, inaccurate, or describing a different site entirely.
How to Check What Quikconsole.com Actually Offers Right Now
Rather than trusting either version blindly, verify it in a few minutes:
Visit the site directly and look at the homepage. Does it read like a blog with published articles, or a product page with pricing and a sign-up button?
Check the About and Contact pages for a real company name, team, or address.
Look at the URL structure. Blog content usually lives under paths like /blog/ or /category/. A SaaS product usually has pages like /pricing, /features, /login.
Search the exact company name (if one is listed) rather than just the domain, to see if it’s registered as a real business.
Be skeptical of any description you find in an article that never quotes or screenshots the actual site.
This kind of quick check works for any domain where you’re getting inconsistent signals, not just this one.
Is It Safe to Visit or Use?
There’s no indication in available information that quikconsole.com is malicious or a scam. Both versions described above sound like ordinary business models (content publishing or SaaS tooling), not phishing or fraud setups. That said, “not obviously malicious” and “verified trustworthy” are different things.
If you’re considering signing up for anything on the site, especially if it’s positioned as a business tool, treat it the way you would any unfamiliar SaaS product:
Don’t enter payment details before confirming the company behind it is real
Look for reviews on independent platforms (not just articles that read like advertising)
Check whether the site has any social proof: real user reviews, a support system, a changelog or update history
If it’s a content site instead, judge it the way you’d judge any blog: check for author names, dates, and whether the information holds up against sources you already trust
Should You Trust It?
Based on what’s publicly available, quikconsole.com doesn’t show clear red flags, but the fact that its own identity is unclear across different sources is itself a reason for caution. Treat any single description of it, including this one, as a starting point rather than the final word. Confirm directly on the live site before deciding to use it for anything that matters, like a business tool subscription or a source you plan to cite.
FAQs
What is quikconsole.com?
Descriptions online conflict: some describe it as a content and knowledge site covering tech, business, and lifestyle topics, while others describe it as an all-in-one business dashboard tool. Check the live site directly to see which one currently applies.
Is quikconsole.com legit?
There’s no clear indication it’s a scam or malicious site. Still, verify any specific claim, especially around pricing or business tools, directly on the site rather than relying on secondhand descriptions.
Is quikconsole.com a blog or a software product?
Both descriptions exist online. This kind of contradiction usually means the site has changed purpose over time, or that some published articles about it are inaccurate or outdated.
Should I sign up for quikconsole.com if it’s a business tool?
Only after checking for real company information, independent reviews, and a working support system, the same due diligence you’d apply to any unfamiliar SaaS product before entering payment details.
Why do different websites describe quikconsole.com so differently?
This often happens when content is generated without actually checking the live site, when a domain changes purpose over time, or when multiple unrelated ventures have used a similar name.
Conclusion
Quikconsole.com is one of those domains where the internet hasn’t settled on a single story: some sources call it a content blog, others call it a business dashboard tool. Rather than picking a side without evidence, the safest move is to check the live site yourself using the quick verification steps above before treating any single description, including the ones circulating in other articles, as fact.
If you’ve landed on webinkey.com or seen it show up in a search result, you’re probably wondering the same thing most first-time visitors do: what actually is this site, and is it worth reading? Here’s a straight answer, along with a simple way to check any unfamiliar site yourself.
What Is Webinkey.com?
Webinkey.com is a general information website. Rather than sticking to one subject, it publishes across a mix of topics like technology, business, and everyday how-to content. Sites built this way aren’t rare. Plenty of publishers run on a broad model because it lets them cover more search queries and reach more readers, instead of betting everything on one narrow subject.
That structure comes with a trade-off. A site that writes about ten different things at once usually can’t go as deep on any single one of them as a site built around just that topic. That doesn’t make it useless; it just changes what it’s good for. Think of it like a general store versus a specialty shop: convenient for a quick answer, not always the place for an expert-level deep dive.
What Kind of Content Does It Publish?
Based on its structure, webinkey.com follows a familiar pattern for this type of site: short, scannable articles built around a single question or keyword, organized loosely by category. Expect explainer-style posts, guides, and roundups rather than long investigative pieces or original research.
This format works well for readers who want a quick, plain-language answer and don’t want to wade through a dense technical article. It works less well if you need citations, data, or expert-level analysis. Knowing which one you need before you start reading saves time.
Is Webinkey.comSafe and Legitimate?
This is really the question behind the search. Legitimacy isn’t a yes/no switch, it’s a handful of signals you can check yourself in a couple of minutes.
Signs that point to a legitimate site:
The site loads over HTTPS (look for the padlock icon in your browser)
It has a working About page and a way to contact someone
Articles are dated and don’t contradict themselves
There’s no aggressive pop-up spam or fake “your device is infected” warnings
Links on the site go to real, working pages, not broken redirects
Things to watch out for:
No author names or editorial info anywhere
Content that reads like it was written to hit a keyword rather than answer a question
Requests for payment info, downloads, or account sign-ups that seem unrelated to reading an article
Claims that sound overly confident on topics like health, law, or finance without any sourcing
Based on what’s publicly visible, webinkey.com fits the profile of a standard content publishing site rather than something built to scam or phish visitors. That said, “standard content site” isn’t the same as “authoritative expert source,” and it’s worth treating any single article on it the way you’d treat a blog post from a site you don’t know yet: useful for a quick answer, not the final word on anything important.
How to Check Any Unfamiliar Website Yourself
You don’t need to take anyone’s word for whether a site is trustworthy, including this article. A quick check takes under five minutes:
Search the domain name plus “reviews” or “reddit” to see if other people have flagged problems.
Check when the domain was registered (tools like WHOIS lookups show this) — a site that’s existed for years with consistent content is a better sign than one that popped up last month.
Look for an About page that names real people or a real company, not just a generic paragraph.
Cross-check any factual claim the site makes against a source you already trust before you act on it.
Notice how the site makes money. Ads and affiliate links are normal. Constant urgent pop-ups pushing downloads or “special offers” are a red flag.
This habit works for any new site you land on, not just this one.
Webinkey.comvs. a Specialized Niche Site
If you’re choosing between reading something on a broad site like webinkey.com versus a specialized site built entirely around one subject, here’s the honest trade-off:
Broad site (like webinkey.com) Specialized niche site Best for Quick answers, general awareness In-depth research, expert detail Coverage Many topics, less depth each One topic, covered thoroughly Update pace Often frequent, shorter posts Varies, but usually more thorough per piece Best use case “What is this, in plain terms?” “I need to make a real decision on this”
Neither is automatically better. A broad site is often exactly what you want when you just need a fast, understandable answer. A specialized site earns its keep when the stakes are higher, like a medical, legal, or financial decision.
Who Should (and Shouldn’t) Rely on It
If you’re a casual reader looking for a plain-language explanation of a topic, a general information site like this can save you time. If you’re a student citing sources, a professional making a business decision, or anyone dealing with health, legal, or financial questions, treat it as a starting point, not a final answer, and confirm anything important against an official or specialist source.
FAQs
Is webinkey.com a scam?
Based on publicly available information, it functions like a standard content publishing site rather than a scam operation. Still, always verify any claim that involves your money, personal data, or health before acting on it.
What topics does webinkey.com cover?
It publishes across multiple general-interest categories such as technology, business, and everyday explainer content, rather than focusing on one single niche.
Is webinkey.com a web development company?
Public content suggests it operates as an informational publishing site rather than a software or web development agency, even if the name might suggest otherwise to some searchers.
Can I cite webinkey.com in research or academic work?
It’s better suited as background reading than a citable authority. For research or professional work, use it to get oriented, then confirm details with a specialized or official source.
How do I know if any website like this is safe to browse?
Check for HTTPS, a real About/contact page, dated and consistent articles, and an absence of aggressive pop-ups or download prompts. These basic checks apply to any unfamiliar site, not just this one.
Conclusion
Webinkey.com reads as a general-purpose information site: useful for quick, plain-language answers across a mix of topics, but not built to be your only source when something actually matters. Judge it the same way you’d judge any site you’re visiting for the first time: check for basic trust signals, use it for what it’s good at, and lean on more specialized sources when the decision in front of you is serious.
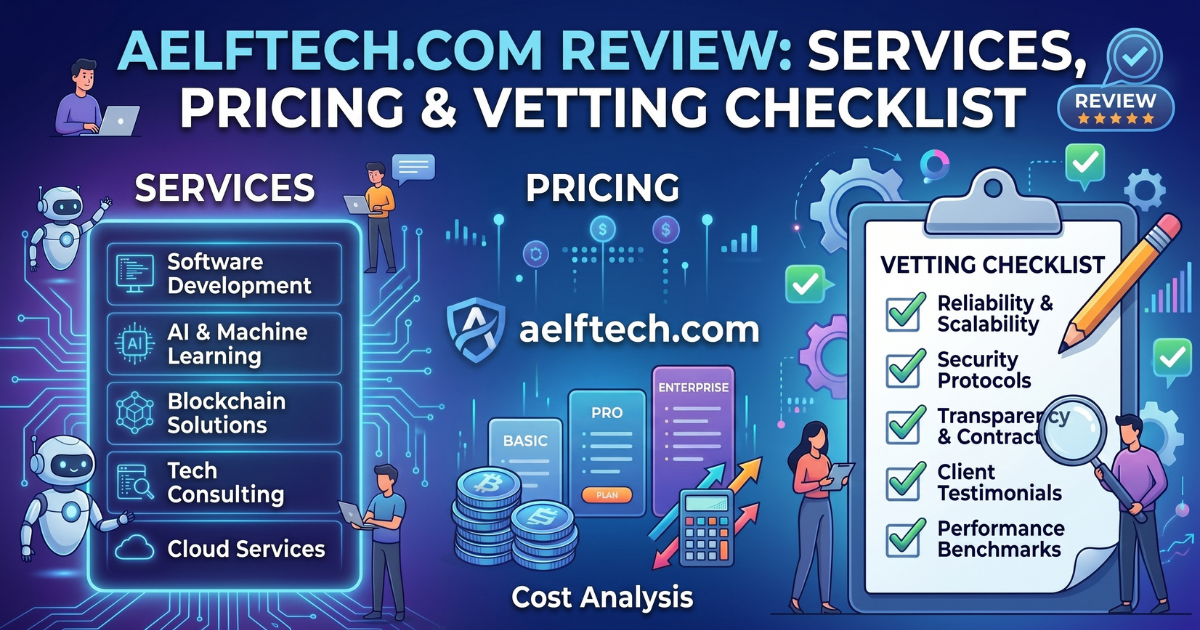
Aelftech com presents itself as a digital marketing and web development agency built for small businesses that need help improving their online visibility. Rather than selling a single tool or app, it operates as a full-service provider, offering SEO, paid advertising, website builds, and social media management under one roof. This breaks down exactly what the agency offers, what a bundled agency model means for your business, and a complete checklist for vetting them (or any similar agency) before you commit any budget.
What Is Aelftech com?
Aelftech com functions as a “done-for-you” digital agency. Small businesses and startups often don’t have in-house technical staff, so instead of hiring a freelance developer, a separate SEO specialist, and a distinct social media manager separately, a bundled agency like this lets a business run several campaigns through one team.
That consolidation saves coordination effort and time spent managing multiple vendors, but it also concentrates risk. If one part of the bundle underperforms, whether that’s the SEO strategy or the site build, it can drag down results across the rest of your marketing at the same time, since everything runs through the same team.
Quick Brand Snapshot:
Detail Info: Business type: Digital marketing and web development agency. Target audience: Small businesses, e-commerce stores, startups. Core model: Bundled agency services (design, SEO, ads, social). Pricing structure: Custom quotes, no published flat-rate pricing
Core Services Offered
The agency’s work generally splits into four categories, a structure common across modern digital agencies.
SEO and Search Visibility
SEO involves restructuring a site’s content and technical setup so it shows up naturally in search results. This is a long-term investment rather than a quick fix, building topical authority and fixing technical issues on a fresh domain typically takes several months before real ranking movement shows up. Any agency promising fast, guaranteed rankings on a brand-new site is overstating what SEO can realistically deliver, regardless of how the offer is framed.
PPC and Paid Traffic
Pay-per-click advertising buys immediate visibility instead of waiting on organic rankings, which makes it useful for time-sensitive promotions or testing a new offer quickly. The trade-off is that paid traffic stops the moment the budget runs out. Pairing PPC with ongoing SEO work is generally a more sustainable approach than relying on ad spend alone long-term.
WordPress Development and Web Design
A marketing budget doesn’t do much good if the website behind it is slow or hard to navigate. This service covers building storefronts, landing pages, and general site structure. Site speed and mobile responsiveness matter here specifically because slower-loading pages are well documented to push up bounce rates, visitors leaving before the page even finishes loading, which wastes whatever traffic the marketing side generates.
Social Media and Content Marketing
This covers content calendars, brand voice, and audience engagement across social platforms. It rarely drives direct, immediate sales the way PPC does, but consistent activity keeps a brand visible to potential customers who aren’t ready to buy yet, and it supports the credibility signals that make SEO and paid campaigns convert better.
Bundled Agency vs Hiring Separately
This is worth thinking through before deciding either way, since it’s the core trade-off with any all-in-one agency model.
Factor Bundled Agency (like Aelftech) Hiring Freelancers Separately Coordination effort Low, one point of contact Higher, you manage multiple people Cost predictability Often bundled/custom quoted Varies per freelancer, easier to compare Risk concentration Higher, one team handles everything Lower, underperformance in one area doesn’t affect the rest Speed to start Usually faster, one onboarding process Slower, multiple hiring processes Specialization depth Can vary by service within the bundle Often deeper, since each hire specializes in one thing
Neither approach is automatically better. A bundled agency tends to suit businesses that want one relationship to manage and don’t have time to vet and coordinate several specialists. Hiring separately tends to suit businesses with a clearer sense of exactly what they need and the bandwidth to manage more moving parts.
Is Aelftech com Safe and Legit?
Whenever you’re considering hiring a remote digital agency, doing your own due diligence matters more than the agency’s own claims. Aelftech com presents a professional layout and a secured connection, but those are baseline requirements for any legitimate business site today, not proof of quality or reliability on their own.
Trust Signals vs Red Flags
A valid SSL certificate just means the connection between you and the site is encrypted. It says nothing about whether the business itself delivers good work. A few things are worth checking closely before committing budget to any agency, this one included:
No public pricing: Custom quotes are standard for larger projects, but a complete absence of any starting price range makes it harder for smaller-budget businesses to compare options without a sales call first.
Unclear team information: If there’s no real “About Us” page naming actual founders or staff, that’s worth treating cautiously.
Generic results without named clients: Agencies that only show vague statistics, without naming actual clients or linking to live sites they’ve built, are harder to verify. Ask directly for real examples you can check yourself.
Vague scope of work: Watch for proposals that describe deliverables in broad terms (“comprehensive SEO strategy”) without specifying what’s actually included, how many hours, what reporting looks like, what counts as done.
How to Verify Any Agency Before You Hire
This checklist applies to Aelftech com and to any digital agency you’re evaluating for the first time. Never hand over passwords, server access, or payment details before working through it.
Test their contact response: Send a specific, technical question through the contact form and see how quickly and how substantively they respond. A vague, templated reply is worth noting.
Ask for real client examples: Request URLs of sites they’ve actually built or currently manage, then check those sites yourself for speed, quality, and whether they still exist and rank.
Get a written, itemized quote: If an agency promises guaranteed page-one rankings for a flat fee without explaining exactly what work that includes, that’s a serious red flag. No legitimate SEO provider can guarantee specific rankings.
Double-check the URL: Confirm you’re on the real domain and not a look-alike. Scammers sometimes register near-identical domains to intercept people searching for a legitimate business.
Ask who owns the deliverables: Confirm in writing that you retain ownership of your website, content, and ad accounts if you end the contract. Some agencies build on accounts they control, which can leave you locked in.
Clarify the reporting cadence: Ask exactly how often you’ll get updates and what those reports actually measure: traffic, rankings, leads, or just vague “engagement” numbers that don’t tie back to your business goals.
Check the contract length and exit terms: Understand whether you’re locked into a long-term commitment and what it takes to cancel if the work isn’t delivering.
Questions Worth Asking Before You Sign
What specific deliverables are included at this price, and what counts as an extra?
Who will actually be working on my account, and can I speak with them directly?
What does a typical first 90 days look like?
How do you measure success, and how often will I see that data?
What happens to my website, content, and accounts if I want to leave?
Conclusion
Aelftech com positions itself as a convenient, all-in-one option for small businesses that need outside help with marketing and web development. Bundling services under one team can save coordination time, but the current lack of easily verifiable public reviews means the burden of due diligence falls on you. Ask for clear pricing, request verifiable case studies with real URLs, clarify ownership and reporting terms, and get everything in a written contract before handing over your marketing budget or site access.
FAQs
What does Aelftech.com actually offer?
A bundle of digital agency services: SEO, PPC advertising, WordPress web development, and social media/content marketing, aimed mainly at small businesses and startups.
Does Aelftech.com publish pricing?
No flat public pricing is listed. Services are quoted individually based on the project, which is common for agencies but makes upfront budget comparison harder.
Is Aelftech.com safe to work with?
The site shows standard security basics like a valid SSL certificate, but that alone doesn’t confirm business reliability. Verify client examples, response quality, and get a written quote before committing.
How long does SEO with an agency like this typically take?
Most SEO work, especially on a newer domain, needs several months before meaningful ranking movement shows up. Be skeptical of any agency promising fast, guaranteed results.
Is a bundled agency better than hiring freelancers separately?
It depends on your bandwidth. A bundled agency reduces coordination effort but concentrates risk in one team. Hiring specialists separately usually offers more depth per service but requires more of your own time managing the relationships.
What’s the biggest red flag to watch for with a digital agency?
A guarantee of specific search rankings for a flat fee, with no explanation of the actual work involved. No agency can honestly guarantee where Google will rank a page.
If “onlyworkmoods com” showed up in your search results or a group chat and you’re not sure what it is, this breaks down what the name likely represents, why it’s picking up search interest, and how to check any unfamiliar domain like this before you click into it.
What Does “Onlyworkmoods com” Mean?
Breaking the name down tells you most of what you need to know. It combines three distinct words:
“Only” suggests a specialized or niche focus rather than a broad, general-purpose site
“Work” ties it to jobs, freelancing, remote tasks, and daily employment
“Moods” points toward feelings, mental energy, stress, and emotional state while working
Put together, it reads as a domain built around the intersection of workplace psychology and productivity, the idea that how you feel during the workday directly affects how well you work.
Why Are People Searching for This Domain?
There are a few likely reasons this term keeps showing up in searches:
Someone saw the name somewhere (a forum, a group chat, a social post) and wants to know what it actually is before clicking a link.
They’re looking for tools that match work to energy levels, doing lighter tasks during low-energy stretches and saving demanding work for peak focus hours.
They’re checking safety first, a smart habit before opening any unfamiliar domain shared in a message or email.
Why Mood and Energy Actually Affect Work Output
This isn’t just wellness talk. There’s a real, well documented relationship between emotional state and cognitive performance. When you’re calm and reasonably engaged, your brain handles complex problem-solving and information processing more efficiently. Under acute stress, elevated cortisol makes short-term memory and focus noticeably harder to sustain, which is part of why the same task can feel effortless one day and exhausting the next.
Workplace research groups like Gallup have published ongoing work on employee engagement showing it correlates with better performance and lower burnout, though exact figures vary by study and year, so it’s worth checking their published reports directly rather than relying on a single cited number.
Remote Work Has Made This More Relevant
The shift toward remote and hybrid schedules changed how people experience the workday. Without office cues like a commute, coworker check-ins, or a clear physical boundary between “work” and “home,” a lot of remote workers report more difficulty disconnecting after hours and a harder time reading their own energy levels through the day.
That gap is exactly what mood-aware productivity tools and content are trying to address, giving remote workers a structured way to notice their own patterns instead of relying on office routines that no longer apply.
Emotional Intelligence as a Practical Work Skill
Emotional intelligence at work isn’t abstract. In practice, it just means knowing your own limits, recognizing when to push through a task and when a short break will actually get you further than forcing it. Workers who pay attention to this tend to communicate better under pressure and avoid the kind of burnout that comes from ignoring fatigue signals for too long.
How to Check Any New Domain Before You Trust It
Whether or not onlyworkmoods.com turns out to be the exact tool you’re picturing, the habit of checking a new domain before engaging with it is worth building generally. A simple four-step check covers most of what matters:
Confirm HTTPS. The address should start with https:// and show a valid padlock in your browser bar.
Check the domain’s age. A public WHOIS lookup tool shows when it was registered. Older, established domains carry slightly more built-in trust than brand-new ones.
Don’t share more than you need to. A content or informational site has no legitimate reason to ask for a password or payment card just to browse.
Use a private browsing window the first time you open an unfamiliar link, especially one sent through email or chat.
A Simple Way to Start Tracking Work Mood
You don’t need software or a paid app to try this. A basic version looks like this:
Log your energy three times a day (morning, early afternoon, late afternoon) on a simple 1 to 5 scale.
Match tasks to your pattern. Save demanding creative or analytical work for your highest-energy windows, and route routine tasks like email or admin work to your lower-energy stretches.
Review after a week. A few days of logging is usually enough to spot your own natural rhythm and plan the following week around it.
What This Looks Like in Practice
A few examples of how this plays out for different kinds of remote work:
A freelance writer hits a slump in the afternoon and switches to editing or research instead of forcing new drafting, saving heavier writing for the next morning.
A remote developer schedules complex debugging during a personal peak-focus window and takes short breaks between review cycles to avoid mental fatigue.
A virtual assistant batches quick client replies during a medium-energy stretch, keeping sharper focus available for detailed scheduling work later in the day.
Traditional Scheduling vs Mood-Aware Scheduling
Factor Fixed-Hours Approach Mood-Aware Approach Task scheduling Based on the clock, regardless of energy Matched to actual focus and energy levels Handling fatigue Push through, often with more caffeine Short, intentional breaks Burnout risk Higher, from sustained forced output Lower, with built-in recovery Consistency Uneven, depends on how the day feels More stable over time
Honest Limitations of This Approach
Mood-aware scheduling isn’t a fix-all, and it’s worth being upfront about where it falls short:
Tracking alone doesn’t help. Logging your energy does nothing if you don’t actually adjust your schedule based on what you notice.
Overthinking it can backfire. Waiting for the “right mood” before starting a task is just a more sophisticated form of procrastination.
Deadlines don’t wait for your energy levels. Urgent client work sometimes lands on a low-energy day regardless, and in those cases, discipline still has to carry you through.
FAQs
What is onlyworkmoods.com?
Based on the name itself, it points to a niche concept around workplace emotional health, productivity, and remote work habits, tools or content built around matching work to how you actually feel, not just the clock.
Is it safe to visit an unfamiliar domain like this?
Apply the same basic checks you’d use for any new site: confirm HTTPS, check the domain’s registration age through a WHOIS lookup, avoid entering sensitive information unnecessarily, and consider opening it in a private browser window the first time.
Why does mood affect productivity?
Emotional state directly affects cognitive function. Calm, engaged states support better focus and problem-solving, while stress and fatigue measurably reduce short-term memory and attention.
How do niche, mood-focused platforms help remote workers?
They typically offer structured ways to track energy, plan tasks around personal rhythms, and build routines that replace the natural cues an office environment used to provide.
How do I start tracking my own work mood?
Rate your energy on a simple 1 to 5 scale a few times a day for about a week, then look back at the pattern and start matching harder tasks to your natural high-energy windows.
Conclusion
Onlyworkmoods.com reads as a niche concept sitting at the intersection of remote work and workplace emotional health, part of a broader shift toward matching tasks to actual energy levels instead of forcing steady output regardless of how you feel. If you’re checking out the domain itself, apply the same basic safety habits you would for any new site, and treat mood-aware scheduling as one useful tool among several, not a replacement for basic discipline when real deadlines land on a bad day.
SimplifyDiggs com presents itself as a broad online magazine, covering everything from business and tech to travel and lifestyle. Look past the wide category menu, though, and it reads more like a generalized content framework than a deeply researched publication. This breaks down what the site actually offers, where its trust signals fall short, and whether it’s a source worth relying on.
A Site That Looks Broad Before It Looks Focused
SimplifyDiggs functions as a catch-all blog rather than a specialized publication. Instead of anchoring itself as a dedicated finance magazine, a focused travel guide, or a niche automotive hub, it spreads across dozens of topics at once. Major multi-topic publications can pull this off because they staff specialized editors for each desk. A smaller, independent site attempting the same range usually can’t match that depth.
The gap shows up quickly once you click into a category. A visitor expecting a deep archive on a specific topic often finds a handful of underdeveloped posts instead. The site’s structure promises more breadth than the actual content backs up, and a large category menu only helps readers when those sections are genuinely active and populated with useful material.
No Clear Editorial Identity
Covering technology, health, finance, gaming, and business all under one roof dilutes the site’s identity. It becomes a place where almost any article could live, rather than a publication built around a specific audience or purpose.
Without a clear editorial identity, readers have a harder time understanding why they should trust this site over a dedicated, niche-specific authority. That ambiguity limits how much authority the site can build in any one subject, even if it manages to pick up scattered search traffic on low-competition keywords.
A stronger, more trustworthy site usually shows at least a few of these signals:
A defined specialty: built out before expanding into other topics
Solid author pages: with real background information and verifiable credentials
A clear About Us page: outlining the mission, the team, and editorial standards
A consistent publishing rhythm: across active categories
Transparent editorial guidelines: on how guest posts and external links are vetted
SimplifyDiggs is missing most of these signals, which makes it easy to browse but hard to fully trust.
Content Quality: Readable, but Shallow
The writing on SimplifyDiggs is straightforward. Short paragraphs, skimmable headings, brief intros- it follows a familiar blog format that’s easy to read casually. For a surface-level explanation of a topic, it does the job.
Readability isn’t the same as depth, though. Articles typically stay at a general overview level, without original research, expert interviews, hands-on testing, or firsthand experience behind the claims. Whether the topic is networking hardware, business software pricing, or online gaming strategy, there’s little evidence the content came from someone with direct expertise in that specific field.
Writing That Reads Like It’s Built for Search
The articles aren’t badly written; they’re just generic. The structure is predictable, and the phrasing stays safe and broad, which is a common trait of search-first content: identify what people are searching for, then answer it using a repeatable, standardized format.
There’s rarely a novel angle, original data, or a real-world example that couldn’t have been guessed from the search results themselves. It reads as informational filler rather than expert analysis, fine for a quick five-second skim, but not the kind of resource a reader tends to bookmark or return to.
Author Transparency Is Thin
Author transparency matters a lot for trust, and this is a weak spot here. A single byline appears across a wide range of unrelated topics: network security, travel, banking, automotive repair, without any detailed author bio explaining background, professional experience, or credentials tied to those subjects.
Having one primary writer isn’t automatically a problem for a smaller site. It becomes a credibility issue, though, when that same byline is expected to carry authority across technical, financial, and health-adjacent subjects with no supporting profile to back it up.
Missing About and Contact Details
A trustworthy site usually goes beyond simply publishing content; it takes visible ownership of it. SimplifyDiggs doesn’t have a substantial About Us page explaining who runs the site or what its editorial goals are. A basic contact form or footer email isn’t enough on its own; readers benefit from real context about who’s behind the content.
This gap matters more on topics that fall into the “Your Money or Your Life” (YMYL) category, finance, health, and real estate, where the expected standard for transparency is significantly higher. SimplifyDiggs doesn’t currently meet that bar.
Guest Post Signals Blur the Editorial Model
The site shows promotional language suggesting it accepts guest posts and external link placements. That alone isn’t a red flag; plenty of legitimate publications take outside contributions. The issue is that it’s unclear how those contributions are vetted, whether links are sponsored, or what editorial standards guest authors are held to.
When a site leans heavily into accepting outside content for link placement, it raises a fair question: is an article there to genuinely help the reader, or mainly to support backlink activity for a third party?
E-E-A-T Snapshot
Based on publicly visible signals, here’s a general sense of where the site lands against Google’s E-E-A-T framework (Experience, Expertise, Authoritativeness, Trustworthiness):
E-E-A-T Area Observation: Experience little visible evidence of hands-on testing, direct reporting, or first-hand use behind the content. Expertise Author credentials aren’t defined for the wide range of technical and specialized topics covered. Authoritativeness No clear depth or authority in any single niche. Trustworthiness Limited contact and ownership details, plus visible guest post signals, weaken overall trust.
Publishing Activity Looks Uneven
Content publishing doesn’t follow a steady rhythm. Some categories go quiet for stretches, while others see sudden batches of new posts. A steady editorial calendar usually signals ongoing engagement with an actual audience. Uneven, bursty publishing more often points to bulk content production or batch guest-post processing.
Where the Site Works
The layout is clean and easy to navigate
The writing is accessible to a general, non-specialist audience
It covers a wide range of popular search topics in one place
The category structure leaves room to grow if the site invests in deeper content later
If you just need a casual, surface-level answer to settle a quick question, it’s fine for that. It’s not built for anything requiring real depth or verification.
What It Would Take to Fix This
The site needs a stronger editorial foundation rather than a design refresh. That means real author bios, clear ownership information, a substantial About Us page, and transparent policies on sponsored or guest content. On the content side, articles need actual depth: expert input, original data or examples, and specifics that go beyond what a general search summary would already tell you.
Is SimplifyDiggs com Reliable?
It works fine as a casual, surface-level source, something to settle a quick question or get oriented on an unfamiliar topic. It falls short as a primary source for anything involving real financial, medical, technical, or legal decisions. For those, the standard practice applies: cross-check the claims against more transparent, specialized, and authoritative sources before acting on them.
FAQs
Is SimplifyDiggs.com a reliable website?
It offers basic, readable content, but lacks the author transparency and editorial signals needed to count as a highly reliable expert source. Verify anything related to finance or health elsewhere.
What kind of content does SimplifyDiggs.com publish?
It’s a generalist blog covering technology, business, travel, lifestyle, health, gaming, and other broadly searched topics.
Who writes the articles on SimplifyDiggs.com?
Many pieces run under a single, largely unverified byline, with little to no background information or credentials published for that author.
Does SimplifyDiggs.com have a clear editorial focus?
No. Covering many unrelated niches at once dilutes its identity and limits how much authority it can build in any single subject.
Is SimplifyDiggs.com suitable for research?
It’s fine for a general, high-level overview. It shouldn’t be relied on as a primary source for academic, financial, medical, or technical research.
Conclusion
SimplifyDiggs. com is a broad, multi-niche blog that leans toward search visibility and content volume over deep editorial authority. The writing is easy to read, and the layout is clean, but the gap between how large the site appears and how much genuine depth backs it up is hard to miss. Thin author transparency, visible guest post signals, and weak E-E-A-T indicators mean it’s best treated as casual, surface-level reading, not a definitive source for anything that actually matters.
If you’ve searched for basic advice on SEO or building a website recently, you’ve probably run into the same problem. A simple question turns into a page full of jargon, padding, and cluttered layout, and finding a direct answer takes longer than it should.
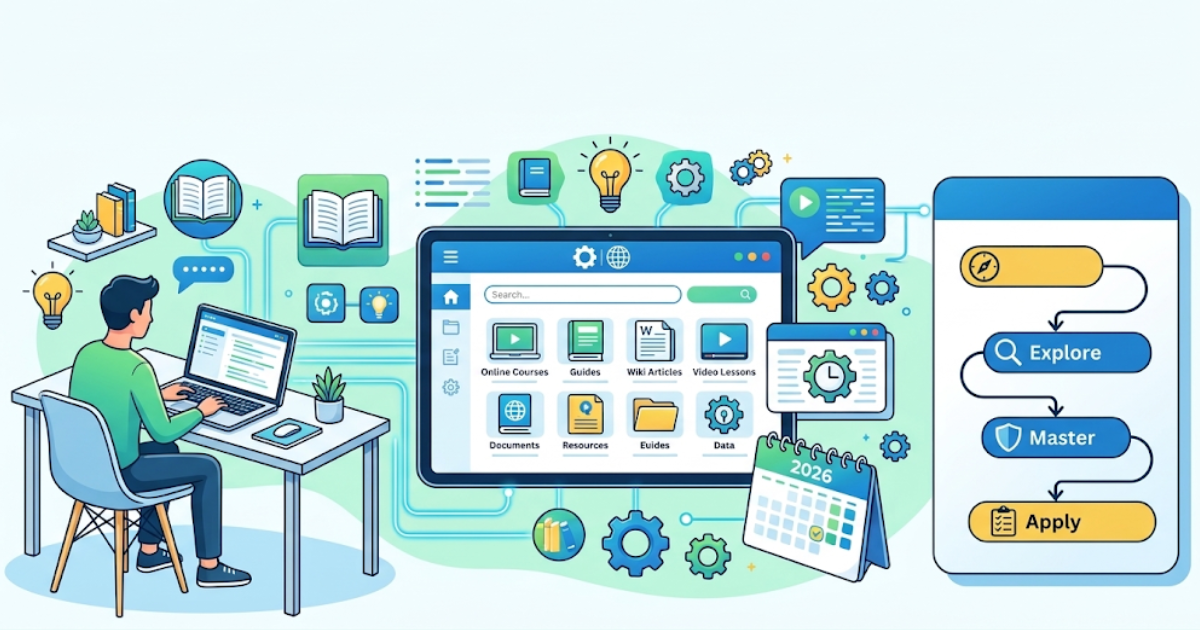
That gap is why PushWiki com has been picking up attention. It’s an online educational platform built around simplifying digital topics for beginners. Instead of burying newcomers in technical terminology, it breaks down subjects like search engine optimization, blogging, and online business growth into short, structured guides.
The platform isn’t trying to compete with advanced technical documentation aimed at developers. It’s positioned as a bridge, taking the concepts that typically confuse new website owners and explaining them in plain language.
How the Platform Is Organized
A common problem with older wikis and information hubs is poor structure. You read one article and have no clear idea what to read next. PushWiki com takes a more connected approach, grouping content into practical categories instead of scattering isolated pages.
If you’re learning how to set up a WordPress site, for example, the layout is built to guide you toward the next logical step, choosing a host, picking a theme, publishing your first post, rather than leaving you to search for it separately.
A few things stand out about the reading experience:
Direct answers. Articles get to the point instead of opening with a long, unnecessary introduction.
Clean formatting. Short paragraphs, bullet points, and bolded key terms make scanning easy.
Plain, conversational writing. The tone reads more like a knowledgeable person explaining a concept than a formal manual.
What the Platform Covers
The content currently centers on the core skills needed to run an online project. These fundamentals don’t shift as fast as the rest of the industry, which is part of why the platform can stay focused on them.
Search Engine Optimization (SEO)
SEO tends to intimidate beginners because advice contradicts itself across different sites and algorithms change often. PushWiki com focuses on fundamentals that hold up over time: writing genuinely helpful content, matching what searchers actually want, and structuring pages clearly. Outdated tactics like keyword stuffing, which search engines now penalize, aren’t part of the advice.
Blogging and Website Setup
Getting a website running involves several moving parts: a domain, a hosting provider, and usually a content management system like WordPress. For a first-timer, it can feel like learning an entirely new skill set. The guides walk through the setup process without assuming prior technical knowledge.
Digital Marketing and Growth
Building a site is only step one, getting people to actually visit it is usually the harder part. This section covers practical approaches to building an audience and understanding marketing basics, aimed more at solo creators and small business owners than large companies with big ad budgets.
Why Simple, Direct Content Is Gaining Ground
There’s been a real shift in how people want to consume educational content online. A few years ago, the dominant strategy was publishing massive, 4,000 to 5,000-word “ultimate guides” covering every possible angle of a topic, on the assumption that longer automatically meant better.
That approach has lost ground. Readers don’t want to scroll through thousands of words to find one specific answer, and search engines have adjusted accordingly, increasingly rewarding content that satisfies a search query quickly and clearly rather than content that’s simply long.
Platforms built around this shift, PushWiki com included, tend to grow because they respect a reader’s time. When the friction of finding an answer is removed, people retain the information better and are more likely to come back the next time they have a question.
Is PushWiki com Safe and Reliable?
When you’re following advice on digital strategy or running a business online, bad information can cost real time and money, so it’s fair to ask whether a source is trustworthy.
Based on how the content is structured, the platform reads as a legitimate educational resource. It doesn’t rely on clickbait framing, and it isn’t built around pushing expensive courses. The focus stays on delivering readable, structured information rather than upselling anything.
That said, the same critical thinking that applies to any informational site applies here too. Digital marketing and SEO best practices shift regularly, and a strategy that worked six months ago may not hold up today. Treat sites like this as a solid starting point, and cross-check anything tied to a significant financial or business decision against current, official documentation.
Where Platforms Like This Fit in the Bigger Picture
Interest in self-directed online education keeps growing as more people try to build independent income through content, freelancing, or small online businesses. Traditional education rarely covers practical website management or modern digital marketing, which leaves a real gap.
Structured, beginner-friendly hubs are stepping into that gap. As the sheer amount of content online keeps expanding, clarity and organization become just as valuable as the information itself. Platforms that can take a technical subject and make it genuinely approachable for a beginner tend to keep their audience.
Key Takeaways
PushWiki com is an educational platform focused on simplifying digital marketing and website topics for beginners.
Content is grouped into logical categories so readers can move step by step instead of getting lost.
Core coverage includes SEO, website creation, blogging, and audience growth.
It stands out through clear, conversational writing and direct answers rather than dense jargon or padded word counts.
Because digital strategy changes quickly, cross-check any advice against current standards before acting on it for a business decision.
FAQs
What exactly is PushWiki com?
It’s an online educational platform offering simplified, easy-to-follow guides on digital topics like SEO, blogging, website development, and online marketing.
Is the content suitable for beginners?
Yes. It’s built specifically to strip out technical jargon and explain internet concepts for someone with no prior background.
Does it only cover SEO?
No. SEO is a major focus, but the site also covers building a website, starting a blog, and general strategies for growing an online audience.
Why is the platform gaining traction?
Readers are tired of bloated, overly long articles. A platform that respects their time with direct answers and clean formatting tends to stand out against that backdrop.
Can the information be trusted?
It works well as a legitimate starting point for learning digital fundamentals. Since the industry moves fast, it’s still worth cross-referencing important strategies before making major decisions based on any single source, according to Google’s guidance on evaluating online information.
Conclusion
PushWiki com fills a real need: a place to get straight, jargon-free answers on SEO, blogging, and website basics without wading through padding. It’s a solid entry point for beginners building their first site or learning digital marketing fundamentals, not a replacement for deeper, specialized resources once you’re past the basics.
If you’ve come across “pixelspinx com” in a search and aren’t sure what you’re looking at, you’re not alone. It’s a newer creator platform, and newer names don’t have years of reviews and forum threads to lean on yet. Here’s a clear, no-hype breakdown of what it is, how it works, and whether it fits what you’re trying to build.
Quick Answer: What Is Pixelspinx com?
Pixelspinx com is a publishing platform built for independent creators, writers, designers, educators, and small businesses who want a permanent home for long-form content instead of relying only on social feeds. Based on what’s publicly available, it’s oriented toward structured, evergreen articles and creator branding rather than short-form, fast-scrolling posts. Because it’s a newer name, it doesn’t carry the track record or transparency of established platforms like Substack or Patreon yet.
Pixelspinx com at a Glance
Aspect
What we know so far
What it is
A publishing platform aimed at independent creators
Early stage, smaller audience than Substack or Patreon
Security
Runs on HTTPS with a valid SSL certificate
Pricing
Not clearly documented, check the official site directly
Treat this table as a starting point. Some of these details come from third-party write-ups rather than official documentation, and that gap is worth keeping in mind before you commit anything to the platform.
What the Platform Is Trying to Do
The core pitch is ownership. Instead of putting effort into a social post that gets buried by an algorithm within a day, creators publish content on a profile meant to hold its value over time. It’s the same logic that pushed a lot of writers toward newsletters and independent blogs over the last several years.
The platform leans on evergreen content, guides and articles that keep attracting readers months or years after publishing, rather than posts built for a single day’s attention span. A well written how-to guide can pull in search traffic for a long time. A social post usually has a shelf life of hours.
Branding is the other piece. On most social platforms, the algorithm decides what people see and your identity is secondary. On a platform like this, your name and body of work are the main event, which matters if you’re trying to build a reputation in a specific niche.
What You Can Actually Publish
Written content fits best here. In-depth guides, breakdowns, opinion pieces, and educational resources all suit a long-form format, and they’re exactly the kind of content search engines tend to reward over time.
Visual creators have a place too. A designer or photographer can build a portfolio with written context around each project, which usually does more to convert a visitor into a client than images alone.
It also works for people teaching something specific, tutorials, niche research, instructional series. What ties all of it together is depth. Thin or repetitive content doesn’t perform well here, or anywhere else for that matter.
Who’s Behind Pixelspinx com?
This is genuinely unclear right now. Detailed information about the founders, company structure, or team isn’t widely published. That’s not unusual for a young platform still building its public presence, but it’s worth noting as a reason to be careful.
Limited transparency doesn’t automatically mean something’s wrong. Plenty of legitimate products launch quietly and fill in their story later. Still, it makes sense to read the terms of service and privacy policy before publishing anything you’d be upset to lose.
How Pixelspinx com Works
The process follows a pattern most creators will already recognize.
Setting Up an Account
Sign up with your basic details, verify your email, then build out a profile with a photo, short bio, and links. A complete profile matters more than people expect, it’s often the first thing that tells a new visitor whether your content is worth their time.
Publishing Content
Write something genuinely useful first, then structure it properly: a clear title, logical headings, clean formatting, and relevant images where they help. Good structure keeps readers on the page and makes it easier for search engines to understand what the piece covers.
Getting Found
Publishing is only part of the job. Actual discovery depends on content quality, search visibility, and how much you promote your own work. Creators who share new pieces through email lists, communities, or social channels almost always do better than those who just wait for the platform to surface their content, especially early on when the built-in audience is still small.
What Sets It Apart
The general pitch is a calmer, more intentional space compared to feed-driven social platforms. Where most networks are designed to maximize scrolling time, this one leans toward structured publishing over constant engagement bait.
Creator identity coming first is the other distinguishing point. Your name and catalog of work sit at the center, which suits people building long-term authority in a niche rather than chasing short-lived viral moments.
What’s Known About Monetization
This is where it’s worth being upfront: exact monetization details aren’t clearly documented in public sources. Platforms in this category typically offer some combination of the following, but you’ll want to confirm what’s actually live on Pixelspinx com before planning around it:
Ad or traffic based earnings from your content’s readership
Gated or premium content for deeper resources
Selling digital products like templates or courses
Reader-supported tips or memberships, similar to Patreon
Don’t assume any of these features are active until you see them on the platform directly. Monetization tools vary a lot between creator platforms and tend to change as a service matures.
Why Long-Form Content Still Works
The platform’s bet on long-form content isn’t sentimental, it reflects how search engines actually rank pages. Detailed, genuinely useful content tends to keep earning traffic long after it’s published, while short posts spike briefly and then disappear from view. One solid guide can quietly bring in readers for years.
Long-form also builds credibility faster. When an article fully answers a question, with real steps, examples, and honest trade-offs, it reads as the work of someone who actually understands the topic. That’s usually what turns a one-time visitor into a repeat reader.
Interface and User Experience
Early impressions describe a clean, simple interface built around straightforward publishing, with basic mobile support for reading and light editing. Treat that as a general impression rather than a guarantee, interfaces change over time, and testing it yourself with one piece beats relying on any single review.
For beginners, the learning curve looks manageable. Anyone who’s used a blogging or newsletter tool before should find their way around fairly quickly.
Who Should Actually Consider This Platform?
It’s not the right fit for everyone, and that’s fine.
Independent creators who want a home base they fully control, rather than a rented spot in someone else’s feed, are the clearest fit.
Bloggers and niche writers building authority around a specific topic benefit from a structured library that compounds in value over time.
Designers and visual creators can pair a portfolio with written context, which tends to convert browsers into clients better than images alone.
Educators and tutorial creators benefit from a lasting, searchable format that students or readers can come back to.
Anyone who needs an existing built-in audience right away, or who isn’t ready to promote their own work, will probably be better served elsewhere for now. A newer platform rewards people who bring some of their own traffic.
The SEO Side of Things
Platforms built around long-form, evergreen content have real search potential, but the platform itself is only half of it. What you write and how consistently you publish matter more. A few things that genuinely help, regardless of where you publish:
Answer a real search question completely, and better than the current top-ranking pages
Structure content for skimming with clear headings, short paragraphs, and lists
Publish on a steady schedule rather than in occasional bursts
Earn genuine links and shares by promoting your own work
Go back and update older pieces instead of letting them go stale
One honest caveat: publishing on a newer domain usually means a slower ramp in visibility, since search engines lean heavily on a site’s established trust. According to Google’s own guidance on creating helpful content, the emphasis has shifted toward rewarding original, people-first content over volume, which works in favor of creators who focus on depth from the start rather than churning out thin posts.
Is Pixelspinx com Safe and Legit?
On the basics, the signals are reassuring. The site runs over HTTPS with a valid SSL certificate, meaning data in transit is encrypted, and there are no widely reported issues with malware or phishing. As a place to read or publish general content, it currently reads as a legitimate platform rather than anything resembling a scam.
The honest caveats are that it’s new, independent reviews are still thin, and there isn’t much public information about who runs it. That doesn’t make it dangerous, it makes it unproven. A reasonable approach is cautious use: try it, but don’t put anything on it you can’t afford to lose, and keep backups of your work elsewhere.
Use a strong, unique password and turn on two-factor authentication if it’s available. Read the terms of service and privacy policy before publishing original work, and don’t share sensitive financial information until you’ve done your own checks on the platform.
How to Vet Any New Creator Platform
This applies well beyond Pixelspinx com, it’s a useful checklist for evaluating any unfamiliar platform before investing real time in it.
Look for a real “about” page or named team. Total anonymity is a warning sign.
Check whether you can export your content and audience if you decide to leave.
Confirm the terms clearly state you retain ownership of what you publish.
Test with one piece of content before moving your full catalog over.
Search for independent reviews, and be skeptical if several sound suspiciously alike.
Keep an email list and backups you fully control, never depend on one platform alone.
The Real Drawbacks
Smaller built-in audience. Unlike an established network, a newer platform won’t hand you readers automatically. Early on, you’ll need to bring your own.
Crowded competition. Substack, Medium, Patreon, and countless personal blogs are all competing for the same creator attention. A new name has to earn its place.
Platform dependency risk. Building entirely on any third-party platform carries risk. If policies, pricing, or the platform itself change, your work and audience can be affected. An email list you actually own is the real insurance policy here.
Limited track record. With less history and public documentation, you’re taking more on trust than you would with an established name.
Pixelspinx com vs Substack vs Patreon
These platforms aren’t built to do the exact same thing, so this is more of a conceptual comparison than a spec-for-spec match.
Platform
Core strength
Best for
Maturity
Pixelspinx com
Long-form, evergreen publishing
Articles, portfolios, searchable resources
Early stage, less public information
Substack
Email newsletters and paid subscriptions
Writers building a subscriber base
Established, large user base
Patreon
Memberships and recurring fan support
Creators with an existing audience to monetize
Established, mature payment system
In practice: Substack makes sense if your growth strategy runs through email, Patreon fits creators who already have a paying fanbase, and a platform like Pixelspinx com is aimed at people who want a searchable, evergreen home base, with the trade-off that it’s newer and still building trust.
Why It’s Getting Attention Right Now
Two things seem to be driving interest. First, more creators are looking to own their work outright as trust in algorithm-driven feeds keeps eroding. Second, a growing number of write-ups have put the platform name in front of people actively searching for new creator tools. Attention isn’t the same as a proven track record though, curiosity is a reason to look into it, not a reason to commit right away.
FAQs
What is Pixelspinx com in simple terms?
It’s a publishing platform for independent creators who want a lasting home for long-form content, articles, guides, portfolios, instead of relying only on social media.
Is Pixelspinx com free to use?
Pricing isn’t clearly documented in public sources right now. Some platforms in this category offer a free tier with paid upgrades, others charge from the start. Check the official site directly for current pricing.
Is Pixelspinx com safe and legit?
The basics look fine, HTTPS with a valid SSL certificate and no widely reported malware issues. It reads as a legitimate platform, but it’s new with limited public transparency, so standard precautions apply: a strong password, backups, and reading the terms before you commit.
Who owns or runs Pixelspinx com?
That information isn’t widely published yet, which is common for young platforms. It’s not proof of a problem, but it’s a good reason to do your own research before relying on the platform for anything important.
How does it compare to Substack or Patreon?
Substack focuses on email newsletters and paid subscriptions. Patreon centers on memberships and fan support. Pixelspinx com leans toward evergreen, searchable publishing and creator branding. The biggest difference is maturity, Substack and Patreon are established, this platform is still new.
Key Takeaways
Pixelspinx com is an early-stage creator platform focused on long-form, evergreen publishing and creator branding.
It suits writers, designers, educators, and niche publishers who want a home base they control.
Public information on ownership, pricing, and exact features is limited, so confirm details directly on the site.
Security basics look fine, but the platform is still unproven, so standard caution applies.
You’ll need to bring your own promotion, a newer platform won’t hand you an audience.
Never build your entire presence on one platform, keep backups and an email list you own.
The Bottom Line
Pixelspinx com is a genuinely interesting early entry in the creator platform space, built around lasting, searchable content instead of disappearing posts. The upside is ownership and a calmer publishing experience. The trade-off is that it’s new, lightly documented, and unproven. If the concept fits what you’re building, test it with a small piece of content first, keep your own backups, and don’t bet your entire online presence on any single platform.
Typing “magazinepanda com” into Google usually means one of two things. Either you already read something on the site and want to know more about who runs it, or you spotted the name somewhere and want to check it out before clicking through. Here’s a straightforward breakdown of what the site is, what it publishes, and whether it holds up.
What Is Magazinepanda com?
Magazinepanda.com is a general-interest online magazine that publishes articles across technology, business, education, and lifestyle topics. It works as a centralized hub for readers who want a mix of everyday content without needing specialized background knowledge in any one field.
Covers software trends, gadgets, digital tools, and simplified explanations of things like AI or cybersecurity. It’s written for a general reader, not for people comparing benchmarks or technical specs.
Business and Finance
Leans toward entrepreneurship, marketing basics, workplace productivity, and general market awareness. Useful as a starting point, not a substitute for a financial advisor or industry report.
Lifestyle and Health
Wellness, self-improvement, and everyday habits, written broadly rather than clinically.
Education and General Knowledge
Background reading style content, useful before moving to more specialized or academic sources.
Why the Site Has Gained Traffic
General-interest platforms like this tend to grow for a simple reason: convenience. Instead of bookmarking five or six niche blogs for tech, business, and lifestyle updates separately, a reader gets it all from one domain. Sites that publish consistently and answer everyday search questions directly also tend to pick up steady organic traffic over time, which appears to be part of the strategy here.
Key Features
Free access, no signup or subscription required
Multiple categories under a single domain
Long-form articles aiming for a fuller overview rather than short blurbs
Mobile-friendly layout
Regular publishing schedule
Ad-supported, not reader-funded
Who Actually Benefits From Reading It?
It works best for people getting oriented on an unfamiliar topic, students doing early background research before hitting academic databases, casual readers who want a mix of subjects, and marketers or content teams scanning what’s getting attention in a general audience space.
It falls short for anyone needing specialized, technical, or professional-grade information. Real financial decisions, medical guidance, or expert-level technical depth aren’t what this format is built for.
Pros and Cons
Pros
Cons
Free to read, no signup required
Content depth varies by topic and article
Covers several subjects in one place
Not a substitute for expert or professional advice
Written in plain, accessible language
Less specialized than niche, single-topic blogs
Mobile-friendly and easy to navigate
Author credentials aren’t always detailed
Is Magazinepanda com Legit and Safe?
Yes, based on standard indicators. It runs over HTTPS, has no evidence of scam behavior, and earns revenue through ads rather than payment or personal data. That puts it in line with most general content publishers.
That said, legitimate doesn’t automatically mean authoritative. Cross-check specific claims against other credible sources, especially anything financial, legal, or medical, and don’t treat a single general-interest article as the final word.
Business Use Cases
Marketing and content teams sometimes use platforms like this for market awareness, checking how mainstream, non-specialist audiences are framing an industry topic. It also works as a quick crash-course resource for junior staff who need context on a new subject before diving into technical material.
How It Compares to Niche Blogs and News Sites
A specialized blog goes deeper because that’s its entire focus. A news portal is built for speed and breaking updates. Magazinepanda.com sits in between, broader than a niche blog, but slower and more explanatory than a news site. You won’t get real-time coverage, but you might get a longer piece on what a trend or event means for a particular industry.
Where the Site Could Improve
General-interest platforms like this tend to face the same long-term challenge. Google’s own guidance on creating helpful, reliable, people-first content increasingly rewards pages with clear expertise and original insight over surface-level summaries. Adding stronger author bios, more specific sourcing, and deeper analysis in individual categories would likely help a site like this hold up better over time.
How to Get the Most Out of It
Use it to get oriented on unfamiliar topics, then verify key details elsewhere.
Cross-check specific numbers or advice against a specialized source before acting on them.
Treat it as background reading for schoolwork, not a citation for formal research.
For anything touching your health, finances, or legal situation, follow up with a qualified professional.
Final Verdict
Magazinepanda.com is a straightforward, ad-supported online magazine covering a wide mix of everyday topics in plain language. It’s a solid option for a quick, free overview of something unfamiliar or for casual reading across subjects. It’s not built to replace specialized publications or professional advice, and it shouldn’t be treated that way.
FAQs
Is Magazinepanda com free to use?
Yes. Articles are available without any subscription fee or paywall, supported through display advertising instead.
What topics does Magazinepanda com cover?
General-interest content across technology, business, lifestyle, health, and education, aimed at everyday readers rather than specialists.
Is Magazinepanda com a reliable source for financial or medical decisions?
No. It’s a general publisher, not a specialized resource. Use it as background reading, then follow up with a qualified professional or specialized source for real decisions.
Can students use it for research?
Fine as introductory reading. For formal academic work, students should still rely on primary sources and academic databases.
Is Magazinepanda com safe to browse?
Yes, based on standard technical indicators like HTTPS and a normal ad-supported model. Still worth verifying specific claims independently.
Conclusion
Magazinepanda com fills a common niche: a free, broad, easy-to-read magazine touching on tech, business, lifestyle, and education without specializing in any one. It’s a decent starting point for casual reading or orientation on a new topic, not a replacement for specialized or professional sources when the stakes are higher.
AI can now create images that look almost identical to real photographs. From realistic portraits and product photos to fake news images and deepfakes, generated visuals are becoming harder for the human eye to spot.
That raises an important question:
How does AI detect fake images if humans often can’t?
The answer is that AI detection systems don’t look at images the way people do. Instead of focusing on whether an image “looks real,” they analyze hidden patterns, pixel level artifacts, metadata, compression signals, and statistical inconsistencies that often reveal how an image was created.
This guide explains exactly how AI image detection works, the technologies behind it, and why no detection method is currently 100% accurate.
How AI Image Detection Works
Most AI image detectors are machine learning models trained on large datasets containing both authentic photographs and AI generated images.
During training, the model learns subtle differences between real and synthetic images.
Rather than asking questions like:
Does this face look real?
Does this landscape seem believable?
The detector analyzes:
Pixel distributions
Texture patterns
Noise signatures
Lighting consistency
Compression artifacts
Image frequency data
Metadata and provenance information
Over time, the system learns patterns that frequently appear in AI generated content but rarely appear in genuine camera photos.
The Main Techniques AI Uses to Detect Fake Images
1. Artifact Detection
AI image generators often leave behind tiny imperfections.
Many of these flaws are invisible to people but detectable by machine learning systems.
Common examples include:
Unnatural skin textures
Distorted backgrounds
Inconsistent shadows
Strange reflections
Irregular edges
Blurred object boundaries
Even advanced generators such as Midjourney, DALL·E, Stable Diffusion, and Flux can leave statistical traces throughout an image.
Detection models are trained to recognize these recurring patterns.
2. Frequency Analysis
Real photographs and AI generated images often contain different frequency patterns.
Instead of examining visible objects, detectors analyze the image’s mathematical structure.
This process can reveal:
Artificial texture generation
Repeated visual patterns
Synthetic noise distributions
Generator specific fingerprints
Many modern detection systems use frequency domain analysis because these signals can remain detectable even when images appear realistic to humans.
3. Neural Fingerprinting
Some image generators leave unique signatures behind.
Researchers often call these signatures “AI fingerprints.”
Just as cameras have unique sensor patterns, AI models can produce recognizable output characteristics.
Detection systems may identify:
Midjourney generated images
Stable Diffusion outputs
DALL·E generated content
Other generative model families
In some cases, detectors can estimate which generator likely created the image.
4. Facial Analysis
Deepfake detection systems often focus on faces.
AI models analyze facial regions for inconsistencies such as:
Eye reflections
Skin texture abnormalities
Facial landmark mismatches
Unnatural expressions
Asymmetrical features
Blinking irregularities in videos
Convolutional Neural Networks (CNNs) are commonly used for this task because they excel at recognizing tiny visual differences across facial features.
5. Metadata and EXIF Analysis
Many images contain hidden information called metadata.
Metadata can reveal:
Camera model
Device information
Editing software
Creation timestamps
Generation tools
Some AI generated images contain metadata indicating they were created with tools such as:
Midjourney
Stable Diffusion
DALL·E
However, metadata alone is not reliable because it can be removed or modified easily. Many social platforms also strip metadata during uploads.
6. Reverse Image Search
Another detection method involves checking an image’s history online.
If a supposedly real photo has never appeared anywhere before and lacks a traceable source, it may deserve additional scrutiny.
Reverse image search tools help investigators:
Find the original version
Locate earlier uploads
Identify edited copies
Verify context
This method is commonly used by journalists and fact checkers.
7. Provenance and Digital Watermarking
One of the most promising solutions is image provenance.
Instead of trying to guess whether an image is fake, provenance systems verify where it came from.
allow platforms and creators to attach authenticity information to images.
If the chain of ownership remains intact, viewers can verify whether an image originated from a camera or an AI system.
Visual Signs Humans Still Look For
Although AI detectors use complex algorithms, people often rely on visual clues.
Common signs include:
Strange Hands and Fingers
Hands remain one of the most common failure points.
Look for:
Extra fingers
Missing fingers
Fused fingers
Unnatural hand positions
Garbled Text
AI often struggles with text inside images.
Signs include:
Misspelled words
Nonsensical letters
Distorted signage
Unreadable labels
Inconsistent Reflections
Check:
Mirrors
Glass surfaces
Sunglasses
Water reflections
AI sometimes generates reflections that don’t match surrounding objects.
Unnatural Background Details
Look closely at:
Crowds
Buildings
Furniture
Objects in the distance
Small details often reveal generation errors.
What Machine Learning Models Are Used?
Several types of AI models power fake image detection.
Convolutional Neural Networks (CNNs)
CNNs analyze visual features such as:
Edges
Shapes
Textures
Pixel relationships
They remain one of the most widely used detection architectures.
Vision Transformers (ViTs)
Vision Transformers analyze images by breaking them into smaller patches and examining relationships between those regions.
Many modern detectors use transformer based architectures because they often generalize better to new AI generators.
Hybrid Detection Systems
Advanced solutions combine:
CNNs
Transformers
Frequency analysis
Metadata inspection
Source verification
This layered approach generally produces more reliable results than relying on a single method.
Are AI Image Detectors Accurate?
Not completely.
This is one of the biggest misconceptions about AI detection technology.
Many commercial tools advertise extremely high accuracy rates, but independent testing shows real world performance is often much lower.
Detection systems frequently struggle when:
Images are compressed
Screenshots are taken
Images are cropped
Filters are applied
New generation models appear
Research and industry testing consistently show that no detector reliably identifies every AI generated image. Cross platform accuracy can vary significantly depending on the image source and generation method.
Why Detecting AI Images Is Getting Harder
Modern image generators improve rapidly.
New models can now create:
Realistic skin textures
Natural lighting
Accurate anatomy
Camera like depth of field
Convincing photographic imperfections
As generation quality improves, detectors must continuously retrain on new data.
This creates an ongoing arms race:
AI generators become more realistic.
Detectors learn new patterns.
Generators adapt to avoid detection.
Detection systems evolve again.
Researchers describe this as a constant cat and mouse cycle.
Best Practices for Verifying Suspicious Images
If an image appears questionable, don’t rely on a single detector.
A better approach is to combine multiple verification methods:
Run the image through several AI detection tools
Check metadata when available
Perform a reverse image search
Examine visual inconsistencies
Verify the source
Look for content credentials or provenance data
Cross check with trusted news sources
Professional fact checkers rarely depend on one signal alone. Instead, they combine technical analysis with source verification.
FAQs
Can AI always detect fake images?
No. Current detectors can identify many AI generated images, but none are perfectly accurate across all generators and editing scenarios.
What is the most reliable way to detect AI generated images?
A combination of methods works best, including AI detection tools, metadata analysis, reverse image search, and source verification.
Can AI generated images fool humans?
Yes. Multiple studies show people often perform only slightly better than random guessing when identifying high-quality AI-generated images.
Can fake images be detected after editing?
Sometimes. However, cropping, compression, screenshots, and filters can reduce detector accuracy and remove important signals.
Conclusion
AI detects fake images by analyzing patterns that humans typically can’t see. Modern detection systems examine pixel-level artifacts, frequency signatures, neural fingerprints, metadata, and source history to estimate whether an image was generated artificially.
The challenge is that image generation technology is improving just as quickly as detection technology.
Today, the most reliable strategy isn’t trusting a single detector. It combines automated tools, visual inspection, metadata analysis, and source verification to build confidence in whether an image is real or AI-generated.
As synthetic media becomes more common online, understanding how AI image detection works is becoming an essential digital literacy skill.