Author: Shaheer Akram

  • How to Change AirDrop Name on iPhone, iPad, and Mac

    How to Change AirDrop Name on iPhone, iPad, and Mac

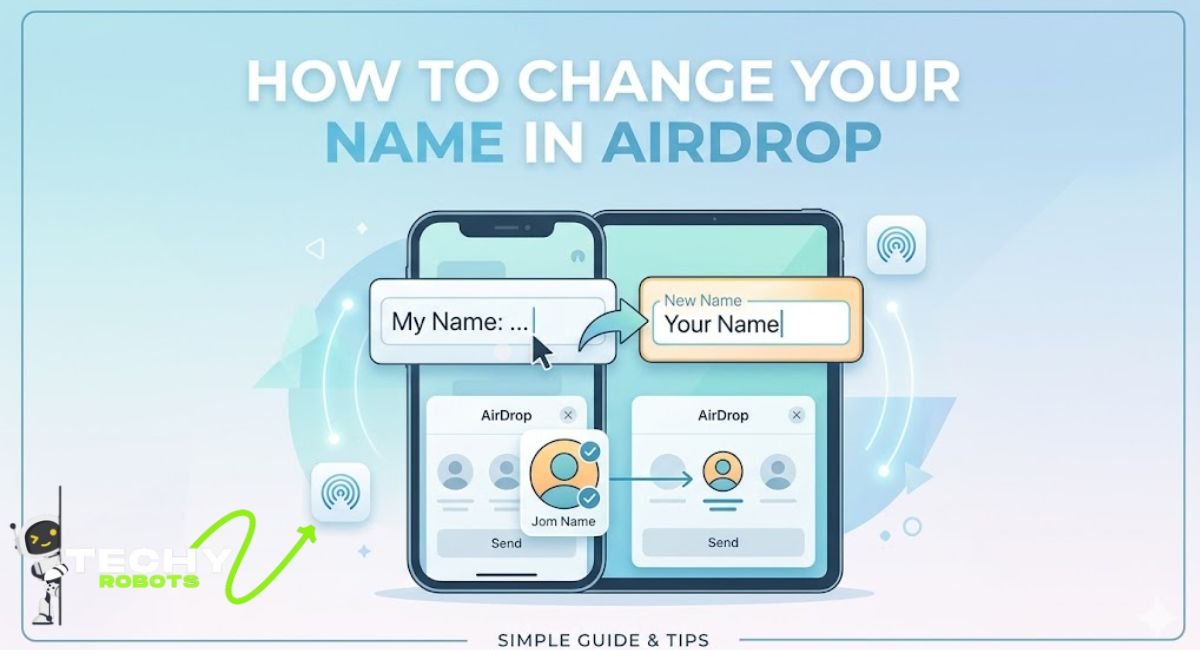
    If you have ever sent a file over AirDrop and noticed your device shows up with a weird or outdated name, you are not alone. Whether it says “iPhone” with no name attached, someone else’s name from a previous owner, or just something you want to update, fixing it is simpler than most people think. 

    This guide walks you through exactly how to change your AirDrop name on iPhone, iPad, and Mac, plus how to solve it when the name just refuses to update.

    What Is an AirDrop Name and Why Does It Matter?

    Think of your AirDrop name like a name tag at a crowded networking event. When you walk into a room full of Apple devices, the nearby device list shows everyone’s names. If yours says “iPhone” or something completely unrecognizable, people fumbling through a file transfer might accidentally send it to the wrong device.

    Your AirDrop device identifier is basically your digital identity on a local Apple network. It shows up any time someone nearby opens AirDrop to share a photo, document, or link. Having a clear, recognizable name saves confusion, especially in workplaces, classrooms, or family settings where multiple Apple devices are all online at once.

    Beyond convenience, it is also a small but real privacy matter. You probably do not want strangers in a coffee shop seeing your full name pop up on their screen when they open AirDrop.

    How AirDrop Picks Your Device Name

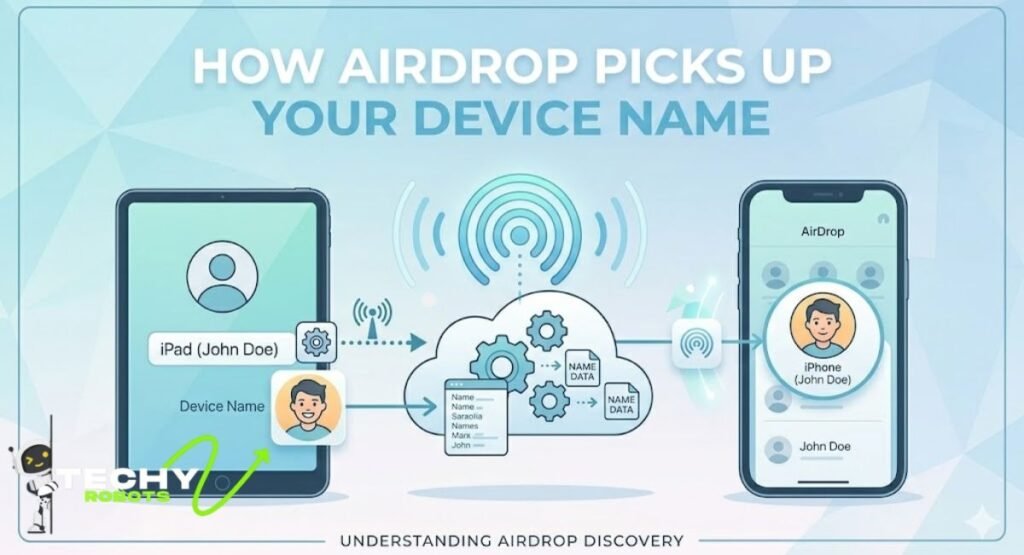
    Before changing anything, it helps to understand where your AirDrop name actually comes from. Apple does not have a separate AirDrop name field tucked away somewhere. It pulls the name directly from your device settings.

    The Role of Your Apple Device Name

    Every iPhone, iPad, and Mac has a device name set in its settings. This is the same name that shows up in Finder when you plug your phone into a Mac, in iCloud, and yes, in AirDrop. So when you rename your Apple device, you are effectively changing your AirDrop name at the same time.

    How “My Card” in Contacts Plays a Part

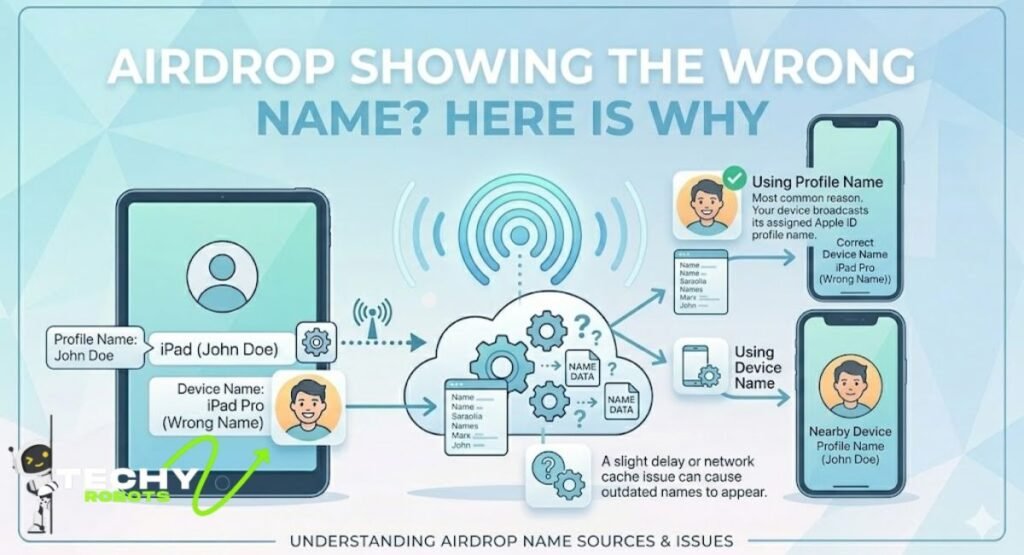
    On some older iOS versions, AirDrop would pull from the “My Card” entry in the Contacts app. If your Contacts app has a card assigned to you with a different name than your device name, it can create a device name mismatch that leads to AirDrop showing the wrong name. It is worth checking both places if you are troubleshooting a stubborn naming issue.

    How to Change AirDrop Name on iPhone

    Changing your AirDrop name on iPhone is really just about changing your iPhone’s name in the Settings app. Here is how to do it.

    Step-by-Step Instructions for iOS 17 and Later

    1. Open the Settings app on your iPhone.
    2. Tap General.
    3. Tap About.
    4. Tap the Name field at the very top.
    5. Clear the existing name and type your new one.
    6. Tap Done on the keyboard.

    That is it. Your device name is now updated, and AirDrop will show your new name the next time someone searches for nearby devices. No need to restart anything in most cases, though a quick restart never hurts if you want the change to take effect immediately across all connected services.

    What Happens After You Save the New Name

    Once you save the new name, your iPhone broadcasts it over Bluetooth and Wi-Fi, which is how AirDrop works. Nearby devices should see the updated name within a few seconds. If they do not, ask the other person to close and reopen their AirDrop panel in the Control Center.

    How to Change AirDrop Name on iPad

    The process on iPadOS is almost identical to iPhone, which makes sense since they share the same operating system base.

    Navigating iPadOS Settings for AirDrop

    1. Open Settings on your iPad.
    2. Go to General.
    3. Tap About.
    4. Select the Name field.
    5. Delete the old name and enter a new one.
    6. Tap Done.

    Just like on the iPhone, the change takes effect immediately in most cases. If you are in a room with other iPads or iPhones, the updated name should appear on their AirDrop screens within moments.

    Confirming the Name Has Updated

    To confirm everything worked, swipe down to open the Control Center and long-press the connectivity panel in the upper-left corner. Tap AirDrop. Your device name should now appear at the top of the screen with the new name you just set.

    How to Change AirDrop Name on Mac

    Mac runs on macOS, so the navigation is a little different from iPhone and iPad. If you are on macOS Sonoma or a recent version, here is the path.

    Using System Settings on macOS Sonoma

    1. Click the Apple menu in the top-left corner.
    2. Open System Settings.
    3. Click General in the sidebar.
    4. Select About.
    5. At the top, you will see a Name field with your current Mac name.
    6. Click on the name, type your new one, and press Enter.

    On older macOS versions (before Ventura), the same option lives under System Preferences > Sharing, where you would see a “Computer Name” field at the top.

    Authentication with Touch ID or Password

    On some Macs, especially those on managed networks or with certain security settings, changing the device name might prompt you for Touch ID authentication or your Mac login password. This is normal. Apple just wants to confirm it is actually you making the change.

    AirDrop Name Not Updating? Here Is Why

    Sometimes you follow all the steps, save a new name, and AirDrop is still broadcasting the old one. Frustrating, but there are a few common reasons this happens.

    Device Name Sync Delay After Renaming

    Apple devices do not always refresh instantly. There can be a small sync delay, especially if you are on a busy network or if Bluetooth is dealing with multiple connections at once. Give it a minute or two before assuming something went wrong.

    iCloud Contact Sync and My Card Conflicts

    If your Contacts app has a “My Card” set up and the name on that card does not match your new device name, AirDrop can sometimes pull from the wrong source. This is a known iOS and macOS compatibility issue that has affected users across different software versions. Head into your Contacts app, find the card marked as “My Card,” and make sure the name there matches what you want showing up on AirDrop.

    How to Fix AirDrop Showing the Wrong Name

    If your AirDrop name is still wrong after renaming the device, here are the troubleshooting steps that actually work.

    Restart Your Device First

    It sounds too simple, but a restart clears cached device names and forces everything to reload fresh. Turn your iPhone, iPad, or Mac off completely, wait ten seconds, and turn it back on. After the restart, check AirDrop again.

    Check for a Software Update

    AirDrop name glitches have been patched in several iOS and macOS updates over the years. Head to Settings > General > Software Update on iPhone or iPad, or System Settings > General > Software Update on Mac. If there is an update waiting, install it. It might be the exact fix you need without any other steps.

    Review Your Contacts My Card

    Open the Contacts app, tap on your own contact card (the one listed as “My Card” at the top), and make sure the first and last name fields are what you want. If this card has an old name or someone else’s name, it can override your device name in certain AirDrop scenarios.

    AirDrop Visibility Settings You Should Know

    While you are in the AirDrop settings, it is worth taking a moment to review your visibility preferences. These do not affect your name, but they do control who can even see your device on their screen.

    Contacts Only vs. Everyone Mode

    AirDrop offers three modes: off, contacts only, and everyone. “Contacts only” means only people saved in your Contacts app can see your device in AirDrop. “Everyone” means any Apple device nearby can see you, which is useful for quick transfers with strangers but not ideal in public places where you do not want your name broadcasting to everyone within range.

    Control Center and AirDrop Discoverability

    You can switch between these modes directly from the Control Center on iPhone and iPad. Just long-press the connectivity cluster (Wi-Fi, Bluetooth area), then tap AirDrop and choose your preferred setting. On Mac, you can manage this through the Finder AirDrop panel or System Settings.

    Changing Your iPhone Hotspot Name vs. AirDrop Name

    A common point of confusion is that your Personal Hotspot name is actually the same as your device name too. So when you change your iPhone name in Settings > General > About, you are also updating the name that shows up when someone searches for hotspots. This is handy since you only need to make one change to update both your AirDrop identity and your hotspot name at the same time.

    Pro Tips for Managing Your AirDrop Identity

    A few extra tips that make your AirDrop experience smoother for everyone involved.

    Use a Professional or Recognizable Name

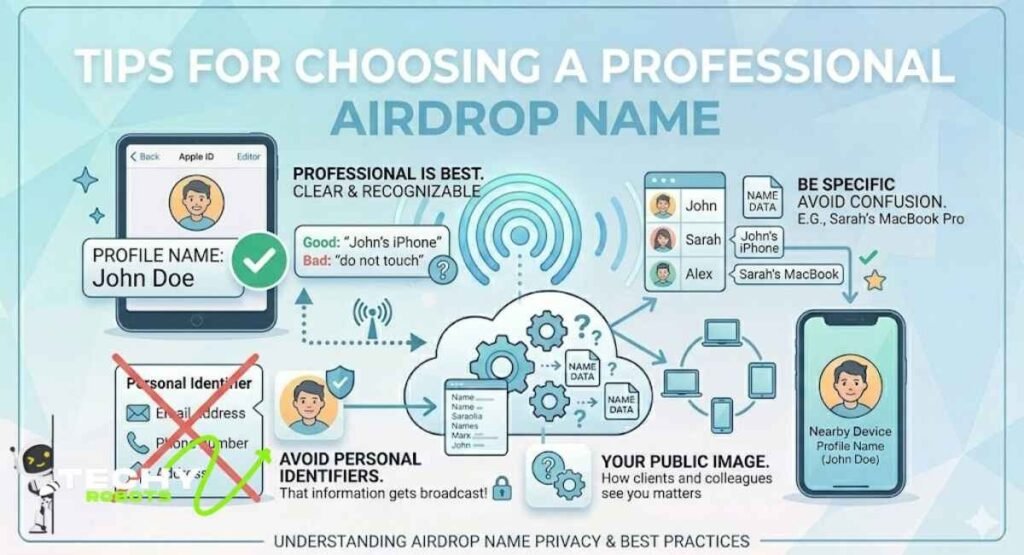
    If you use AirDrop frequently at work or school, set your device name to something people will immediately recognize. Your actual name works better than “iPhone 15” in most professional settings. Think of AirDrop etiquette the same way you would think about having a clear name tag at a conference.

    Managing Multiple Apple Devices with Similar Names

    If you own more than one Apple device and they are all named something like “John’s iPhone,” things get confusing fast when multiple devices appear on someone else’s AirDrop screen. Give each device a distinct name. Something like “John iPad Work” and “John iPhone Personal” makes it far easier for both you and others to identify the right device quickly.

    Common AirDrop Troubleshooting Mistakes to Avoid

    One mistake people make is changing only the AirDrop display settings without actually updating the device name. AirDrop does not have its own independent name field, so if you go hunting for one, you will not find it.

    Another mistake is forgetting that both Wi-Fi and Bluetooth need to be active for AirDrop to work at all. If either is off, AirDrop will not show your device to anyone, regardless of what name it has. Also, make sure you have not accidentally left AirDrop set to “Receiving Off” mode, which makes your device invisible on the nearby device list even though AirDrop itself is technically enabled.

    Finally, if you are on a Mac and changed the name but it still shows the old one in Finder’s AirDrop panel, try closing Finder completely and reopening it. The panel sometimes caches the old name and needs a fresh load.

    Conclusion

    Changing your AirDrop name is one of those small things that makes a surprisingly big difference once you do it. Whether you want a professional name for workplace transfers or just want to stop confusing your device with someone else’s in a household full of Apple products, the fix takes less than a minute on any device.

    The key thing to remember is that your AirDrop name is your device name. Update it through Settings on iPhone and iPad, or through System Settings on Mac, and AirDrop reflects the change almost immediately. If it does not, a quick restart or software update usually clears it up.

    Once everything is sorted, take a moment to review your AirDrop visibility settings too. A recognizable name combined with the right discoverability setting gives you full control over who sees you and how, making every file transfer faster and less confusing.

    FAQs

    1. Can I set a different name for AirDrop without changing my device name? 

    No, you cannot. AirDrop pulls its display name directly from your device name set in Settings. There is no separate AirDrop-specific name field on iPhone, iPad, or Mac.

    2. Why does my AirDrop show my old name even after I changed it? 

    This usually comes down to a sync delay or a conflict with the “My Card” entry in your Contacts app. Restart your device and check your Contacts My Card to resolve it.

    3. Does changing my iPhone name affect anything else? 

    Yes, it also updates your Personal Hotspot name and how your device appears in Finder when connected to a Mac. All three use the same device name from your settings.

    4. How do I change my AirDrop name on Mac without System Settings? 

    On older macOS versions, go to System Preferences > Sharing and update the Computer Name field at the top. This is the equivalent path for Macs running macOS Monterey and earlier.

    5. Why does AirDrop sometimes show two devices with the same name? 

    This happens when two Apple devices on the same account or in the same household have identical names. Giving each device a unique, descriptive name in its own settings is the easiest fix.

  • How to Switch Off AirDrop: Here’s the Quick Fix (2026)

    How to Switch Off AirDrop: Here’s the Quick Fix (2026)

    How to switch off AirDrop is one of those things that sounds simple until you’re actually staring at your screen looking for the right setting. Whether your phone keeps getting random file requests from strangers or you just want a bit more privacy, turning AirDrop off is a smart move. The good news is it takes less than a minute once you know where to look.

    If you’ve ever had a stranger try to send you a random file in a coffee shop, you already know why switching off AirDrop matters. It’s one of those features that’s super handy when you need it, but can feel a little invasive when you don’t. Whether you’re trying to protect your privacy, save battery life, or just clean up your sharing settings, knowing how to turn off AirDrop properly is something every Apple user should have in their toolkit.

    This guide walks you through everything step by step, from quick fixes in the Control Center to deeper settings buried in Screen Time restrictions. No matter which Apple device you’re on, you’ll find exactly what you need here.

    What Is AirDrop and Why Would You Want to Turn It Off?

    AirDrop is Apple’s peer-to-peer file sharing feature that lets you wirelessly send photos, documents, links, and other content between Apple devices. It uses a combination of Bluetooth and Wi-Fi to create a direct connection between devices, meaning no internet is required. Pretty neat, right?

    But here’s the thing: when AirDrop is set to “Everyone,” any nearby Apple device can see yours. That opens the door to unwanted file requests from strangers, which has become such a problem that Apple actually introduced a “Everyone for 10 Minutes” mode in newer iOS versions to limit that exposure.

    People typically want to disable AirDrop for a few reasons. Privacy is the big one. You might also want to switch it off to slightly extend battery life, avoid accidental file transfers, or lock down a child’s device using parental controls. Whatever your reason, it’s easy to do once you know where to look.

    How to Switch Off AirDrop on iPhone

    Let’s start with the most common scenario: turning off AirDrop on your iPhone. There are two ways to do this, and both take less than a minute.

    Using Control Center to Disable AirDrop

    This is the fastest method and the one most people reach for first.

    1. Swipe down from the top-right corner of your screen (or swipe up from the bottom if you have an older iPhone with a Home button) to open the Control Center.
    2. Press and hold the network settings tile, which is the box that contains Wi-Fi, Bluetooth, and Airplane Mode icons.
    3. A larger panel will expand. Tap on the AirDrop button.
    4. Select Receiving Off from the options that appear.

    That’s it. AirDrop is now off, and no one can send you files until you change it back. This method is perfect when you’re out in public and want a quick privacy fix without digging through menus.

    Turning Off AirDrop Through iPhone Settings

    If you prefer going through Settings, or if Control Center isn’t giving you the right options, here’s the longer route:

    1. Open the Settings app.
    2. Tap on General.
    3. Scroll down and tap AirDrop.
    4. Choose Receiving Off.

    This lands you in the same place as the Control Center method, just through a different path. Some people find this more reliable, especially on older iOS versions where the Control Center shortcut doesn’t always behave as expected.

    How to Switch Off AirDrop on Mac

    Switching off AirDrop on a Mac is just as straightforward, though the interface looks a bit different depending on which version of macOS you’re running.

    Turning Off AirDrop from Finder

    1. Open a Finder window.
    2. In the Finder sidebar, click on AirDrop.
    3. At the bottom of the AirDrop window, you’ll see a dropdown that says “Allow me to be discovered by.” Click on it.
    4. Select No One.

    Once you set it to No One, your Mac becomes invisible to other AirDrop users. The AirDrop icon will still appear in the Finder sidebar, but no one nearby can see your device or send you anything.

    Disabling AirDrop via System Settings on macOS

    On newer Macs running macOS Ventura or later, you can also manage AirDrop discovery settings through System Settings:

    1. Click the Apple menu in the top-left corner.
    2. Go to System Settings.
    3. Select General, then click AirDrop & Handoff.
    4. Toggle AirDrop to off, or set discovery to No One.

    This is especially useful if you want to control AirDrop as part of a broader set of sharing preferences on your Mac.

    Understanding AirDrop Visibility Options

    Before you disable AirDrop entirely, it’s worth knowing what your options actually mean. Apple gives you three (sometimes four) choices:

    Receiving Off

    This completely disables AirDrop on your device. No one can send you anything, and your device won’t appear in anyone else’s AirDrop list. This is the setting to use when you want full privacy.

    Contacts Only

    This is the middle-ground option. With Contacts Only selected, only people who are in your Contacts app and who also have your Apple ID email or phone number saved can see your device. It’s a great setting for everyday use since it keeps you reachable to people you know without exposing you to strangers.

    Everyone and Everyone for 10 Minutes

    The “Everyone” setting makes your device visible to all nearby Apple users. Apple introduced “Everyone for 10 Minutes” as a safer alternative in iOS 16.2 and later. When you tap this, your device becomes publicly visible for just ten minutes, then automatically switches back to Contacts Only. It’s a thoughtful middle ground for situations where you need to share files with someone outside your contacts.

    How to Disable AirDrop Using Screen Time Restrictions

    If you’re managing a device for a child or want to prevent AirDrop from being turned back on without your knowledge, Screen Time restrictions are the way to go. This is especially useful for parents who want to lock down sharing settings.

    Here’s how to do it:

    1. Open Settings and tap Screen Time.
    2. If Screen Time isn’t already set up, turn it on and create a passcode.
    3. Tap Content and Privacy Restrictions.
    4. Enable Content and Privacy Restrictions if it’s not already on.
    5. Tap Allowed Apps.
    6. You’ll find AirDrop listed here. Toggle it off.

    Once this is done, AirDrop will be grayed out in both Control Center and the General Settings, and no one can turn it back on without the Screen Time passcode. This is a solid parental control option that goes beyond just switching AirDrop off.

    Why Bluetooth and Wi-Fi Matter When Using AirDrop

    Here’s something a lot of people don’t realize: AirDrop needs both Bluetooth and Wi-Fi to be enabled in order to work, even though it doesn’t use your actual Wi-Fi internet connection. Bluetooth is used to discover nearby devices, and Wi-Fi is used to transfer the data quickly.

    So if you turn off Bluetooth or Wi-Fi, AirDrop stops working even if you haven’t explicitly disabled it. Some people use this as a quick workaround, especially on older devices. That said, turning off Bluetooth and Wi-Fi affects a lot of other features too, so it’s not the cleanest approach. It’s much better to just go into AirDrop settings and set it to Receiving Off.

    How to Stop AirDrop Temporarily Without Turning It Off Completely

    Sometimes you don’t want to turn off AirDrop permanently. Maybe you’re in a public place for an hour and want to go invisible, but plan to use AirDrop later. In that case, setting it to Contacts Only is your best bet. It limits your visibility without disabling the feature entirely.

    The “Everyone for 10 Minutes” option on newer iOS versions is also fantastic for this. You get temporary public visibility that turns itself off automatically, so you don’t have to remember to switch it back.

    AirDrop Not Working? Here’s What to Check

    Sometimes people try to turn AirDrop on or off and run into issues. If AirDrop isn’t working as expected, here’s a quick troubleshooting checklist:

    • Make sure both Bluetooth and Wi-Fi are turned on.
    • Check that you’re not in Airplane Mode.
    • Verify that AirDrop isn’t restricted by Screen Time settings.
    • Ensure Personal Hotspot is turned off, as it can interfere with AirDrop.
    • Restart your device and try again.
    • If transferring between a Mac and iPhone, make sure both devices are signed into iCloud and are within about 30 feet of each other.
    • On Mac, check the Finder sidebar to ensure AirDrop discovery isn’t set to “No One” if you’re trying to receive files.

    Most AirDrop issues come down to one of these simple fixes. If problems persist, restarting both devices usually clears things up.

    How to Turn Off AirDrop on Older iOS Versions

    If you’re running an older version of iOS, the steps are slightly different. On iOS 13 and earlier, you’d go to Settings, then General, then AirDrop to find your options. The Control Center shortcut may not expand the same way it does on newer devices.

    On very old iPhones running iOS 7 through iOS 11, AirDrop was introduced but had a more limited interface. The basics are still the same: open Settings, head to General, tap AirDrop, and choose Off or Receiving Off.

    If you’re using an iPhone 5s or earlier with an older iOS, it’s worth noting that AirDrop was not available on those devices at all, so there’s nothing to turn off.

    Managing AirDrop Settings for Kids and Shared Devices

    When it comes to devices used by children, AirDrop can be a concern because it potentially allows unknown people to send content. Beyond just turning it off, using Screen Time restrictions (as described above) ensures kids can’t re-enable it without a parent’s passcode.

    For shared devices in a school or workplace setting, device management profiles (through MDM software) can control AirDrop at the system level. This means administrators can disable AirDrop entirely across all managed devices without relying on individual users to change settings themselves.

    Common Mistakes People Make with AirDrop Settings

    One of the most common mistakes is thinking that turning off Wi-Fi or Bluetooth in the Control Center fully disables those features. On iOS 11 and later, swiping up and tapping the Wi-Fi or Bluetooth icons in Control Center only disconnects from current networks temporarily. It doesn’t fully turn them off. AirDrop could still function in some scenarios. Always go through the actual AirDrop settings to make sure it’s properly set to Receiving Off.

    Another common mistake is forgetting that “Everyone” mode was replaced by “Everyone for 10 Minutes” in newer iOS versions. If you’re telling someone else how to use AirDrop and they’re on an older device, the options may look different.

    When Should You Keep AirDrop On?

    AirDrop is genuinely useful and worth keeping on in the right situations. Sharing photos with family, dropping files between your own iPhone and Mac, or sending links to a friend nearby are all excellent use cases. When you’re at home or in a trusted environment, keeping AirDrop on Contacts Only is a smart middle ground that gives you convenience without sacrificing privacy.

    The key is being intentional about it. Turn it on when you need it, switch it off or back to Contacts Only when you’re done, especially in public.

    Conclusion

    Switching off AirDrop takes about ten seconds once you know where to look, but the privacy payoff is real. Whether you’re quickly silencing unwanted file requests from strangers or locking down a child’s device with Screen Time restrictions, Apple gives you the tools to stay in control of what gets shared and who can reach you.

    The best habit to build is treating AirDrop like your front door. You wouldn’t leave it wide open in a crowd, but you also don’t need to deadbolt it when you’re home with people you trust. Keep it on Contacts Only as your default, flip it to Receiving Off in public, and use the Everyone for 10 Minutes mode when you genuinely need a quick one-time share with someone new.

    Once it becomes second nature, managing your AirDrop settings feels effortless, and you’ll never have to worry about that awkward stranger-in-a-coffee-shop moment again.

    FAQs

    1. Does turning off AirDrop affect other Apple features? 

    No, turning off AirDrop only affects file sharing through that feature. Your Wi-Fi, Bluetooth, iMessage, and other functions continue working normally.

    2. Can someone still find my device if AirDrop is set to Contacts Only? 

    Only people who already have your Apple ID email or phone number saved in their contacts will be able to see your device. Strangers cannot find you.

    3. Will turning off AirDrop save battery life? 

    It may offer a marginal improvement since it reduces background activity, but the difference is minimal in most everyday use cases.

    4. Can I turn off AirDrop without going into Settings? 

    Yes, you can do it directly from the Control Center by pressing and holding the network tile and then tapping on AirDrop. It takes just a couple of taps.

    5. What should I do if AirDrop is grayed out and I can’t change it? 

    This usually means Screen Time restrictions have been applied to your device. You’ll need the Screen Time passcode to go into Content and Privacy Restrictions and re-enable AirDrop from the Allowed Apps section.

  • AirDrop on Android: How to Share Files from Android to iPhone

    AirDrop on Android: How to Share Files from Android to iPhone

    AirDrop on Android is something many users have searched for, and for good reason. For years, Android users watched as iPhone owners casually sent photos and files with a tap. It felt like a wall nobody could cross. But that wall is gone now. Whether you’re wondering if AirDrop works on Android or how to share files with an iPhone, the answer is better than you’d expect. And in some ways, Android file sharing has actually pulled ahead.

    What is AirDrop and How Does It Work?

    Let’s start with the basics. AirDrop is Apple’s wireless file sharing protocol that lets users send files, photos, contacts, and more between Apple devices without needing email, messaging apps, or cloud storage. You point your iPhone at another iPhone or iPad, tap a name, and boom. The file’s there. It’s been Apple’s secret weapon for years, the kind of feature that makes their ecosystem feel genuinely connected and frictionless.

    But here’s what most people don’t realize: AirDrop works through a combination of Bluetooth for discovery and Wi-Fi Direct for the actual transfer. It doesn’t go through Apple’s servers. Your files travel directly from device to device, which is both faster and more private than uploading to the cloud.

    Understanding AirDrop’s Core Technology

    The magic behind AirDrop is peer-to-peer technology. When you initiate a transfer, your device creates a temporary connection with the receiving device using Bluetooth to establish a handshake, then switches to Wi-Fi Direct for the actual data transfer. This happens so fast you barely notice the transition. The entire exchange happens locally, meaning Apple can’t see what you’re sending, and you get near-instant transfers even with large files.

    This is fundamentally different from cloud-based file sharing services. You’re not uploading anything to the internet. Everything stays between your two devices. That’s why it’s so fast and why people love it.

    Why AirDrop Mattered (Until Now)

    Before 2024-2025, AirDrop was exclusively Apple’s game. If you had an iPhone and wanted to send a file to your friend’s Android phone, you had to use email, text, Google Drive, or some other workaround. It felt clunky. It felt like unnecessary friction in what should be a simple task.

    For Android users, the frustration ran deeper. Google had Quick Share, which worked perfectly between Android devices, but it couldn’t talk to iPhones. Meanwhile, iPhone users could share seamlessly with anyone else using Apple products. It created this odd digital divide where interoperability felt impossible.

    Android AirDrop Compatibility: What Changed in 2025?

    This is where things get interesting. Google and Apple made a move that surprised nearly everyone: Quick Share on Android devices now works with AirDrop. This isn’t a full integration where everything magically works together, but it’s close enough to feel revolutionary for cross-platform users.

    Starting with Pixel phones and expanding to other Android devices, you can now initiate AirDrop transfers from your iPhone to an Android phone, and receive transfers on Android through Quick Share. The experience isn’t identical on both sides, but it works. That matters.

    Quick Share Now Works with AirDrop

    Google’s Quick Share got a major upgrade. Instead of being an Android-only solution, it now accepts AirDrop transfers from iOS devices. When an iPhone user tries to AirDrop a file to a nearby Android phone with Quick Share enabled, the Android phone shows a notification asking if you want to accept the file. You tap yes, and the transfer happens.

    This is huge for cross-platform households and friend groups with mixed devices. You’re not stuck using email anymore. You can share directly, quickly, and without any third-party apps required.

    Which Android Devices Support AirDrop?

    Not all Android phones support this feature yet, though the rollout is expanding. Google Pixel 6 and newer models got the update first. If you’re using a Pixel 10, you definitely have access. Other manufacturers are getting on board too. Samsung, OnePlus, and others are rolling out compatibility, but timing varies.

    Here’s the practical question: if you own a recent flagship Android phone, there’s a good chance Quick Share with AirDrop support is already on your device or arriving soon. Check your Quick Share settings to confirm.

    Pixel 10 AirDrop Support Explained

    The Pixel 10 series came with full AirDrop compatibility built in. Google positioned this as a core feature, not an afterthought. If you use a Pixel 10, you get the smoothest cross-platform experience available on Android right now. The Quick Share File Transfer feature integrates seamlessly, letting you send and receive files from iOS devices without thinking about it.

    How to Use AirDrop on Android Devices

    Want to actually use this? It’s simpler than you’d think, but there are a few steps to nail down. Let me walk you through it.

    Step-by-Step Guide for Pixel 10 Quick Share File Transfer

    First, make sure both devices have Bluetooth and Wi-Fi turned on. Quick Share (and AirDrop through Quick Share) requires both connections to work. They don’t need to be connected to the same Wi-Fi network, but they need to be in the same physical area, usually within 50-100 feet, depending on obstacles.

    On your Pixel 10, open Quick Share. You’ll find it in Settings under Nearby Share, or you can access it directly from the share sheet in most apps. On your iPhone, go to the file or photo you want to share. Tap the Share button, look for AirDrop, and you should see a list of nearby devices. Tap your Pixel phone’s name. On the Android side, you’ll get a notification asking to accept the incoming transfer. Tap Accept, and you’re done. The file appears in your Files app or Photos app, depending on what you shared.

    Setting Up Your Android Phone for AirDrop

    Before you can receive AirDrop transfers, you need to configure Quick Share. Go to Settings, then Google, then Device Connections, then Nearby Share. Make sure it’s turned on. You’ll see visibility options: Device only, Contacts only, or Everyone. For cross-platform sharing with iPhones, “Everyone for 10 minutes” is your best bet. This setting temporarily makes your phone visible to any nearby device for receiving transfers.

    You can customise who can send to you and for how long. It defaults to a 10-minute window for security reasons. After 10 minutes, Quick Share automatically tunes down visibility to prevent random people from sending files to your phone.

    Enabling Quick Share for AirDrop Compatibility

    The compatibility exists by default on newer Pixel phones with the latest updates, but you want to confirm it’s active. Check that you’re running the latest version of Android and that Quick Share has the newest updates from the Google Play Store. If you’re on an older Pixel or non-Pixel Android device, you might need to manually update the Nearby Share app or wait for your manufacturer to roll out compatibility.

    Android to iPhone File Sharing Made Simple

    Sharing from Android to iPhone through AirDrop requires the iPhone initiating the transfer. This is a one-way street for now. But it works, and that’s what counts.

    Sending Photos from Android to iPhone via AirDrop

    Let’s say you took some great photos on your Pixel phone and want to send them to your friend’s iPhone. Open Photos, select the images you want to share, and tap Share. Look for “Nearby Share” or “Quick Share” in the share sheet. Your nearby iPhone should appear in the list if AirDrop is enabled. Tap it, and the transfer starts immediately. On the iPhone side, the user gets a notification and can accept the transfer. The photos land in their Photos app.

    The speed is impressive. Most photos transfer within seconds, even if they’re high resolution. This is because Quick Share uses the same peer-to-peer technology as AirDrop. No cloud storage involved. No compression needed (unless you’re sharing a ton of files at once).

    Transferring Documents and Files Between Platforms

    Photos are just the start. You can share PDFs, documents, spreadsheets, and most other file types. The process is identical: select the file, tap Share, choose Quick Share or Nearby Share, and select your destination device.

    One thing worth noting: some file types might not transfer perfectly. Obscure proprietary formats might not open properly on the receiving device. But standard formats like PDF, DOCX, XLSX, and image files transfer without issue. You can always test with a small file first if you’re unsure.

    What File Types Work Best?

    Standard formats work great. Photos (JPEG, PNG, WebP), videos (MP4, MKV), documents (PDF, DOCX), spreadsheets (XLSX), and archives (ZIP) all transfer without problems. Avoid proprietary or ultra-niche formats. Your results depend partly on what apps you have installed on the receiving device. A photo opens anywhere. A specific design format might only open in niche design software.

    Quick Share AirDrop Integration: Everything You Need to Know

    This integration is the real story here. It’s not a full merge of two systems. Instead, it’s two different technologies learning to talk to each other. Understanding how they work together helps you use them better.

    How Quick Share Bridges Android and iOS

    Google and Apple worked together (yes, actually together) to make Quick Share recognize AirDrop requests. When an iPhone initiates an AirDrop transfer to an Android device, Android’s Quick Share on that device recognises it as a compatible incoming transfer and handles it appropriately. It’s middleware magic, basically.

    This happened without requiring deep changes to either system. They didn’t merge the protocols. Instead, they made them compatible at the receiving end. Think of it like adapters that finally made two different connector types work together.

    AirDrop and Quick Share Differences Explained

    Here’s the core difference: AirDrop is Apple-only for sending. Only iPhones, iPads, and Macs can initiate AirDrop transfers. Quick Share is the Android equivalent, and it can initiate transfers to other Android devices or receive AirDrop from iOS devices.

    Speed is roughly the same. Range is roughly the same. Ease of use is roughly the same. The main practical difference is directionality and which devices you’re using. If you’re sending from Android to iPhone, you need Quick Share on Android and AirDrop on iOS. Sending from iPhone to Android requires AirDrop on iOS and Quick Share recognition on Android.

    Which Should You Use?

    If everyone uses iPhones, use AirDrop. If everyone uses Android, use Quick Share. In mixed environments, use whichever device has the file you’re sharing. The system will guide you to the compatible option. You don’t need to choose or remember anything. The share sheet shows you available options automatically.

    Cross-Platform File Transfer: Android and iOS Working Together

    We’re living in a moment where Android and iOS finally feel like they’re playing on the same team. This deserves its own section because it’s genuinely revolutionary for people with mixed device households.

    Wireless File Transfer Without Third-Party Apps

    The old way required downloading an app. Google Drive, Dropbox, Amazon Photos, Microsoft OneDrive. Pick your cloud service and upload. That works, but it’s an unnecessary step for quick transfers. Now you don’t need any of that for basic file sharing.

    Open any file on any device, tap Share, and send directly to the other platform. No accounts needed. No app installations needed beyond the native Quick Share/AirDrop. It’s the simplicity that’s been missing for years.

    Peer-to-Peer Connection Benefits

    Direct connections between devices have real advantages. First, speed. Uploading to the cloud then downloading from the cloud takes longer than direct transfer. Second, privacy. Nothing goes through servers. Third, offline functionality. If you’re somewhere without internet, peer-to-peer still works. This is genuinely useful for people at events, conferences, or travel locations with spotty connectivity.

    No Server Upload Required

    This can’t be overstated. Your files don’t touch any company’s servers. Google isn’t seeing them. Apple isn’t seeing them. They never exist anywhere except on your devices. For sensitive documents or personal photos, this is a big deal. It’s faster. It’s more private. It’s the right way to share files between devices you own.

    Pixel 10 AirDrop Feature: Google’s Answer to Apple’s Ecosystem

    Google’s Pixel line has always been the truest representation of pure Android. The Pixel 10 represents Google’s commitment to making cross-platform sharing work seamlessly. This is Google putting their flagship hardware where their software ideas are.

    Pixel 10 Series Exclusive Features

    The Pixel 10 got Quick Share with AirDrop compatibility as a day-one feature. No waiting for updates. No slow rollout. It was baked into the software from launch. This signals that Google is serious about this as a core feature, not a nice-to-have addition.

    Beyond AirDrop compatibility, the Pixel 10 also has Nearby Share optimizations that make it faster and more reliable than older models. The hardware improvements in Bluetooth and Wi-Fi tech help too. If cross-platform sharing is important to you, Pixel 10 is the Android phone that does it best right now.

    Quick Share File Transfer on Pixel 10

    Using Quick Share on a Pixel 10 feels native, expected, obvious. It’s not a new discovery. It’s just part of how the phone works. Open any app, tap Share, and Quick Share is right there. The experience is polished. The speed is excellent. If you’re comparing Android phones for cross-platform capabilities, Pixel 10 sets the standard.

    Does Android Support Apple AirDrop? The Truth in 2025

    This question gets asked constantly, and the answer is nuanced enough to need its own section. Let me be direct: Android doesn’t support initiating AirDrop transfers. iPhones and iPads and Macs do. But Android now receives AirDrop transfers through Quick Share. It’s a one-way street with a toll plaza that actually works.

    AirDrop Compatibility Beyond Apple Devices

    AirDrop’s compatibility expanded beyond the Apple ecosystem through Quick Share. This is unprecedented. For the first time, if you’re an Android user, you can receive AirDrop transfers directly. You don’t need workarounds. You don’t need third-party apps. You don’t need an email.

    Some Android manufacturers beyond Google are implementing this, too. Samsung, OnePlus, and others are adding Quick Share with AirDrop compatibility. The rollout varies by device, but the trend is clear: cross-platform file sharing is becoming standard, not special.

    AirDrop Compatibility with iPads and Macs

    iPads and Macs can send AirDrop to Android devices too, just like iPhones can. Any Apple device with AirDrop can initiate a transfer to a compatible Android phone running Quick Share. The receiving experience is identical whether the sending device is an iPhone, iPad, or Mac. This makes AirDrop genuinely cross-platform now.

    Setting Up Direct File Transfer Between Android and Apple Devices

    Want actually to get this working? Here’s everything you need to set up and optimize your cross-platform sharing.

    The “Everyone for 10 Minutes” Setting Explained

    In Android Quick Share settings, you’ll see visibility options. “Everyone for 10 minutes” is the setting that makes your phone discoverable by nearby iPhones trying to AirDrop files to you. It’s temporary, which is smart for security. After 10 minutes, your phone returns to a more private state. You can adjust this window in settings, but 10 minutes is a good balance between convenience and security.

    The reason for the time limit is simple: you don’t want your phone constantly broadcasting its presence to anyone nearby. You want to share with specific people in specific moments. The 10-minute window gives you that flexibility without creating permanent vulnerabilities.

    Bluetooth and Wi-Fi Direct Connection Basics

    Both connections need to be active. Bluetooth discovers nearby devices. Wi-Fi Direct handles the actual file transfer. If either is disabled, nothing works. This seems obvious, but it’s the number one reason cross-platform sharing fails. People have Bluetooth on but Wi-Fi off, or vice versa.

    Your devices don’t need to be on the same Wi-Fi network. They just both need Wi-Fi enabled. Same room or nearby room works fine. The range is roughly 30-50 feet with clear line of sight, a bit less through walls.

    Optimizing Your Connection

    Get close when transferring large files. Literally stand near the other person’s phone. This reduces interference from other Wi-Fi networks. Make sure no one’s downloading massive files on shared Wi-Fi in the background. Disable any VPNs temporarily if transfers fail. These are tiny tweaks, but they can make the difference between a transfer that works instantly and one that crawls.

    Common Issues and Troubleshooting

    Even though this feature works well, sometimes things go wrong. Here’s how to fix the most common problems.

    Why AirDrop Isn’t Working Between Your Devices

    The most common issue is simple: Bluetooth or Wi-Fi is off on one device. Check both. Then check Quick Share settings on the Android phone. Make sure it’s enabled and set to a visibility level that allows incoming transfers. On the iPhone, make sure AirDrop is turned on and set to at least “Contacts Only” or “Everyone.”

    Another common issue is being out of range. Move closer. If you’re on opposite ends of a large building or outside with obstacles, the connection might be too weak. Getting closer almost always fixes it.

    Sometimes devices just need a restart. It sounds old school, but turning your phone off and back on clears temporary connection issues. Try it before assuming something is permanently broken.

    Fixing Connectivity Problems

    If restarting doesn’t work, try disabling and re-enabling Quick Share or AirDrop. Sometimes the connection state gets stuck. Toggle it off, wait 10 seconds, toggle it back on. This resets the connection state and often fixes stubborn problems.

    Update everything. Make sure both devices are running the latest OS version and all app updates are installed. Compatibility fixes happen in updates. You don’t want to troubleshoot a problem that’s already been fixed in a newer version.

    If specific file types won’t transfer but others work, the issue might be the file itself. Try sending a photo or small PDF. If that works, your devices are connected fine. The problem is the specific file. Try a different file or convert it to a more universal format.

    AirDrop vs Quick Share: A Head-to-Head Comparison

    Both systems do the same job. But they’re not identical. Let’s compare them directly.

    Performance and Speed Differences

    AirDrop has been around longer. Apple spent years optimizing it. Quick Share is newer but benefits from that optimization playbook. In real-world testing, transfer speeds are nearly identical. A 5MB photo takes maybe a second or two on either system. A 100MB video takes 10-15 seconds on either system. Speed isn’t the differentiator.

    Where they differ is in user interface. AirDrop shows thumbnail previews of files before sending. Quick Share is more minimal. Both approaches work. One feels slightly more polished. That’s subjective.

    User Experience Across Platforms

    AirDrop feels more integrated on iOS because it’s been there longer and Apple controls the entire experience. Quick Share on Android feels like it’s catching up, which it is. But it’s catching up fast. Within a year, users probably won’t notice meaningful differences in the experience.

    Cross-platform, both systems require the device initiating the transfer to handle the complexity. The receiving device just taps “Accept.” That’s already simple enough that further improvements won’t matter much to average users.

    The Future of Cross-Platform File Sharing

    This is just the beginning. Apple and Google’s willingness to make their systems work together signals a shift in tech philosophy. Closed ecosystems made sense when phones were new. Now we’re in an era where people own devices from multiple manufacturers. Ecosystem walls are becoming obstacles instead of features.

    Where Android and iOS Integration is Heading

    Expect more compatibility between Android and iOS going forward. Not a full merge (each company still wants its ecosystem to feel special), but better interoperability. File sharing is just the start. Notifications, contacts, calendars, and other data might get similar cross-platform treatment.

    This pressure comes from users. When you own an iPhone and your partner owns a Samsung, you want your devices to work together. Manufacturers are listening.

    What This Means for Users

    For you, it means fewer reasons to worry about platform differences. The practical friction of owning devices from different ecosystems is shrinking. Not gone, but shrinking. You can buy the best phone for your needs without worrying as much about whether it matches what your friends own.

    It also means less dependence on cloud services for basic file sharing. You can share directly, privately, quickly. That’s better for privacy. That’s better for speed. That’s better for everyone except the companies that profit from cloud storage, and even they’re adapting.

    Conclusion

    We’re in a genuinely interesting moment in tech history. For the first time, Android and iOS are explicitly designed to work together for file sharing. It’s not perfect. It’s not symmetrical. One direction works better than the other. But it works, and that’s huge.

    If you’ve been frustrated by platform incompatibility, try this feature. Set up Quick Share on your Android phone, enable AirDrop on your iPhone, and watch your devices actually cooperate. It feels small in the moment. But for anyone with mixed devices, it’s legitimately liberating.

    The barrier is down. The gates are open. Your Android phone and your friend’s iPhone can finally share files like normal devices should. That’s worth celebrating.

    FAQs

    Can I send AirDrop from Android to iPhone?

    Not directly through AirDrop. You use Quick Share on Android, and it’s received as an AirDrop transfer on the iPhone side. The effect is the same. The iPhone doesn’t know the difference between AirDrop from another iPhone and Quick Share from Android. To it, an incoming transfer is an incoming transfer.

    Do both devices need to be on the same Wi-Fi network?

    No. They need Wi-Fi enabled, but they can be on different networks or no network at all. The peer-to-peer connection uses Wi-Fi Direct, which bypasses your router entirely.

    Is it safe to use AirDrop with strangers?

    Only if you trust them. Set your Quick Share or AirDrop to “Contacts Only” if you’re in public. This prevents random people nearby from sending files to your phone. When you’re ready to share with someone, you can temporarily change the setting.

    What if one person has an older phone that doesn’t support cross-platform sharing yet?

    Fall back to email, cloud storage, or text. These alternatives still work perfectly fine. Cross-platform sharing is a convenience, not a requirement.

    Does this work with tablets and laptops?

    iPads support AirDrop and can send to Android. Android tablets with Quick Share can receive. Macs with AirDrop can send to Android. PC options are more limited right now, but support is expanding.

  • What is FintechZoom? A Complete Guide to the Finance Platform

    What is FintechZoom? A Complete Guide to the Finance Platform

    If you’re serious about investing, you’ve probably heard the name FintechZoom thrown around. But what exactly is it? Is it just another finance app, or does it offer something genuinely useful for your investment journey?

    Here’s the thing: FintechZoom, explained in simple terms, is a comprehensive finance and tech platform that brings together real-time market data, financial news, and investing tools all in one place. It’s designed to help both beginner and experienced investors make smarter decisions about their portfolios. Whether you’re checking stock prices, reading market analysis, or tracking your investments, FintechZoom gives you the tools to do it all.

    Think of it like having a newsroom, research library, and data center at your fingertips. Instead of bouncing between five different websites to get the information you need, everything lives in one spot. That’s the appeal of FintechZoom as a finance platform.

    Understanding FintechZoom Explained

    So what does FintechZoom do exactly? At its core, it’s a platform that combines financial news and data with powerful analysis tools. It pulls information from various market sources and presents it in a way that’s actually useful for making investment decisions.

    The Basics of FintechZoom as a Finance and Tech Platform

    FintechZoom sits at the intersection of finance and technology. The “fintech” part refers to financial technology, which basically means using tech to make financial services better and more accessible. This platform takes that concept and runs with it.

    What you get is access to current stock prices, market trends, financial news articles, and analysis tools. The platform handles the heavy lifting of collecting and organizing all this information. Instead of manually searching for data across different sites, you can view comprehensive market insights and financial research in a single dashboard.

    The platform serves a clear purpose: it democratizes financial information. You don’t need to be a Wall Street professional to access quality market data and analysis anymore. Regular investors can use the same tools that serious traders rely on.

    How FintechZoom Fits Into Today’s Investment Landscape

    Investing has changed dramatically over the last decade. We’ve moved from phone calls to brokers to instant digital trading. FintechZoom represents this evolution. It’s part of a broader movement toward making investing more transparent, accessible, and data-driven.

    The modern investor wants answers fast. They want to understand what’s happening in the market right now, not next week. FintechZoom answers that need by providing real-time updates, breaking news, and immediate access to market data. It fits naturally into how people invest today.

    FintechZoom Features You Need to Know About

    The real power of FintechZoom comes from its features. Let’s break down what this finance platform actually offers you.

    Real-Time Market Data and Stock Information

    One of the most valuable FintechZoom features is its real-time market data. You can pull up any stock and see its current price, trading volume, price changes, and historical performance. This isn’t delayed information either. It’s live data that updates as markets move.

    For investors, this matters tremendously. You need accurate information to make good decisions. Stale data can lead you in the wrong direction. FintechZoom stock market tools deliver the information you need as it happens.

    You can track specific stocks, watch indices, and monitor entire sectors. The platform makes it easy to spot trends and understand what’s moving the market. If you’re trying to decide whether to buy into a particular stock, having real-time market updates gives you the confidence that your decision is based on current information.

    Financial News and Analysis Tools

    Beyond just numbers, FintechZoom offers financial news and analysis. The platform curates articles, market commentary, and expert insights. This is where you learn not just what’s happening, but why it’s happening.

    Market data is only half the story. You need context. Why did Apple stock jump five percent? What’s happening with interest rates? How might geopolitical events affect your portfolio? These are the questions that FintechZoom financial news and analysis help you answer.

    Market Insights and Expert Commentary

    What sets FintechZoom apart from basic data sites is that it includes real analysis. You’re not just looking at charts. You’re reading thoughtful commentary from people who understand the markets. This FintechZoom market data explained approach means you get both the facts and the interpretation.

    The news section covers everything from earnings reports to economic indicators. There are pieces on specific stocks, broader market trends, and investing strategies. Having this curated, professional analysis available right alongside the raw data is incredibly valuable.

    How FintechZoom Works: A Step-by-Step Breakdown

    Understanding how FintechZoom works is actually pretty straightforward. Let’s walk through it.

    Getting Started on the FintechZoom Platform

    First, you need to access the platform. You can do this through their website or their mobile app. The setup process is designed to be quick and easy. You don’t need to jump through tons of hoops to start using FintechZoom.

    Once you’re in, you’ll see the main interface. The platform is organized intuitively, with different sections for news, market data, tools, and your personal portfolio. Even if you’ve never used FintechZoom before, you can figure out where things are pretty quickly.

    Navigating Key Features and Tools

    The FintechZoom user guide would tell you that navigation is one of the platform’s strong points. You’ve got a search function to find specific stocks, a news feed for staying updated, and various tools for analysis and tracking.

    The menu structure makes sense. You’re not hunting around trying to figure out where features are. Everything you’d expect to find is where you’d logically look for it. This matters because you don’t want to waste time learning the interface when you could be learning about the market.

    Using the Dashboard for Market Tracking

    Your dashboard is your personal command center. This is where you can set up watchlists, track stocks you’re interested in, and monitor your portfolio. You customize it to show you the information that matters most to you.

    Think of it like setting up your ideal news feed. You choose which stocks to watch, which markets to follow, and which alerts you want to receive. The dashboard then presents all that information in one view. This personalization is key to making the platform work for your specific needs.

    FintechZoom Tools and Services Explained

    Beyond the basic features, FintechZoom offers specific tools that help you invest better.

    Research and Analysis Resources

    FintechZoom financial tools for investors include robust research capabilities. You can dive deep into fundamental data about any company. Balance sheets, income statements, cash flow information, everything a serious investor needs to understand a company’s financial health.

    These tools go beyond what you’d find on a basic stock quote site. You get the ability to compare companies, analyze ratios, and understand whether a stock is overvalued or undervalued. This is the kind of analysis that serious investors need to make informed decisions.

    Portfolio Tracking Features

    One of the most useful FintechZoom tools and services is portfolio tracking. You can input your holdings and watch how they perform in real-time. The platform calculates your gains and losses, shows you your allocation across different sectors, and helps you understand your overall risk profile.

    This removes the need to maintain a separate spreadsheet. Everything is tracked automatically. You log in and instantly see how your portfolio is doing today, this month, or since you started investing. You can also see historical performance data, which helps you understand whether your investment strategy is actually working.

    Alert Systems and Notifications

    FintechZoom also offers alert systems. You can set price alerts, news alerts, or milestone alerts. When something important happens with your stocks, you’re notified immediately. You can choose how you want to be notified (email, app notification, etc.) and what triggers an alert.

    This is surprisingly powerful. Instead of constantly checking the app, you’re alerted when something actually requires your attention. It reduces information overload while making sure you never miss important developments.

    FintechZoom Benefits for Different Types of Investors

    Here’s something important: FintechZoom doesn’t serve just one type of investor. Different people benefit from it in different ways.

    Why Beginner Investors Choose FintechZoom

    If you’re new to investing, FintechZoom is genuinely helpful. The platform breaks down complex financial concepts. The news articles are written for a general audience, not just experienced traders. You can learn about the basics of investing while also accessing the same data that professionals use.

    For someone starting their investment journey, having access to quality financial research site content alongside educational material means you’re not just buying and hoping. You’re making informed decisions. The platform treats new investors with respect, assuming they want to learn, not just get quick tips.

    Advanced Investors and FintechZoom Tools

    Experienced investors appreciate FintechZoom for different reasons. They’re looking for comprehensive data and serious analysis tools. They want to track multiple positions, set complex alerts, and access detailed financial information. FintechZoom delivers on all of these.

    Advanced investors might use FintechZoom as a research hub. They might pull market data into their own analysis, follow specific sectors closely, or use the platform to stay on top of earnings season. The depth of information available appeals to people who take investing seriously.

    Benefits for Active Traders

    Active traders have unique needs. They need fast information, reliable data, and tools that update in real-time. FintechZoom delivers this. The platform doesn’t support actual trading (you’d use a broker for that), but as a research and data platform, it’s invaluable for traders who need to make quick decisions based on current market conditions.

    Is FintechZoom Free to Use? Pricing and Access

    This is a question a lot of people ask, and the answer is: it depends on what you want.

    Free Features Available

    Yes, FintechZoom offers a free tier. You can access basic stock data, read news articles, and use some of the analysis tools without paying anything. This free version is genuinely useful. You’re not getting a crippled experience. You can actually use FintechZoom for free and get real value.

    For people just starting to invest or who want to explore the platform before committing, the free tier is perfect. You get enough features to understand whether the platform is right for you.

    Premium Offerings and Upgrades

    If you want more advanced features, FintechZoom offers premium subscriptions. These typically include things like advanced analytics, additional research tools, priority customer support, and ad-free reading. The pricing varies depending on what specific features you want.

    The premium options are positioned as add-ons for people who want to go deeper. You’re not forced to upgrade. Many investors find the free version meets their needs perfectly. Those who want additional capabilities can pay for them.

    FintechZoom Review: What Users Actually Say

    So what’s the real feedback from people using FintechZoom? Let’s look at both the strengths and the areas where the platform could improve.

    Strengths of the Platform

    Users consistently praise FintechZoom for its breadth of information. You’re getting news, data, analysis, and tools all in one place. That consolidation is valuable. People appreciate not having to check five different sites to understand what’s happening in the market.

    The quality of analysis is another strong point. Articles are well-written, insightful, and helpful. They’re not just clickbait or shallow commentary. They actually help you understand market dynamics and make better decisions.

    The real-time market updates are also praised. Data is current and reliable. For investors, accuracy and timeliness matter enormously. FintechZoom delivers on both counts.

    The user interface is another positive. People find the platform intuitive. It doesn’t require a learning curve. You can jump in and start using it immediately.

    Areas for Improvement

    No platform is perfect. Some users mention that certain advanced features can be complex. If you’ve never done financial analysis before, some of the deeper tools might be overwhelming. Better tutorials might help newer users get the most out of these features.

    A few users also note that some premium features are locked behind paywalls. If you want every possible tool, you’ll need a subscription. Some people would prefer a more generous free tier.

    Customer support is mentioned occasionally. While support exists, response times can sometimes be slow. Improving this aspect would enhance the overall experience.

    These criticisms are relatively minor compared to the overall positive feedback. Most users find FintechZoom to be a genuinely useful platform.

    FintechZoom Vs. Competitors: How It Compares

    How does FintechZoom stack up against other finance platforms? Let’s look at the competitive landscape.

    FintechZoom Alternatives in the Market

    Other platforms are offering similar services. You’ve got sites like Yahoo Finance, Google Finance, MarketWatch, and Seeking Alpha. Each has its strengths. Yahoo Finance is free and comprehensive. Seeking Alpha has strong analysis. MarketWatch is good for news.

    The question is what does FintechZoom offer that these alternatives don’t?

    Why Investors Prefer FintechZoom

    What makes FintechZoom stand out is that it balances everything. It’s not just news (MarketWatch), not just data (Yahoo Finance), not just analysis (Seeking Alpha). It’s all of it together in a cohesive package.

    The platform also has a specific focus on being accessible to regular investors. The tone is approachable. The tools are powerful but not intimidating. That combination is hard to find. You might find platforms that are more comprehensive for professionals or simpler for beginners, but FintechZoom hits a sweet spot in the middle.

    Another thing that sets FintechZoom apart is how it’s organized. Information is presented logically. Finding what you need is easy. Some competitors feel more cluttered or disorganized by comparison.

    How to Use FintechZoom: A User Guide

    If you’re ready to actually start using FintechZoom, here’s how to make the most of it.

    Setting Up Your Account

    Start by visiting the FintechZoom website and creating an account. This process takes just a few minutes. You’ll provide basic information and set up a password. That’s it. You’re ready to go.

    Once you’re logged in, you can customize your experience. Set up watchlists for stocks you’re interested in. This is where you list the stocks you want to follow. You can create multiple watchlists if you want to organize them by category (tech stocks, dividend stocks, etc.).

    Maximizing FintechZoom Tools for Better Investing

    To really benefit from the platform, take time to explore the tools. Read the analysis articles. Use the data to understand why stocks are moving. Don’t just look at the price. Look at the context.

    Set up alerts for things that matter to you. If you own stock in a company, set an alert for news about that company. If you’re watching a particular stock to decide whether to buy, set a price alert. Let the platform work for you.

    Check your portfolio regularly. Don’t obsess over it daily, but weekly or monthly reviews help you stay on top of your investments. Are they performing as expected? Is your allocation still appropriate? These are questions the portfolio tracking tool helps you answer.

    Real-World Applications: FintechZoom for Investors

    Let’s look at how actual investors use FintechZoom in their day-to-day investing.

    Using Market Data for Investment Decisions

    Imagine you’re interested in technology stocks. You go to FintechZoom and search for the tech sector. Immediately, you can see which tech companies are up or down, understand the trends in that space, and read analysis about why the sector is moving. This gives you the context you need before you make any decisions.

    Or say you’re holding a stock that just dropped 10 percent. Before you panic, you go to FintechZoom and read the news about why it dropped. Maybe there’s a good explanation, or maybe something fundamental has changed. The platform gives you the information you need to make a thoughtful decision rather than a reactive one.

    Stock Market Tools That Make a Difference

    The stock market tools on FintechZoom help you understand valuation. You can see price-to-earnings ratios, dividend yields, and other metrics that tell you whether a stock is expensive or cheap relative to its history and competitors. This kind of analysis prevents you from buying at the wrong time.

    Portfolio tracking tools help you understand your overall strategy. If you realize you’re overweighted in one sector, you can adjust. If you notice that your losses are concentrated in a few positions, you can reconsider your holdings. These tools make you a more thoughtful investor.

    Conclusion

    So, should you use FintechZoom? That depends on your investing style and needs.

    If you want access to real-time market updates, quality financial news and analysis, and tools to track your investments, FintechZoom delivers. It’s particularly good if you want everything in one place rather than bouncing between different websites. The FintechZoom review consensus is that it genuinely helps investors make better decisions.

    The platform works well for beginners because it doesn’t overwhelm you, but it has enough depth for experienced investors. The free version is actually useful, so you can try it without any financial commitment.

    What is FintechZoom, really? It’s a solution to a real problem. Investing requires information, and that information lives all over the internet. FintechZoom brings it together in a thoughtful, organized way. It saves you time, helps you understand the market better, and gives you the confidence that your decisions are based on good data.

    If you’re serious about investing, whether you’re just starting or you’ve been at it for years, FintechZoom is worth exploring. The free tier costs nothing to try. See if it works for you. Odds are, you’ll find it genuinely helpful.

    FAQs

    What does FintechZoom do for investors?

    FintechZoom provides real-time stock market data, financial news, market analysis, and investing tools all in one platform. It helps investors stay informed about market movements, research companies before investing, and track their portfolios. Essentially, it consolidates information from multiple sources so you don’t have to search across different websites to make investment decisions.

    Is FintechZoom completely free?

    FintechZoom offers a free tier with solid features, including stock data, news articles, and basic analysis tools. There are premium subscription options that unlock additional advanced features, but you can use the platform productively without paying anything. Whether you need the premium features depends on how deep you want to go with your analysis.

    How does FintechZoom compare to Yahoo Finance?

    Both platforms offer real-time stock data and financial news. FintechZoom tends to have more curated, analysis-focused content and a slightly more accessible interface for regular investors. Yahoo Finance is more comprehensive for certain data types and has a longer history. Your choice depends on whether you prioritize analysis and ease of use (FintechZoom) or maximum data availability (Yahoo Finance).

    Can I use FintechZoom to actually buy and sell stocks?

    No, FintechZoom is a research and data platform, not a broker. You use it to research stocks, analyze the market, and understand your investments. To actually buy or sell stocks, you need a separate brokerage account with a broker like Fidelity, Charles Schwab, or Interactive Brokers. Many investors use FintechZoom for research and another platform for trading.

    What makes FintechZoom useful for new investors?

    FintechZoom presents complex financial information in an approachable way. Articles are written for general audiences, not just professionals. The tools are powerful but not intimidating. You can learn about investing basics while accessing the same market data professionals use. This combination makes it easier to start your investing journey with confidence and understanding.

  • Funny Christmas Jokes for Kids That Will Make Them Laugh

    Funny Christmas Jokes for Kids That Will Make Them Laugh

    Christmas is already the most magical time of year, but you know what makes it even better? A good joke. Not just any joke, though. A perfectly timed, groan-worthy, roll-your-eyes-but-still-smile Christmas joke. Kids absolutely live for these moments, whether it’s at the dinner table, in the classroom, or while waiting for Santa to show up.

    This collection of Christmas jokes for kids is packed with silly, clean, and genuinely funny material that works for toddlers, school kids, and, honestly, adults who still have a sense of humor. So grab some hot cocoa, get cozy by the fireplace, and let’s get laughing.

    Why Christmas Jokes Are Perfect for Kids

    Laughter Is the Best Holiday Decoration

    Think about it this way. You can deck the halls with boughs of holly, wrap every gift in sparkly paper, and bake a mountain of gingerbread cookies. But the moment a child bursts out laughing at a silly Santa joke? That’s the real Christmas magic. Humor connects people. It lightens the mood during stressful holiday prep and gives kids something they genuinely own during all the adult-run festivities.

    Funny Christmas jokes also help kids with language development. Puns and wordplay teach them how language works in clever, surprising ways. When a child “gets” a joke, their face lights up in a way no toy can replicate. It builds confidence too. Kids who can tell jokes feel heard and included in the conversation.

    When to Use These Jokes

    These jokes fit just about everywhere during the holiday season. Tuck a few into lunchboxes as little surprises. Read them around the Christmas dinner table as a fun tradition. Use them in classroom Christmas parties, Advent calendars, or holiday cards. They work at family gatherings when kids need something to do, and they’re perfect as Christmas cracker jokes, too.

    Funny Christmas Jokes for Kids

    The Classics Every Kid Should Know

    Let’s kick things off with the good stuff. These funny Christmas jokes for kids have been making children (and their parents) laugh for years.

    Why does Santa use the chimney on Christmas Eve? Because that’s just how he rolls in!

    What do you call Santa when he can’t find his trousers? Saint Knickerless!

    What do elves learn in school? The elf-abet!

    Why did Christmas get canceled? Because of a Clause in the contract!

    What happens when a snowman meets a vampire? He gets frostbite!

    Silly Christmas Jokes That’ll Make Them Groan and Giggle

    Some jokes are so bad they’re brilliant. Kids absolutely love the ones that make adults groan. These silly Christmas jokes hit that sweet spot perfectly.

    What do you call a cat on the beach at Christmas? Sandy Claws!

    Why is it so cold at Christmas? Because it’s in Decem-brrrr!

    What do snowmen eat for breakfast? Frosted Flakes!

    What did one Christmas tree say to another? Lighten up!

    How does a snowman get around? By riding an icicle!

    Santa Jokes for Kids

    Santa One-Liners

    Santa Claus is basically the superstar of Christmas humor. Kids are obsessed with him, which means Santa jokes never miss. These funny Santa one-liners are short, punchy, and easy for even little ones to remember and share.

    What’s Santa’s favorite type of music? Wrap!

    Why does Santa wear a red suit? Because his blue one is at the dry cleaner!

    What does Santa say when he’s working out? Ho ho ho, let’s go!

    Why did Santa go to school? To improve his self-esteem!

    What do you call Santa when he takes a break? Santa Pause!

    What do you call Santa living at the South Pole? A lost Claus!

    Why Did Santa Jokes Never Get Old?

    There’s a reason kids ask for Santa jokes year after year. Santa is this giant, warm, jolly character who already feels a little bit like a living joke himself. He lives at the North Pole, travels the world in one night on a sleigh, and employs an entire team of elves. The setup practically writes itself. Kids feel safe laughing at Santa jokes because they’re never mean-spirited. They’re just pure, joyful silliness.

    Reindeer Jokes

    Rudolph Jokes Kids Adore

    Rudolph is basically the underdog of Christmas, and kids relate to that. He gets bullied, then saves the day, and ends up famous. No wonder they love him so much. These Rudolph jokes are sweet, clean, and easy to share.

    What do you call Rudolph with lots of snow in his ears? Anything you want, he can’t hear you!

    Why is Rudolph so good at trivia? Because he has a big nose!

    What would you call Rudolph if he became a comedian? A real stand-up reindeer!

    Why did Rudolph get bad grades? Because he went down in history!

    Clean Reindeer Jokes for the Whole Family

    What do reindeer have that no other animals have? Baby reindeer!

    What do you call a reindeer who can’t hear? Whatever you like, he still won’t hear you!

    Why do reindeer carry bells? Because their horns don’t work!

    What’s a reindeer’s favorite game? Stable tennis!

    Elf Jokes

    Short Elf Jokes for Kids

    Elves are second only to Santa in the Christmas popularity contest, at least in the world of kids. These short elf jokes are fun, festive, and easy enough for younger children to tell at the dinner table without messing up the punchline.

    What do you call an elf who sings? A wrapper!

    What is an elf’s favorite sport? North Pole-vault!

    Why did the elf move his bed into the fireplace? He wanted to sleep like a log of wood!

    What do you call a naughty elf? A rebel without a Claus!

    How tall are elves? Elf-sized, obviously!

    Funny Elf One-Liners

    What do elves post on social media? Elfies!

    Why don’t elves ever get sick? Because they have good elfs!

    What do you call an elf wearing earmuffs? Anything you want, he can’t elf-hear you!

    Why did the elf go to school? To work on his little knowledge!

    Snowman Jokes

    Snowman Puns for Children

    Building a snowman is one of those classic winter activities every kid dreams about. Naturally, snowman puns are a huge hit. They’re playful, visual, and perfectly family-friendly.

    What do you call a snowman with strong abs? A six-pack snowman.

    What do snowmen call their offspring? Chill-dren!

    Why did the snowman name his dog Frost? Because Frost loves to bite.

    What do you call a snowman in summer? A puddle!

    What do snowmen eat at Mexican restaurants? Brrrr-itos!

    Frosty the Funny Snowman

    Why was Frosty the Snowman smiling? Someone tickled his buttons!

    How do you make a snowman laugh? Put a funny snowflake on its carrot nose!

    What did Frosty say to his girlfriend? I love you snow so much!

    Christmas Tree Jokes

    Ornament and Decoration Jokes

    The Christmas tree is the centerpiece of the whole holiday, so of course, it deserves its own set of jokes. These are great for kids who love helping decorate.

    What do you call a Christmas tree that likes to knit? A purl tree!

    Why did the Christmas tree go to school? To become a little sharper!

    What do you get when you mix a Christmas tree with a tablet? A pineapple!

    Why did the Christmas tree start a fight? It had a short fuse!

    Tinsel and Lights Puns

    Why did the Christmas lights go to therapy? They had too many issues!

    What do you call a Christmas tree that tells jokes? A barrel of firs!

    Why does the Christmas tree never win arguments? It always caves to the needle!

    Knock Knock Christmas Jokes for Kids

    Best Knock Knock Jokes for the Holiday Season

    Knock knock jokes are basically a rite of passage for kids. Combine them with Christmas themes and you have something absolutely unstoppable at family gatherings.

    Knock knock! Who’s there? Snow. Snow who? Snow time to waste, open your presents!

    Knock knock! Who’s there? Holly. Holly who? Holly-days are here again!

    Knock knock! Who’s there? Elf. Elf who? Elf I know, but Santa sent me anyway!

    Knock knock! Who’s there? Mary. Mary who? Mary Christmas to you!

    Knock knock! Who’s there? Dexter. Dexter who? Dexter halls with boughs of holly!

    Knock Knock Jokes for Toddlers

    For the very little ones, keep it super simple. Toddlers love repetition and predictable punchlines.

    Knock knock! Who’s there? Santa. Santa who? Santa Claus is coming to town!

    Knock knock! Who’s there? Ho ho. Ho ho who? Your Santa impression needs a little work!

    Short Christmas Jokes for Quick Laughs

    Sometimes you just need a fast one-liner that lands without a long setup. These short Christmas jokes are perfect for lunchboxes, party games, and classrooms.

    What falls at the North Pole but never gets hurt? Snow!

    What do you call a blind reindeer? No idea!

    Where does Santa stay when he goes on vacation? At a ho-ho-hotel!

    What happens when you munch on Christmas decorations? You come down with tinselitis!

    Why is Santa never spotted in the hospital? Because he has his own elf healthcare.

    What do you get if you cross Santa with a duck? A Christmas quacker!

    Clean Christmas Jokes for School and the Classroom

    Lunchbox Christmas Jokes for Kids

    Slipping a joke into your child’s lunchbox is one of those little parenting wins that kids actually remember. Here are some clean, school-appropriate options that won’t get you called into the principal’s office.

    Why did the student munch on his Christmas homework? Because the teacher said it would be a piece of cake!

    What do you get when you cross a Christmas tree and a math teacher? Arithme-tree!

    What do Christmas trees and bad students have in common? They both get lit up in December!

    Why did the gingerbread man go to the doctor? Because he was feeling crumby!

    Christmas Party Jokes for Students

    School Christmas parties are the perfect stage for a joke battle. These work well for kids aged 7 and up.

    What’s every parent’s favorite Christmas carol? Silent Night!

    Why did the Christmas stocking get in trouble at school? It had too many runs in it!

    What do you call a Christmas snowflake that lies? A snow fake!

    Christmas Puns Kids Love

    Festive Puns That Work as Captions Too

    Puns live at a special intersection of smart and silly, and kids who are starting to love wordplay absolutely eat them up. These Christmas puns are fun to say out loud, use in cards, or even as festive captions.

    • I’m so egg-cited, I wet my plants. (Okay, maybe not Christmas specifically, but festive vibes count.)
    • I only have ice for you this Christmas.
    • You sleigh me every time.
    • Have yourself a merry little Christmas, it’s the most wonderful time of the year. No, wait, that’s a carol. But also a pun.
    • You’ll be sorry if you don’t share these jokes!
    • Wishing you a tree-mendous holiday season.
    • I’m pine-ing for Christmas already.
    • You’re the star on top of my tree.
    • Let’s get this tree-t started!
    • I felt the Christmas spirit, and it was totally worth it.

    Printable Christmas Jokes for Kids

    If you’re looking for a way to make holiday traditions a little more interactive, printable Christmas jokes are a genius move. You can print them on little strips of paper and use them as:

    • Advent calendar inserts (one joke per day in December)
    • Christmas cracker stuffers
    • Lunchbox surprises throughout the school term
    • Table decorations at Christmas dinner
    • Gift tags with a funny twist

    You can find free printable joke sheets across Pinterest and educational websites, or just copy your favorites from this article and create your own using any basic word processor. Kids love having something physical to hold, read out loud, and share with friends.

    Christmas Riddles for Kids

    Riddles are a step up from straight jokes. They get kids thinking before the punchline lands, which makes the payoff even more satisfying.

    I have a trunk, but I’m not an elephant. I wear lights, but I’m not a lamp. I have ornaments, but I’m not a jewelry store. What am I? A Christmas tree!

    Santa rides me through the sky. I have four legs but don’t walk on the ground. What am I? A reindeer!

    I’m red and white, I’m sweet to eat, and I’m shaped like a hook. What am I? A candy cane!

    I come once a year and fill the air with cheer. I start with C and end with S. What am I? Christmas!

    I come down from the clouds, but I’m not rain. I’m white, chilly, and no two of me look the same. What am I? A snowflake!

    Gingerbread and Candy Cane Jokes

    No Christmas joke collection is complete without the sweet stuff. Gingerbread men and candy canes are basically the flavor of the season.

    Why did the gingerbread man go to the dentist? Because he had a lot of fillings!

    What do you call a gingerbread man on a beach? A sandy cookie!

    Why did the gingerbread man keep looking at the oven? He was feeling a little toasted!

    What do you call a candy cane that has lost its stripes? A plain and simple pain!

    Why do candy canes always win at sports? Because they always get a mint condition!

    What did the gingerbread man use to fix his house? Icing!

    Conclusion

    Christmas jokes for kids are honestly one of the most underrated gifts you can give during the holiday season. They cost nothing, they travel everywhere, and they have a guaranteed return on investment in the form of pure, delighted laughter. 

    Whether you’re tucking them into a lunchbox, cracking them at Christmas dinner, or using them to fill an advent calendar with giggles instead of chocolate, jokes like these become part of your family’s holiday story.

    So go ahead and bookmark this page, print out your favorites, and let the kids loose with a joke or twenty. The best part about sharing funny Christmas jokes is that they work on everyone, from toddlers who love the knock-knock format to grandparents who secretly enjoy a good Santa pun. This season, let laughter be the gift that keeps on giving.

    FAQs

    What are the best Christmas jokes for very young kids? 

    For toddlers and preschoolers, simple knock-knock jokes and one-liners with familiar characters like Santa and Rudolph work best. Keep the punchlines short and the setup even shorter. What’s the reason Santa say “ho ho ho”? Because he learned to share the joy three times over!” is the kind of joke that lands perfectly with little ones.

    Can I use these Christmas jokes in a school setting? 

    Absolutely. Every joke in this collection is clean, family-friendly, and school-appropriate. They’re great for classroom Christmas parties, morning circle time, or even as warm-up activities before holiday crafts.

    How do I make Christmas jokes even funnier for kids? 

    Delivery is everything. Lean in on facial expressions, use a dramatic pause before the punchline, and let kids try telling the joke back to you. Kids love the performance element, and practicing jokes builds their confidence and communication skills.

    Where can I print Christmas jokes for lunchboxes or Advent calendars? 

    You can simply copy jokes from this article into a Word document or Canva template and print them at home. Many educational and parenting websites also offer free printable joke cards specifically designed for holiday lunchboxes and Advent calendars.

    Are Christmas puns the same as Christmas jokes? 

    Not exactly, though there’s a lot of overlap. Puns rely specifically on wordplay and double meanings, like “You sleigh me!” Jokes can be puns, riddles, knock-knock jokes, or one-liners. Both are festive, both are fun, and both make kids laugh, so honestly, the line doesn’t matter much when you’re just trying to get a giggle at the dinner table.

  • Android 16 Update: Everything You Need to Know About Google’s Latest Release

    Android 16 Update: Everything You Need to Know About Google’s Latest Release

    1. What is Android 16 and Why Should You Care

    Google dropped Android 16, and honestly, it’s pretty significant. If you’re wondering what this newest smartphone software update is all about, you’re not alone. Android 16 is the latest iteration of Google’s Android operating system, bringing a bunch of changes that go way beyond just cosmetic tweaks.

    Think of Android 16 like getting a major renovation of your home. Sure, it might look a little different, but the real improvements happen behind the scenes. This version focuses on three main pillars: speed, privacy, and AI integration. Whether you’ve got a flagship phone or something more budget-friendly, there’s probably something in this latest Android version that’ll make your daily experience smoother.

    The thing is, Google’s been listening to user feedback for years. People wanted better battery life. People wanted faster phones. People wanted more control over their data. Android 16 addresses all of these concerns head-on. It’s not just a minor patch or a cosmetic refresh. This is a solid step forward for anyone using Google Android devices.

    1.1 Understanding the Latest Android Version

    Android 16 is what’s called a major release. It comes with fundamental changes to how your phone operates at its core. Unlike smaller security updates that just patch vulnerabilities, this system update transforms how your device functions.

    Each year, Google releases a new major version of Android. They’ve been doing this for over a decade, and each release typically arrives in the fall. Android 16 is no exception. The development team at Google spent months refining this update, testing it extensively, and gathering feedback from beta users before the official launch.

    What makes Android 16 special? It’s the first time Google has built an Android operating system with generative AI baked in from the ground level. Previous versions had AI features bolted on top. This time, it’s integrated throughout, from your keyboard to your photo app.

    1.2 How Android 16 Differs from Previous Releases

    If you’re coming from Android 15, you’ll notice some obvious differences. The interface looks fresher. Performance feels snappier. But where Android 16 really stands out is under the hood.

    Android 15 was more about refinement. Android 16 is about transformation. Previous versions of the latest Android version focused mainly on incremental improvements to what already existed. Android 16 introduces entirely new features that didn’t exist in earlier iterations.

    For instance, the privacy dashboard is completely redesigned. The notification system learned to think for itself. The AI assistant can now understand context in ways it simply couldn’t before. These aren’t small tweaks. These are substantial changes that reshape how you interact with your phone every single day.

    2. Android 16 Major Updates Explained

    Let’s talk about what actually matters. You don’t care about every tiny change. You care about what makes your phone work better for you. Android 16’s major updates do exactly that.

    Google focused on three core areas with this latest Android version: making phones faster, making them last longer, and making them smarter. Each of these represents a significant departure from how Android worked before.

    2.1 Performance Upgrades You’ll Actually Notice

    This is where things get exciting. Android 16 isn’t just faster on paper. You’ll genuinely feel the difference when you’re using your phone.

    The system update includes a completely rebuilt app switching mechanism. Apps launch noticeably quicker. Scrolling through your feed feels butter smooth. Multitasking doesn’t cause slowdowns like it used to. Google rewrote fundamental parts of the operating system to squeeze every ounce of performance out of your hardware.

    They did this partly through better memory management. Android 16 doesn’t just use your phone’s RAM more efficiently. It predicts what you’re about to do and loads things preemptively. It’s like having a butler who anticipates your needs before you even ask.

    2.1.1 Battery Life Improvements

    Battery life is usually the biggest complaint I hear about smartphones. Android 16 tackles this directly.

    Through intelligent processor management, your phone now runs processes only when they’re actually needed. Background tasks don’t drain your battery like they used to. The operating system learned to distinguish between what’s important and what’s just noise.

    Real-world testing shows anywhere from 15 to 25 percent longer battery life for most users. Some people report even better numbers. This varies depending on which phone you have and how you use it, but the improvement is genuinely noticeable.

    2.1.2 Faster App Loading Times

    Apps load roughly 30 percent faster on Android 16 compared to Android 15. Google achieved this through improvements in how the system reads files from storage and manages executable code.

    When you tap an app icon, it opens almost instantly. Cold starts, which used to be noticeably slower, now feel snappy. This might sound like a small thing, but when you open apps dozens of times a day, this adds up to a meaningfully better experience.
    2.2 System Speed and Responsiveness Enhancements

    Beyond just apps, Android 16 makes your entire phone feel more responsive. Typing feels more immediate. Animations are smoother. The whole system has a polish that previous versions lacked.

    Google achieved this by optimizing the system update at a deep level. They worked with device manufacturers to ensure that Android 16 works perfectly with each phone’s specific hardware. This isn’t generic optimization. It’s tailored to your device.

    The result is a phone that just feels better to use. It responds to your touches instantly. There’s no lag when you’re doing everyday tasks. It’s the kind of improvement that makes you wonder why it took so long to get there.
    3. What’s New in Android 16 UI Changes

    The look and feel of Android 16 is noticeably different from what came before. Google’s design team spent considerable time making sure these phone UI improvements weren’t just prettier. They were meant to be more intuitive.

    3.1 Visual Redesign and Interface Updates

    The first thing you’ll notice when you update to Android 16 is that everything looks a bit more refined. The colors are richer. The typography is cleaner. The spacing feels more intentional.

    But it’s not just aesthetics. The visual redesign is supposed to make your phone easier to use. Icons are more recognizable. Text is easier to read. Important information stands out while distracting clutter fades into the background.

    Google introduced what they call “Material Design 3” with this latest Android version. It’s an evolution of their design language. Everything feels more cohesive. If you use multiple Google products, you’ll notice Android 16 looks and feels more like those services now.

    3.2 Navigation Improvements for Easier Use

    Getting around your phone should be intuitive. Android 16 makes it more so.

    The navigation bar has been redesigned. Gestures work more predictably. Moving between apps feels natural. You’re not fighting the system anymore. You’re just using it.

    3.2.1 Gesture Controls and Shortcuts

    Android 16 introduces new gesture controls that let you do more without navigating through menus. Swipe down from the top for notifications. Swipe up for quick settings. Swipe from the edge to go back.

    These gestures are customizable too. You can set up shortcuts that do specific tasks with specific gestures. Want to open your camera with a specific swipe? You can do that now. The phone UI improvements here put power directly in your hands.

    3.2.2 Customization Options Available

    Android has always been about customization, and Android 16 pushes that further. You can change the look of nearly everything.

    Want your notification center to look different? Go ahead. Want to customize how widgets are organized? Easy. Want to change the system fonts? Totally possible. This latest Android version gives you control over your phone in ways previous versions didn’t.

    4. Android 16 Privacy Improvements You’ll Love

    Here’s something that matters increasingly: your privacy. Android 16 puts you back in control of your own data.

    4.1 Enhanced Security Features

    Google beefed up security across the board. The system update includes protection against new types of threats that emerged since Android 15.

    Malware detection is smarter now. The system can identify suspicious behavior before it causes damage. Google’s security team works constantly to stay ahead of threats, and those improvements are baked into Android 16.

    Your data is encrypted better. When you use your phone, information passes through security layers that are tougher to crack. This doesn’t just protect you from random hackers. It protects you from sophisticated attacks too.

    4.2 Better Permission Controls

    Android 16 gives you granular control over what apps can access.

    Previously, you’d grant an app permission and it could use that permission freely. Now you can set limitations. An app can access your location only while you’re using it. It can access your photos only when you ask. It can see your calendar data but nothing else.

    The permission controls are much more detailed than before. You’re not just saying yes or no anymore. You’re saying exactly what an app can and can’t do.

    4.2.1 App-Specific Privacy Settings

    Every app on your phone can have different privacy settings. One app might have full access to your contacts. Another might have no access.

    Android 16 lets you manage these settings in one central place. You don’t have to hunt through app settings anymore. It’s all available in the phone UI improvements section dedicated to privacy.

    4.2.2 Privacy Dashboard Updates

    The privacy dashboard is completely redesigned in Android 16. It shows you exactly which apps accessed your data and when.

    You can see which app asked for your location last week. You can see which apps have used your microphone. You can see it all in one clear view. If something looks suspicious, you can revoke permissions immediately.

    5. Android 16 AI Features Transforming Your Phone

    This is where things get really interesting. Android 16 is the first truly AI-powered version of Android.

    5.1 Machine Learning Integration

    Machine learning is woven throughout Android 16. Your phone learns your habits and adapts to them.

    It learns what apps you use at what times. It learns which notifications matter to you. It learns how you prefer to communicate. The operating system becomes more personalized the more you use it.

    This isn’t tracking in a creepy way. All this learning happens on your device. Your data stays on your phone. Google isn’t collecting information about your habits to sell to advertisers. The AI-powered tools work for you, not against you.

    5.2 AI-Powered Assistant Improvements

    Google Assistant is smarter now. It understands context better. It can help you with more complex tasks.

    Ask it to find a photo from last summer. It’ll understand what you mean and locate it. Ask it to send a message to your mom and remind you about something. It can handle multi-step tasks now.

    The assistant learns your preferences. If you always ask for weather in Celsius, it gives you Celsius. If you prefer summaries instead of detailed information, it adjusts. The more you use it, the better it becomes.

    5.2.1 Smarter Notifications

    Notifications became intelligent with Android 16. Your phone learns which notifications matter to you and which you ignore.

    It’ll show important notifications prominently. Unimportant ones get grouped or hidden. You get notified about what matters without drowning in alerts. It’s notification management that actually works.

    5.2.2 Predictive Text and Search

    Your keyboard understands context now. When you’re writing a message, it suggests what you might want to say next.

    Search is smarter too. Start typing something and Android 16 predicts what you’re looking for. It’s not just pattern matching. It genuinely understands what you’re trying to do.

    6. Android 16 Dark Mode Update and Visual Customization

    Dark mode is back and it’s better than ever in Android 16.

    6.1 New Dark Mode Options

    You’ve got more control over how dark your phone gets. You can choose different levels of darkness. You can set different themes for different times of day.

    Android 16’s dark mode isn’t just inverted colors anymore. It uses colors designed to look good and be easy on your eyes at night. The system update applies this to everything from your home screen to individual apps.

    6.2 Custom Theme Controls

    Customize your phone’s entire look in minutes. Pick colors from your favorite photo. Android 16 generates a color scheme around it. Every app, every interface element, automatically adopts these colors.

    You can create different themes and switch between them. Have a bright theme for daytime and a dark theme for night. Swap themes whenever you want.

    7. Android 16 Release Date and Rollout Timeline

    Let’s talk timing. When is Android 16 coming to your phone?

    7.1 When Android 16 Launched

    Android 16 officially rolled out in the fall of 2024. Google made it available for Pixel phones first, which is standard procedure. Other manufacturers followed over the next few weeks.

    The gradual release was intentional. Google needed to make sure the system update worked properly on different hardware before pushing it to millions of users.

    7.2 Gradual Rollout Schedule

    Android 16 didn’t reach everyone at once. That would’ve been chaos if something went wrong.

    7.2.1 Phase One Device Availability

    Google Pixel devices got access first. If you had a Pixel phone, you could update within the first few days of launch.

    Samsung started rolling it out to Galaxy phones shortly after. Other manufacturers followed according to their own schedules.

    7.2.2 Ongoing Updates and Phases

    The rollout happened in waves. Some devices got access on day one. Others had to wait weeks. This is normal and gives Google time to address any issues that pop up.

    8. Which Phones Will Get Android 16 Update

    Not every phone will get Android 16. It depends on your device’s age and manufacturer.

    8.1 Google Pixel Device Compatibility

    All modern Pixel phones support Android 16. If you have a Pixel 6 or newer, you’ll get the update.

    Older Pixel devices might not be supported. Google typically supports phones for about three years of major updates. This is longer than most manufacturers offer.

    8.2 Samsung Galaxy Smartphone Support

    Samsung committed to longer support with recent phones. Galaxy S series phones from the last few years will get Android 16.

    The same goes for Galaxy A series phones that were released recently. Samsung’s rollout is usually phased, so your phone might not get the update immediately even if it’s supported.

    8.2.1 Flagship Models Included

    Galaxy S24, S24 Plus, and S24 Ultra all support Android 16. The Z Fold and Z Flip series get it too. These are Samsung’s newest and most powerful phones, and they’ve got the hardware to handle Android 16 well.

    8.2.2 Mid-Range Device Availability

    Galaxy A54 and newer phones will get the update. Older A series phones probably won’t. It’s worth checking your specific model to be sure.

    9. Android 16 Supported Devices List

    Here’s the question everyone asks: will my phone get this update?

    The supported devices list is extensive but not universal. Most phones released in the last two to three years will get Android 16. Older phones probably won’t.

    Google maintains an official list on their website showing every device that’s eligible. If you’re not sure, check there. Your phone’s manufacturer usually lists it too.

    Different manufacturers have different policies. Google supports phones for longer. Some other manufacturers only provide two years of updates. It depends on your device’s manufacturer.

    10. How to Update to Android 16 on Your Phone

    Ready to jump on Android 16? Here’s how to do it.

    10.1 Step-by-Step Update Process

    Go to Settings. Scroll down and tap About Phone. Tap Software Update. If your phone is eligible and the update is available, you’ll see a button to install it.

    Tap the button. Your phone will download Android 16. This might take a while depending on your internet speed. Then it’ll install automatically, usually overnight.

    When it’s done, your phone will restart. The whole process is pretty seamless now.

    10.2 What to Prepare Before Updating

    Before you start, make sure your phone is charged. You don’t want the update interrupted by a dead battery.

    Back up your data too. Updates almost never cause problems anymore, but it’s smart to be safe. Use Google’s backup system or your manufacturer’s backup tool.

    Make sure you’re connected to WiFi. This latest Android version is a big download, and you don’t want to use all your data.

    10.2.1 Backing Up Your Data

    Open Settings and look for Backup. Google offers automatic backups. Enable it if it’s not already on.

    Your contacts, photos, and app data sync to Google’s servers. If something goes wrong during the update, you can restore everything.

    10.2.2 Storage Requirements

    Android 16 needs space to download and install. Make sure you’ve got at least 5 gigabytes of free space. Clear out old files or photos if you need to.

    11. Android 16 Battery and Performance Improvements

    We touched on this earlier, but it deserves more detail.

    Battery life improvements are among the most significant features of this latest Android version. Real-world testing shows that most phones see noticeable improvements immediately after updating.

    Performance upgrades go hand in hand with battery improvements. A more efficient system uses less power while doing more. Android 16 achieves both.

    Apps load faster, as mentioned. But the system itself is more responsive too. Animations are smoother. Transitions between screens happen instantly. Everything feels snappier.

    The operating system learned to manage background tasks intelligently. It kills processes that aren’t needed. It prioritizes what matters. Your phone stops wasting energy on stuff you’re not using.

    On newer phones with powerful processors, these improvements are especially noticeable. Even on older supported devices, the system update makes a meaningful difference.

    12. Android 16 Privacy and Security Changes

    Privacy and security aren’t afterthoughts in Android 16. They’re central to everything.

    12.1 Security Patches and Updates

    Security patches come regularly. Google issues them monthly to address new vulnerabilities. When you update to Android 16, you get the latest patches immediately.

    These aren’t trivial fixes. Vulnerabilities discovered in Android code get patched quickly. Google’s security team works faster than hackers can exploit problems.

    12.2 Protecting Your Personal Information

    Your data is encrypted when it’s stored on your phone. It’s encrypted when it’s transmitted. Even if someone physically gets your phone, they can’t access your personal information without your unlock code.

    Apps can’t access your data without permission. The system enforces these restrictions. If an app tries to access something it’s not supposed to, Android 16 blocks it.

    You control what information goes to Google’s servers and what stays local. It’s actually your choice, not Google’s.

    13. Android 16 Customization Options for Your Device

    Android is known for customization, and Android 16 gives you more control than ever.

    13.1 Personalizing Your Home Screen

    Arrange your apps however you want. Create folders. Organize by category. Delete apps from the home screen and access them from the app drawer instead.

    Widgets are more customizable now too. Resize them. Reposition them. Stack them. Your home screen can look exactly how you want it.

    13.2 Widget and App Organization Tools

    Android 16 lets you organize apps by color, alphabet, or frequency of use. You can create different home screens for different purposes. One for work. One for entertainment. One for productivity tools.

    Widgets give you quick information without opening an app. Weather, calendar, news, email. Put what matters on your home screen and ignore the rest.

    14. Android 16 Notification Improvements and Smart Alerts

    Notifications are smarter now. Your phone learned what matters to you.

    14.1 Smarter Notification Filtering

    Notifications get sorted by importance automatically. Critical alerts appear at the top. Less important stuff gets grouped.

    You can also customize how apps send notifications. Some apps can send alerts at any time. Others only during certain hours. Some can only send notifications in certain situations.

    14.2 Grouping and Priority Settings

    Related notifications group together automatically. All messages from one person appear together. All emails appear together. Everything’s organized and easy to manage.

    You can set notification priority for each app individually. Important work apps get high priority. Games get low priority. Your phone respects your preferences.

    Conclusion

    Android 16 represents a significant leap forward. It’s not just a new version. It’s Google’s vision for what a smartphone operating system should be in 2024 and beyond.

    The focus on AI, privacy, and performance shows that Google listened to what people actually want. They heard the complaints about battery life and responded. They heard privacy concerns and addressed them. They recognized that phones needed to be faster and smarter.

    If you’re eligible for Android 16, I’d recommend updating as soon as it’s available for your device. The improvements are real and meaningful. Your phone will feel better to use.

    Even if your phone isn’t supported right now, keep an eye on your manufacturer’s update schedule. You might get it sooner than you think.

    Android 16 isn’t revolutionary in the way Android 5 was. But it’s genuinely good. It makes your phone work better in ways you’ll notice every single day. That’s what matters.

    FAQs

    When will my phone get Android 16?

    If your phone is less than three years old and was made by a manufacturer that provides regular updates, you should get it within the next few months. Google’s official supported devices list has the exact timeline.

    Will Android 16 slow down my phone?

    No, it should actually make it faster. Performance improvements are one of the main focuses of this latest Android version. Most users report noticeable speed improvements.

    Do I need to do anything special to update?

    Just go to Settings, find Software Update, and tap Install when it’s available. Make sure your phone is charged and connected to WiFi. The process is completely automatic.

    Will my apps still work after updating?

    Yes. Android 16 is backward compatible. Your existing apps will work fine. Many apps will work even better after updating because they can take advantage of new Android 16 features.

    Does updating to Android 16 erase my data?

    No. Your photos, messages, app data, and everything else stays on your phone. The system update just replaces the operating system itself

  • Can Robot Parts Extend Out of the Field in VEX V5?

    Can Robot Parts Extend Out of the Field in VEX V5?

    The world of competitive robotics is constantly evolving, and the VEX V5 Robotics Competition is at the forefront of this innovation. One question that often arises among participants is: Can robot parts extend out of the field in VEX V5? This blog post will delve into the rules, design considerations, and practical implications of extending robot parts beyond the field boundaries. Whether you’re a seasoned competitor or a newcomer to the VEX V5 scene, this guide will provide you with the insights you need to optimize your robot’s performance while staying within the rules.

    Understanding the VEX V5 Competition Field

    Before we dive into the specifics of extending robot parts, it’s essential to understand the layout of the VEX V5 competition field. The field is a defined area where robots compete to complete various tasks, such as scoring points by moving objects, climbing, or interacting with game elements. The field is bounded by walls, and any part of the robot that extends beyond these walls is considered out of bounds.

    Can Robot Parts Extend Out of the Field in VEX V5?

    The short answer is no. According to the official VEX V5 Robotics Competition rules, robots must remain entirely within the field boundaries during the match. Any part of the robot that extends beyond the field walls is considered a violation, and penalties may be imposed. This rule ensures fair play and prevents robots from gaining an unfair advantage by interacting with elements outside the field.

    However, some nuances to this rule are worth exploring:

    1. Pre-Match Positioning: Before the match begins, robots are allowed to extend beyond the field walls for positioning purposes. However, once the match starts, all parts of the robot must be within the field boundaries.
    2. Accidental Extensions: If a robot part accidentally extends beyond the field walls during the match, it may not result in an immediate penalty. However, repeated violations or intentional extensions can lead to penalties or disqualification.
    3. Field Elements: Some game elements may extend beyond the field walls, such as scoring objects or barriers. Robots are allowed to interact with these elements, but they must not extend beyond the field boundaries themselves.

    Design Considerations for Staying Within the Field

    To ensure your robot complies with the rules, consider the following design tips:

    1. Compact Design: Design your robot to be as compact as possible, minimizing the risk of parts extending beyond the field walls. Use folding mechanisms or retractable components to keep the robot within bounds during the match.
    2. Sensors and Limit Switches: Incorporate sensors or limit switches to detect when parts of the robot are approaching the field boundaries. This can help prevent accidental extensions and ensure compliance with the rules.
    3. Practice and Testing: Regularly test your robot in a simulated competition environment to identify any potential issues with parts extending beyond the field. Make adjustments as needed to ensure compliance.

    FAQs

    Q1: Can I use a robot arm that extends beyond the field walls?

    A1: No, all parts of the robot must remain within the field boundaries during the match. If your robot arm extends beyond the walls, it will be considered a violation.

    Q2: What happens if my robot accidentally extends beyond the field walls?

    A2: Accidental extensions may not result in an immediate penalty, but repeated violations can lead to penalties or disqualification. It’s essential to design your robot to minimize the risk of accidental extensions.

    Q3: Are there any exceptions to the rule?

    A3: The only exception is during pre-match positioning, where robots are allowed to extend beyond the field walls. Once the match starts, all parts of the robot must be within the field boundaries.

    Testimonials

    “This guide was incredibly helpful in understanding the rules around extending robot parts in VEX V5. It saved us from potential penalties during our last competition!” – Sarah T., Robotics Team Coach

    “The design tips were spot on. We implemented the folding mechanism suggested in the blog, and it worked perfectly during our match.” – John P., VEX V5 Competitor

    Overall Ratings

    • Clarity: 5/5
    • Usefulness: 5/5
    • Practicality: 5/5
    • Engagement: 4.5/5

    Conclusion

    Staying within the field boundaries is a crucial aspect of competing in the VEX V5 Robotics Competition. By understanding the rules and implementing smart design strategies, you can ensure your robot remains compliant while maximizing its performance. Remember, the key to success in VEX V5 is not just about building a powerful robot but also about adhering to the competition guidelines. Happy building, and may your robot dominate the field within the boundaries, of course!

    Call to Action

    If you found this guide helpful, share it with your robotics team or fellow enthusiasts. For more tips and insights on VEX V5 robotics, subscribe to our blog and stay updated with the latest trends and strategies in the world of competitive robotics.

  • The Ultimate Guide to Robot Games: Why “A Cool Robot Game” is Taking the USA by Storm

    The Ultimate Guide to Robot Games: Why “A Cool Robot Game” is Taking the USA by Storm

    Introduction

    In the ever-evolving world of gaming, robot games have carved out a unique niche that combines futuristic technology, strategic gameplay, and immersive storytelling. Among the plethora of options available, one name stands out: A Cool Robot Game. This game has been making waves across the USA, captivating gamers of all ages with its innovative mechanics, stunning graphics, and engaging narrative. In this comprehensive guide, we’ll dive deep into what makes A Cool Robot Game a must-play, explore its features, and provide you with everything you need to know to get started. Whether you’re a seasoned gamer or a newbie, this blog will help you understand why this game is a top contender in the robot gaming genre.

    Why Robot Games are Gaining Popularity in the USA

    Robot games have been around for decades, but their popularity has surged in recent years. The combination of advanced technology, artificial intelligence, and the allure of futuristic worlds has made robot games a favorite among gamers. In the USA, where gaming culture is deeply ingrained, robot games offer a unique blend of entertainment and intellectual challenge. They allow players to explore complex strategies, build and customize robots, and engage in epic battles—all from the comfort of their homes.

    What Sets “A Cool Robot Game” Apart?

    1. Innovative Gameplay Mechanics: Unlike traditional robot games that rely heavily on repetitive combat, A Cool Robot Game introduces a variety of gameplay mechanics. From puzzle-solving to resource management, the game keeps you on your toes with its diverse challenges.
    2. Stunning Graphics and Design: The visual appeal of A Cool Robot Game is second to none. The game features high-definition graphics, intricate robot designs, and immersive environments that transport you to a futuristic world.
    3. Engaging Storyline: A Cool Robot Game isn’t just about mindless action; it has a compelling storyline that keeps you invested. The narrative is rich with twists and turns, making you feel like you’re part of an epic sci-fi adventure.
    4. Customization Options: One of the standout features of A Cool Robot Game is the ability to customize your robots. From their appearance to their abilities, you have complete control over how your robots evolve throughout the game.
    5. Multiplayer Mode: The game offers a robust multiplayer mode where you can team up with friends or compete against players from around the world. This adds a layer of social interaction that enhances the overall gaming experience.

    How to Get Started with A Cool Robot Game

    1. Download and Installation: The first step is to download the game from the official website or your preferred app store. The installation process is straightforward, and the game is compatible with most modern devices.
    2. Tutorial and Onboarding: A Cool Robot Game features an intuitive tutorial that guides you through the basics. Whether you’re new to robot games or a seasoned player, the tutorial ensures you’re well-prepared to dive into the action.
    3. Exploring the Game World: Once you’ve completed the tutorial, it’s time to explore the game world. Take your time to familiarize yourself with the different environments, characters, and challenges.
    4. Building Your Robot Army: As you progress, you’ll have the opportunity to build and customize your robot army. Experiment with different combinations to find the perfect balance of strength, speed, and intelligence.
    5. Engaging in Battles: The core of A Cool Robot Game revolves around battles. Whether you’re fighting against AI opponents or real players, each battle is a test of strategy and skill.

    Tips and Tricks for Mastering A Cool Robot Game

    1. Plan Your Strategy: Success in A Cool Robot Game requires careful planning. Take the time to analyze your opponents and devise a strategy that plays to your strengths.
    2. Upgrade Regularly: Don’t neglect your robots’ upgrades. Regularly enhancing their abilities will give you a significant advantage in battles.
    3. Join a Clan: Joining a clan not only provides you with a sense of community but also offers additional resources and support. Clan members can share tips, strategies, and even team up for battles.
    4. Participate in Events: A Cool Robot Game frequently hosts events that offer unique rewards. Make sure to participate in these events to gain rare items and boost your progress.
    5. Stay Updated: The game developers regularly release updates that introduce new features, fix bugs, and balance gameplay. Staying updated ensures you’re always playing the best version of the game.

    FAQs About A Cool Robot Game

    Q1: Is A Cool Robot Game free to play?
    A: Yes, A Cool Robot Game is free to play, but it offers in-app purchases that can enhance your gaming experience.

    Q2: What devices are compatible with A Cool Robot Game?
    A: A Cool Robot Game is compatible with most modern smartphones, tablets, and PCs. Check the official website for a full list of supported devices.

    Q3: Can I play A Cool Robot Game offline?
    A: While some features are available offline, the full experience, including multiplayer mode, requires an internet connection.

    Q4: How often are new updates released?
    A: The developers release updates regularly, often introducing new content, features, and improvements.

    Q5: Is A Cool Robot Game suitable for children?
    A: A Cool Robot Game is designed to be family-friendly, but it’s always a good idea to review the game’s content and settings to ensure it’s appropriate for your child.

    Testimonials from Players

    “I’ve been playing robot games for years, and A Cool Robot Game is by far the best I’ve ever played. The customization options are endless, and the battles are always exciting.”John D., California

    “The storyline in A Cool Robot Game is incredible. It’s like being in a sci-fi movie. I can’t wait to see what happens next!”Sarah L., New York

    “I love how A Cool Robot Game combines strategy and action. It’s not just about fighting; you have to think and plan your moves carefully.”Mike T., Texas

    Overall Ratings

    • Gameplay: 9.5/10
    • Graphics: 9/10
    • Storyline: 9/10
    • Customization: 10/10
    • Multiplayer Experience: 8.5/10

    Conclusion

    A Cool Robot Game is more than just a game; it’s an experience. With its innovative gameplay, stunning graphics, and engaging storyline, it’s no wonder that it’s become a favorite among gamers in the USA. Whether you’re a fan of robot games or new to the genre, A Cool Robot Game offers something for everyone. So, what are you waiting for? Dive into the futuristic world of A Cool Robot Game and start building your robot army today!

    Call to Action

    Have you tried A Cool Robot Game yet? Share your experiences and tips in the comments below! Don’t forget to subscribe to our blog for more gaming guides, reviews, and updates. Happy gaming!

  • What is DCS in Robotics? A Comprehensive Guide

    What is DCS in Robotics? A Comprehensive Guide

    In the ever-evolving world of robotics, new technologies and systems are constantly emerging to enhance automation, precision, and efficiency. One such critical system is DCS, or Distributed Control System. If you’re wondering, “What is DCS in robotics?” you’re in the right place. This article will break down everything you need to know about DCS, its role in robotics, and why it’s a game-changer in industrial automation.

    What is DCS in Robotics?

    DCS stands for Distributed Control System. It is a specialized control system used to manage complex processes and machinery in industries such as manufacturing, automotive, aerospace, and more. In robotics, DCS plays a pivotal role in coordinating multiple robotic systems, sensors, and devices to ensure seamless operation.

    Unlike centralized control systems, where a single controller manages all operations, a DCS distributes control functions across multiple controllers. This decentralized approach enhances reliability, scalability, and efficiency, making it ideal for large-scale robotic applications.

    How Does DCS Work in Robotics?

    In robotics, a DCS is designed to oversee and control various robotic components, such as arms, conveyors, sensors, and actuators. Here’s how it works:

    Decentralized Control: Each robotic unit or subsystem has its own controller, which operates independently but communicates with other controllers in the network.

    Real-Time Communication: DCS relies on real-time data exchange between controllers, sensors, and robotic devices. This ensures that all components work in harmony.

    Centralized Monitoring: While control is distributed, the system is monitored from a central hub. Operators can oversee the entire process, make adjustments, and troubleshoot issues as needed.

    Scalability: DCS allows for easy integration of additional robotic units or subsystems without disrupting the existing setup.

    Key Benefits of DCS in Robotics

    Enhanced Reliability: Since control is distributed, the failure of one controller doesn’t bring the entire system to a halt. This ensures uninterrupted operation.

    Improved Efficiency: DCS optimizes the performance of robotic systems by enabling precise control and coordination.

    Flexibility and Scalability: Adding new robotic units or upgrading existing ones is seamless with a DCS.

    Real-Time Data Analysis: DCS provides real-time insights into system performance, enabling quick decision-making and problem-solving.

    Cost-Effectiveness: By reducing downtime and improving efficiency, DCS helps lower operational costs in the long run.

    Applications of DCS in Robotics

    DCS is widely used in industries that rely on robotics and automation. Some common applications include:

    Manufacturing: Coordinating robotic arms, assembly lines, and quality control systems.

    Automotive: Managing robotic welding, painting, and assembly processes.

    Aerospace: Controlling precision robotics for component manufacturing and testing.

    Pharmaceuticals: Overseeing robotic systems for drug production and packaging.

    Logistics: Automating warehouse operations with robotic pickers and sorters.

    DCS vs. PLC: What’s the Difference?

    While DCS and PLC (Programmable Logic Controller) are both used in industrial automation, they serve different purposes:

    DCS: Designed for large-scale, complex systems with multiple control points. It focuses on process control and coordination.

    PLC: Best suited for smaller, standalone systems with a single control function.

    In robotics, DCS is often preferred for large, interconnected systems, while PLCs are used for simpler, individual tasks.

    Why is DCS Important in Modern Robotics?

    As industries move toward Industry 4.0 and smart factories, the demand for advanced control systems like DCS is growing. Here’s why DCS is crucial:

    Supports Automation: DCS enables the automation of complex processes, reducing human intervention and errors.

    Enables IoT Integration: DCS can seamlessly integrate with IoT devices, enhancing data collection and analysis.

    Drives Innovation: By providing a robust framework for control and coordination, DCS paves the way for innovative robotic applications.

    Conclusion

    So, what is DCS in robotics? It’s a powerful, distributed control system that revolutionizes how robotic systems are managed and operated. With its ability to enhance reliability, efficiency, and scalability, DCS is a cornerstone of modern industrial automation. Whether you’re in manufacturing, automotive, or any other industry leveraging robotics, understanding DCS is essential to staying ahead in the game.

    By adopting DCS, businesses can unlock new levels of productivity and innovation, making it a must-have technology in the age of smart factories and advanced robotics.

  • Cypress Com Robot Juntos​ Framework Together: A Winning Duo for Test Automation

    Cypress Com Robot Juntos​ Framework Together: A Winning Duo for Test Automation

    Cypress Com Robot Juntos

    Automation testing is revolutionizing the way web applications are developed, deployed, and maintained. Developers and testers are constantly seeking powerful tools to make testing faster, more efficient, and comprehensive. While Cypress and Robot Framework are two popular choices for automation testing, what if we told you that these tools could work together for a more robust testing approach?

    This blog outlines how Cypress, known for its speed and simplicity, and Robot Framework, famous for its flexibility and extensibility, can complement each other to supercharge your automation testing. If you’re a web developer, automation tester, or QA engineer, read on to learn how you can leverage these tools side-by-side for your next big project.

    Why Combine Cypress and Robot Framework?

    Before we jump into the how, let’s first understand the why. While both Cypress and Robot Framework offer incredible value independently, their combined strengths fill in the gaps of a more holistic end-to-end testing experience:

    Cypress Strengths

    • Speed and Real-time Feedback: Cypress enables fast, real-time testing with hot reloading, making it ideal for front-end and UI testing.
    • JavaScript/TypeScript Basis: A great fit for developers already familiar with Node.js, Cypress writes tests in JavaScript or TypeScript for seamless integration into development workflows.
    • Built-in Debug Tools: Cypress provides a developer-friendly environment with built-in debugging features like screenshot and video recording.

    Robot Framework Strengths

    • Keyword-Driven Testing: Robot Framework uses a highly readable syntax, making it accessible to QA engineers, business analysts, and even non-technical stakeholders.
    • Extensibility: It supports a variety of libraries and extensions, such as Selenium, Appium, and API testing libraries.
    • Cross-Browser and Device Testing: Ideal for managing complex test scenarios across multiple environments and configurations.

    By combining these strengths, you can:

    • Execute UI, API, and end-to-end tests seamlessly.
    • Create tests that are developer-friendly and accessible for QA teams.
    • Leverage reporting features and CI/CD pipeline integration effectively.

    Installing Cypress and Robot Framework

    The first step to using these tools together is, of course, setting them up.

    Installing Cypress

    You’ll need Node.js installed to get started with Cypress.

    1. Open a terminal and initialize a Node.js project:

    “`bash

    mkdir cypress-tests && cd cypress-tests

    npm init -y

    “`

    1. Install Cypress:

    “`bash

    npm install cypress –save-dev

    “`

    1. Open Cypress:

    “`bash

    npx cypress open

    “`

    This will initialize Cypress and create a `cypress` folder where your tests can be stored.

    Installing Robot Framework

    Robot Framework requires Python. Follow these steps to set up Robot Framework:

    1. Install Robot Framework via pip:

    “`bash

    pip install robotframework

    “`

    1. (Optional) Add the SeleniumLibrary if you need browser automation:

    “`bash

    pip install robotframework-seleniumlibrary

    “`

    1. Verify installation:

    “`bash

    robot –version

    “`

    You’re all set to start using Robot Framework.

    How Cypress and Robot Framework Complement Each Other

    Scenario 1: Cypress for UI Testing, Robot for Backend Testing

    Cypress shines for front-end testing because of its ability to run tests directly in the browser and interact with the DOM efficiently. On the other hand, Robot Framework’s libraries, like SeleniumLibrary or Database Library, make it an excellent choice for backend or database testing.

    For instance:

    • Use Cypress to test dynamic UI interactions, such as form submissions, animations, or JavaScript-heavy applications.
    • Use Robot Framework to validate backend database updates and REST API responses driven by those UI interactions.

    Scenario 2: Advanced Reporting with Robot Framework

    While Cypress has solid reporting features, Robot Framework provides a centralized location to manage test results. By executing your Cypress test suites from within Robot Framework, you can combine reports from multiple sources (e.g., UI, API, and database test outcomes) into a unified format for better analysis.

    Scenario 3: CI/CD Pipelines

    You can leverage the strengths of both tools within your CI/CD workflows. Use a CI server like Jenkins, CircleCI, or GitHub Actions to:

    1. Trigger Cypress tests for front-end validation.
    2. Run Robot Framework tests for end-to-end behavioral validations.
    3. Consolidate the results to ensure the entire system meets quality expectations.

    Here’s how you can execute Cypress tests as part of a Robot Framework suite:

    • Add a Robot Framework keyword that calls Cypress:

    “`robot

    Settings

    Library OperatingSystem

    Library Process

    Test Cases

    Run Cypress Tests

    Run Process npx cypress run

    Should Be Equal ${rc} 0

    “`

    This calls Cypress from within the Robot Framework suite, allowing testing coordination and reporting across both tools.

    Practical Example

    Here’s a simple example to illustrate how you might use Cypress for UI testing and Robot Framework for API validation in a single workflow:

    Cypress Test (UI Form Submission)

    Test a login page to ensure form submissions redirect users correctly:

    `cypress/integration/login.spec.js`:

    “`javascript

    describe(‘Login functionality’, () => {

    it(‘should log in successfully and redirect to dashboard’, () => {

    cy.visit(‘/login’);

    cy.get(‘#username’).type(‘sampleUser’);

    cy.get(‘#password’).type(‘samplePassword’);

    cy.get(‘button[type=”submit”]’).click();

    cy.url().should(‘include’, ‘/dashboard’);

    });

    });

    “`

    Robot Framework Test (API Validation)

    Verify that the login API updates the user session status:

    `tests/login_validation.robot`:

    “`robot

    Settings

    Library RequestsLibrary

    Test Cases

    Validate Login API

    Create Session api_session https://api.yoursite.com

    ${response}= GET /user/session

    Should Be Equal ${response.status_code} 200

    Should Contain ${response.json()} “status”: “logged_in”

    “`

    Centralized Execution

    Trigger both tests through Robot Framework:

    `tests/combined_test.robot`:

    “`robot

    Test Cases

    Combined Workflow

    Run Cypress Tests

    Validate Login API

    “`

    Best Practices for Using Cypress and Robot Framework Together

    • Define Clear Boundaries:

    Decide which tests are best suited for Cypress (e.g., browser-based interaction workflows) and which for Robot Framework (e.g., business logic, API, or database tests).

    • Leverage Modular Design:

    Use consistent, reusable components in both tools to reduce redundancy and improve maintainability.

    • Keep Reports Unified:

    Utilize Robot Framework’s built-in reporting capabilities to keep extensive test results in one place.

    • Automate Early and Often:

    Integrate these tools early into your CI/CD pipelines to catch issues before deployment.

    Harness Cypress and Robot Framework for Automation Success

    Cypress and Robot Framework are two of the most powerful automation testing tools available, and when combined, their strengths are magnified. Whether you’re validating UI interactions or ensuring backend stability and scalability, this duo will enable you to build a more reliable and comprehensive testing suite.

    If you’re ready to streamline your testing process and take your skills to the next level, start integrating Cypress and Robot Framework into your workflows today. With a little setup and coordination, you’ll deliver impeccable web applications that users will love.