Most people don’t think about AirDrop until something weird happens. Maybe a stranger sent you a random photo at the airport. Maybe your kid accidentally received something they shouldn’t have. Or maybe you just read something online about AirDrop security risks and now you’re second-guessing whether yours is even turned on.
Whatever brought you here, you’re asking the right question. Knowing how to disable AirDrop isn’t just a tech tip, it’s a genuine privacy move. And the good news is, it takes about thirty seconds once you know where to look.
This guide walks you through everything: how to turn off AirDrop on iPhone, iPad, and Mac, what the different settings actually mean, and why controlling your AirDrop visibility matters more than most people realize.
What Exactly Is AirDrop and How Does It Work?
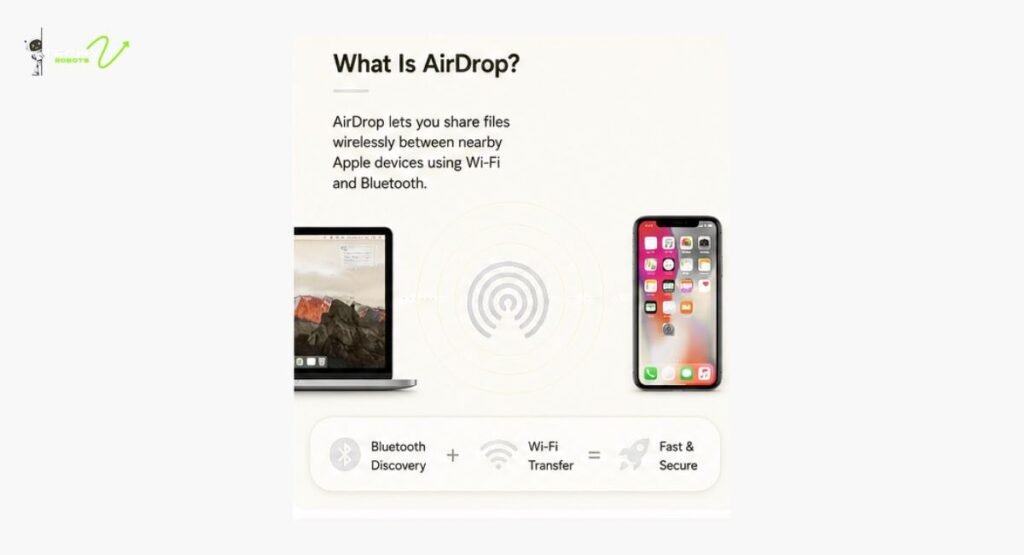
Before we get into disabling it, let’s quickly understand what we’re dealing with. AirDrop is Apple’s built-in wireless file sharing feature that lets you send photos, videos, documents, links, and other files between nearby Apple devices without needing an internet connection or even being on the same Wi-Fi network.
It runs on a combination of Bluetooth Low Energy and Wi-Fi. Bluetooth handles the discovery part; your device essentially broadcasts a signal that nearby devices can pick up. Once two devices recognize each other, the actual file transfer happens over Wi-Fi, which makes it fast and reliable.
The thing is, that Bluetooth broadcasting happens quietly in the background, even when you’re not actively using AirDrop. So if your settings are open, your iPhone or Mac might be visible to every Apple device nearby without you realizing it.
Why Would You Want to Disable AirDrop?
Good question. AirDrop is genuinely useful when you’re sharing files with people you know. But there are some real reasons to either turn it off completely or tighten up the settings.
Unwanted Files and Unsolicited Images
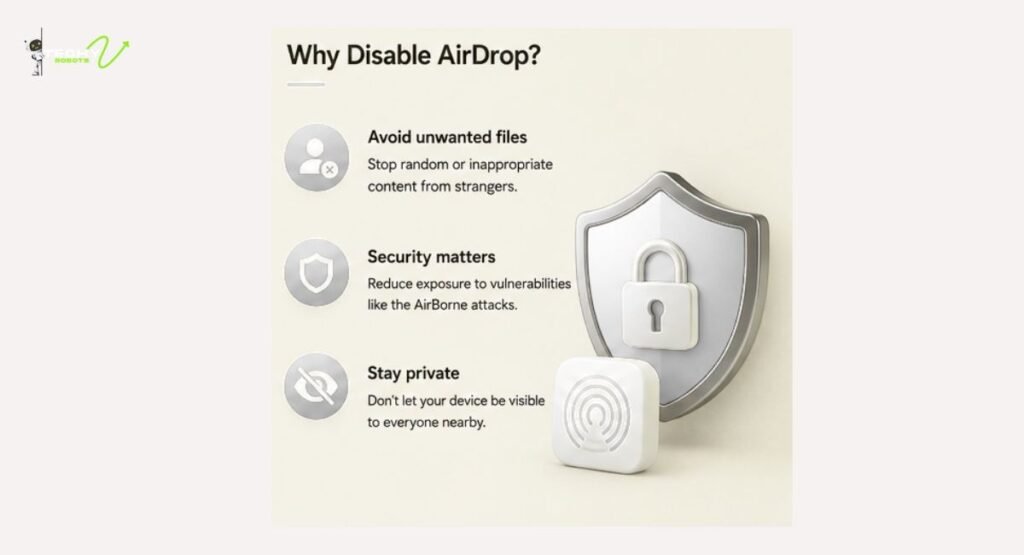
This is the most common reason people want to disable AirDrop. The “Everyone” setting means literally anyone nearby with an Apple device can send you a file request. You’ve probably heard stories about people receiving inappropriate or unsolicited images in public places — on trains, in airports, at concerts. It’s uncomfortable, it’s intrusive, and it happens more than you’d think.
Even if you don’t accept the file, the preview pops up on your screen for everyone around you to see. That alone is reason enough to reconsider your settings.
The AirBorne Vulnerability Explained
Here’s something that doesn’t get talked about enough. Security researchers discovered a series of vulnerabilities in AirDrop collectively known as the AirBorne vulnerability. These flaws in Apple’s wireless peer-to-peer transfer system showed that under certain conditions, an attacker on the same Wi-Fi network could potentially exploit AirDrop to install malware on a target device or even gain remote device access sometimes without the user doing anything at all.
Apple has patched many of these issues, but the discovery raised a broader point: your AirDrop discoverability isn’t just about who can send you files. It also affects how visible your device is to potentially malicious actors in shared wireless environments like coffee shops, hotels, or airports.
How to Disable AirDrop on iPhone
There are two main ways to do this on your iPhone through Control Center for a quick toggle, or through the Settings app for something more permanent.
Using Control Center on iPhone
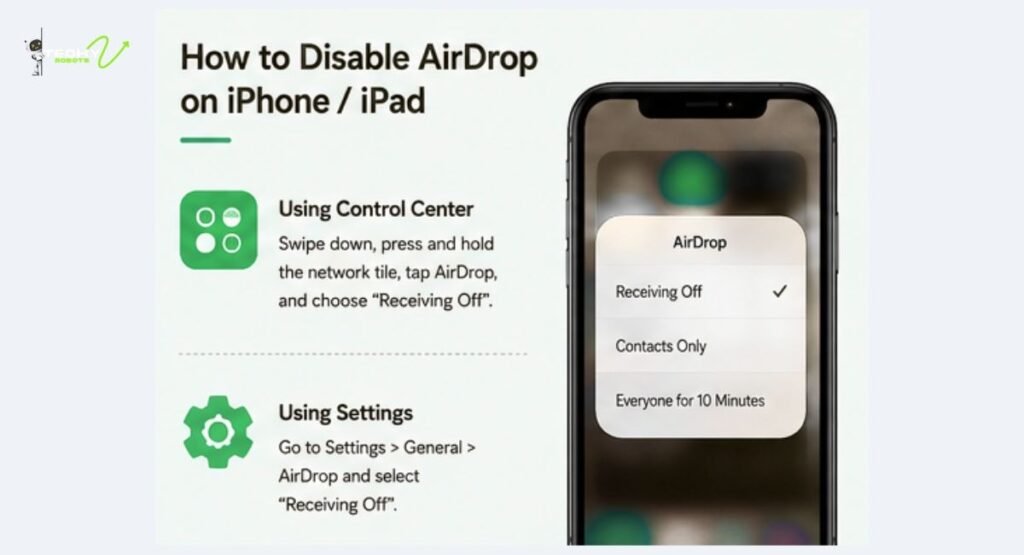
This is the fastest route. Swipe down from the top-right corner of your screen to open the Control Center. Look for the network settings tile; it’s the square that shows your Wi-Fi, Bluetooth, cellular, and airplane mode icons grouped together.
Press and hold that tile to expand it. You’ll see the AirDrop icon appear. Tap it, and a menu will come up with three options: Receiving Off, Contacts Only, and Everyone for 10 Minutes. Choose “Receiving Off” to stop your iPhone from accepting any AirDrop requests.
Disabling AirDrop Through iPhone Settings
If you want to go through the Settings app instead, here’s how to get there. Open Settings, scroll down to General, and tap it. From there, look for AirDrop. Tap it and you’ll see the same three visibility options. Select “No One” or “Receiving Off” to disable AirDrop completely.
This method is slightly more permanent in the sense that it won’t reset after a timer like the “Everyone for 10 Minutes” option does. Whatever you set here stays until you change it manually.
How to Disable AirDrop on iPad
The process on the iPad is almost identical to the iPhone. Open Control Center by swiping down from the top-right corner. Press and hold the connectivity tile, then tap the AirDrop icon to bring up the visibility options.
You can also navigate to Settings, tap General, then AirDrop, and select your preferred setting from there. If your iPad is shared with a child or used in a public space, setting it to “Receiving Off” or “Contacts Only” is definitely the smarter choice.
How to Turn Off AirDrop on Mac
Mac users have a couple of different options depending on which macOS version they’re running. Let’s cover both.
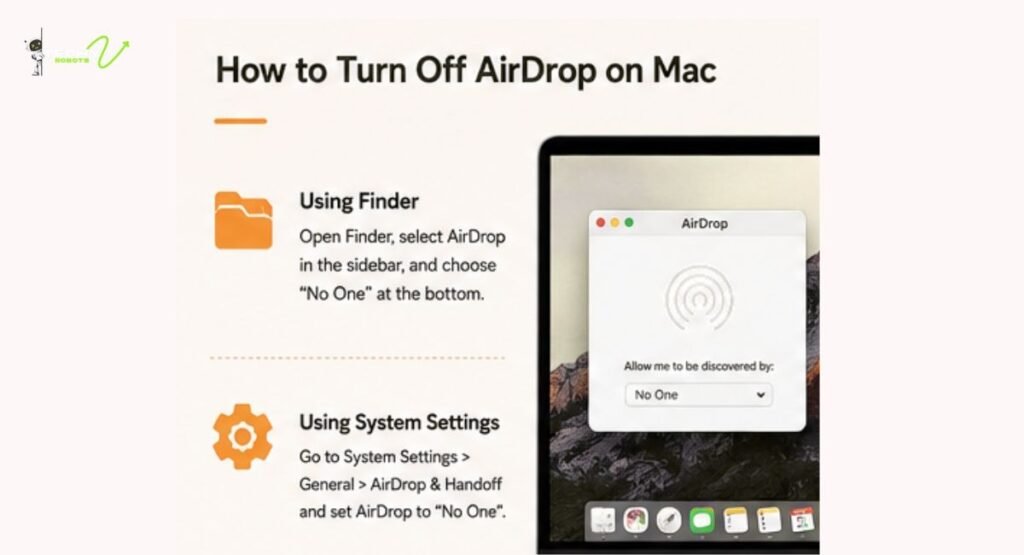
Using Finder to Disable AirDrop
Open a Finder window. In the left sidebar, you’ll see AirDrop listed under your favorite locations. Click on it. At the bottom of the AirDrop window, you’ll see a dropdown menu that says “Allow me to be discovered by.” Click it and select “No One.” That’s it — your Mac is no longer broadcasting itself to nearby Apple devices.
Disabling AirDrop Through System Settings on macOS Ventura
If you’re running macOS Ventura or later, Apple moved a lot of settings around. Open System Settings from the Apple menu. Click on General, then AirDrop and Handoff. You’ll find the AirDrop setting right there. Switch it to “No One” or turn it off entirely using the toggle.
This is particularly useful if you use your Mac in shared workspaces or public spots where Bluetooth discoverability is a real concern.
What Does “Receiving Off” Actually Mean?
When you set AirDrop to “Receiving Off” or “No One,” your device stops broadcasting its availability for incoming file transfers. People nearby won’t see your device show up as an option when they try to AirDrop something. They can’t send you files, and you won’t get any incoming requests or previews popping up on your screen.
It’s worth knowing though that this doesn’t fully disable AirDrop as a feature. You can still send files to others. Your device just becomes invisible on the receiving end, which is exactly what most people actually want.
The Difference Between “No One,” “Contacts Only,” and “Everyone”
Let’s break these down because they’re not all created equal.
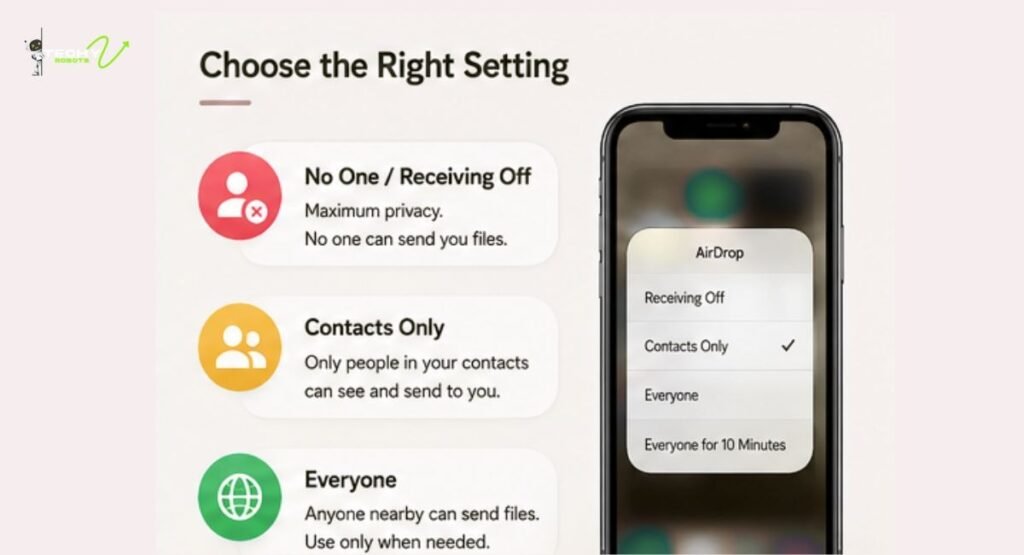
“No One” or “Receiving Off” means your device is completely hidden. Nobody can send you anything through AirDrop. This is the most private option.
“Contacts Only” means only people in your contacts list can see your device for AirDrop transfers. This is a solid middle ground for most users. You stay reachable to people you know while staying invisible to strangers.
“Everyone” or “Everyone for 10 Minutes” means your device is visible to every nearby Apple device. This setting is convenient when you’re doing a quick transfer with someone new, but leaving it on permanently is a genuine privacy risk.
The “Everyone for 10 Minutes” option Apple introduced is a nice compromise: your device becomes temporarily visible for a short transfer, then automatically reverts to a more private state.
How to Restrict AirDrop Using Screen Time
If you’re managing an iPhone or iPad for a child, or you want to prevent AirDrop from being re-enabled by someone else, Screen Time restrictions are the way to go. This approach actually locks the AirDrop setting so it can’t be changed without a passcode.
Setting Up Content and Privacy Restrictions
Open Settings and tap Screen Time. If you haven’t set it up, you’ll be prompted to do so. Once inside, tap Content and Privacy Restrictions. Enable it if it’s not already on.
Scroll down to find Allowed Apps or look under the sharing and connectivity section depending on your iOS version. You’ll find AirDrop listed there. Toggling it off here means the AirDrop option disappears from Control Center and Settings entirely on that device — nobody can turn it back on without the Screen Time passcode.
This is hands-down the best way to disable AirDrop permanently for kids’ devices or managed devices in a workplace setting.
Can You Disable AirDrop Without Turning Off Bluetooth?
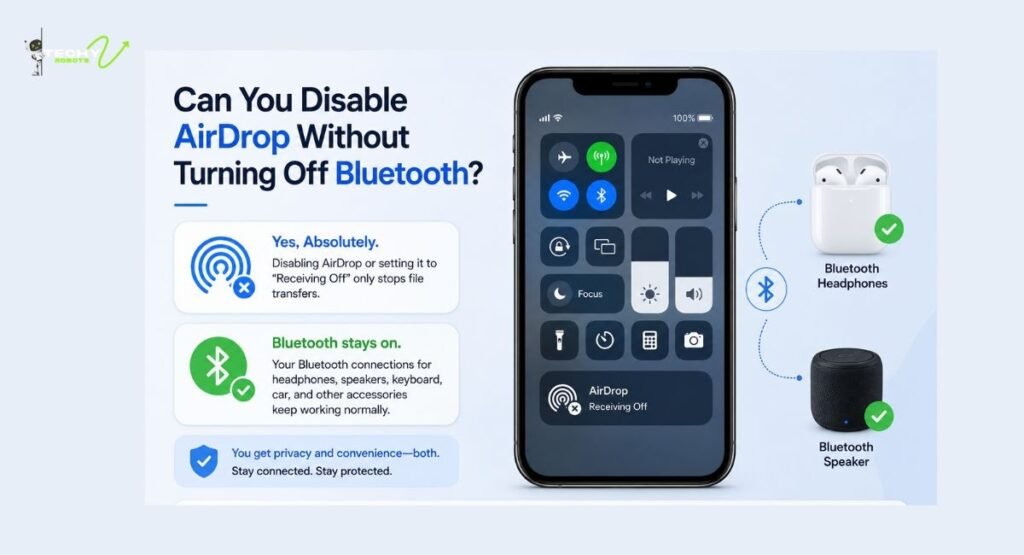
Yes, absolutely. This is a common misconception. A lot of people think AirDrop is basically just Bluetooth, so they assume you’d have to turn Bluetooth off to stop AirDrop. That’s not how it works.
AirDrop uses Bluetooth for device discovery and Wi-Fi for the actual transfer, but you can control AirDrop access independently of both. Setting AirDrop to “Receiving Off” in your settings keeps Bluetooth running normally for your headphones, keyboard, car connection, and anything else it just turns off the AirDrop discovery layer. You get to keep your wireless accessories connected without leaving your device open to incoming AirDrop requests.
How to Stop Strangers from AirDropping You
The simplest answer here is to never leave your AirDrop on “Everyone” in public. Most security experts and Apple’s own guidance now recommend “Contacts Only” as your default setting when AirDrop is active.
If you’re somewhere busy like an airport, stadium, or busy public transit, just flip it to “Receiving Off” for the duration. There’s no reason to be discoverable by strangers while you’re just sitting there minding your business.
Also keep your iOS and macOS software updated. Many of the patches Apple has quietly pushed out over the last few years have specifically addressed AirDrop-related security vulnerabilities, including aspects of the AirBorne vulnerability. Staying current with updates is one of the easiest ways to keep your Apple devices secure.
Best AirDrop Privacy Settings for Everyday Use
Here’s a practical setup that works well for most people:
On your iPhone or iPad, keep AirDrop set to “Contacts Only” as your daily default. This way, people who actually know you can still send files easily, but random people around you can’t ping your device.
On your Mac, especially if it’s a work machine or you use it in public spaces, consider keeping AirDrop set to “No One” unless you’re actively using it for a transfer. Macs tend to sit open and run in shared environments, so keeping discoverability off is just good practice.
If you ever need to share with someone new, temporarily switch to “Everyone” for that moment, complete the transfer, and switch right back. It takes five seconds and the habit will save you a lot of headaches.
AirDrop Not Working After Disabling? Here’s What to Check
Sometimes people disable AirDrop and then run into issues later when they try to use it again. Here are the most common things to check.
First, make sure both Bluetooth and Wi-Fi are turned on. AirDrop needs both to function, even though it’s not dependent on an internet connection. If either is off, AirDrop won’t work regardless of your visibility settings.
Second, check if Screen Time restrictions have locked your AirDrop settings. If you can’t even see the AirDrop option in Control Center or Settings, there’s a good chance someone enabled Content and Privacy Restrictions. You’ll need the Screen Time passcode to undo that.
Third, make sure both devices are within a reasonable range roughly 30 feet or about 9 meters is typically the effective distance for AirDrop transfers. Walls, interference from other devices, and older hardware can all reduce that range in practice.
Finally, if AirDrop still isn’t showing up after you’ve re-enabled it, try toggling Airplane Mode on for a few seconds and then off again. This resets your wireless connections and often clears up any temporary glitches.
Is Disabling AirDrop the Right Move for You?
It really depends on how you use your device and where. If you’re someone who regularly shares files between your own Apple devices or with close friends and coworkers, keeping AirDrop on “Contacts Only” is probably fine and convenient.
If you work in environments where data security matters healthcare, legal, finance, or any field with confidentiality requirements disabling AirDrop entirely on work devices is worth considering. The risk of accidental data leaks or device discoverability isn’t worth the convenience.
For most everyday users, the sweet spot is “Contacts Only” as a default setting with a quick manual flip when you need to share with someone new. That keeps you flexible without leaving your device open to the internet equivalent of strangers knocking on your door.
Conclusion
Disabling or adjusting your AirDrop settings is one of those small moves that quietly makes a real difference to your privacy. Whether you’re trying to stop unsolicited files, reduce your device’s wireless footprint, or just take back a bit of control over who can reach your iPhone or Mac, the fix is genuinely straightforward.
Use “Receiving Off” for maximum privacy, “Contacts Only” for everyday use, and Screen Time restrictions if you want to lock the setting for good. Keep your software updated, don’t leave AirDrop on “Everyone” in public spaces, and you’ll be in a much better spot.
Apple’s ecosystem is powerful, but it works best when you’re the one deciding how visible your device is. A few taps in the right direction and you’re sorted.
FAQs
1. Does disabling AirDrop turn off Bluetooth on my iPhone?
No, it doesn’t. Turning off AirDrop or setting it to “Receiving Off” only affects your discoverability for file transfers. Your Bluetooth connection for headphones, speakers, and other accessories stays active.
2. Can someone still send me an AirDrop request if I set it to “Contacts Only”?
Yes, but only if they’re in your contacts and vice versa. If someone not in your contacts tries to send you a file, your device simply won’t appear on their end.
3. Is “Everyone for 10 Minutes” safe to use?
It’s reasonably safe for short, intentional transfers. The issue is when people forget about it and step out into a public space while still discoverable. Get into the habit of switching back to “Contacts Only” right after your transfer is done.
4. How do I permanently prevent my child from using AirDrop?
Go to Settings, open Screen Time, enable Content and Privacy Restrictions, and toggle off AirDrop under Allowed Apps. This removes AirDrop access entirely until you enter your Screen Time passcode to restore it.
5. Does disabling AirDrop protect me from the AirBorne vulnerability?
It significantly reduces your exposure. The AirBorne vulnerability exploits were largely tied to how AirDrop broadcasts device availability over shared networks. Keeping AirDrop off or set to “Contacts Only” limits that broadcasting and makes your device a much harder target. Keeping your iOS and macOS software up to date is equally important for staying protected.