You open Chrome, fire up Microsoft Teams, have Outlook running in the background, and suddenly your PC starts groaning like an old engine. Everything slows to a crawl. Apps take forever to load. Windows 11 starts stuttering. Sound familiar?
Here is the truth: your computer is probably running out of RAM. And the good news is, upgrading your system memory is one of the most affordable, high-impact upgrades you can make. Whether you are on a desktop tower or a laptop, this guide walks you through everything, from figuring out what RAM you need to physically installing it and optimising Windows 11 for the best performance.
Let us get into it.
What Is RAM and Why Does It Matter in Windows 11
Think of RAM (Random Access Memory) as your computer’s short-term memory. Your processor uses it to store all the data it is actively working with right now. Your long-term storage, whether that is an SSD or HDD, holds everything permanently. But RAM? That is the workspace.
When you have too little RAM, Windows 11 starts using a portion of your hard drive as a substitute. This is called virtual memory or the paging file. The problem is, a hard drive is nowhere near as fast as actual RAM. So the moment Windows starts leaning on that swap file, things slow down fast.
More RAM means more things running at once without that slowdown kicking in. It is as simple as that.
How Much RAM Do You Actually Need

This depends entirely on what you do with your computer. There is no one-size-fits-all answer, but here is a practical breakdown.
8GB RAM: Is It Still Enough?
A few years ago, 8GB was perfectly fine. Today, it is borderline. If you are just browsing, watching videos, and writing documents, 8GB can get the job done. But the moment you open a few browser tabs alongside Teams and Outlook, you will start hitting limits. A computer slow with 8GB RAM is becoming a very common complaint, especially after Windows 11 updates that have increased memory demands.
16GB RAM: The Sweet Spot
For most people in 2025, 16GB is the ideal amount. It handles multitasking comfortably, runs modern games without memory-related FPS drops, and gives Windows 11 enough breathing room to manage background processes smoothly. If you are upgrading from 8GB to 16GB, you will notice a real difference.
32GB and Beyond: Who Needs This Much?
If you are into video editing, 3D rendering, game development, or running virtual machines, 32GB makes sense. For everyone else, it is more than enough for any foreseeable future workload. Some content creators and developers even go higher, but for daily use and gaming, 32GB is the ceiling you will rarely touch.
How to Check Your Current RAM in Windows 11
Before buying anything, know what you have. Here is how to check your installed RAM in Windows 11:
- Press Ctrl + Shift + Esc to open the Task Manager.
- Click the Performance tab.
- Select Memory on the left side.
You will see how much RAM you have, how much is in use, and importantly, the memory speed and how many slots are being used. This last point matters a lot when planning your upgrade.
You can also right-click the Start button, go to System, and see the basic installed RAM amount under Device Specifications.
Is Your RAM Upgradeable? Laptop vs Desktop
This is the question most people skip and then regret. Not all computers let you upgrade RAM. Knowing what you are working with saves a lot of time and money.
Desktop RAM Upgrades
Desktop PCs almost always have upgradeable RAM. You will find DIMM slots on the motherboard, usually two to four of them. As long as slots are available and your motherboard supports higher memory capacity, you can add or replace RAM sticks with minimal hassle.
Laptop RAM: Soldered vs Removable
This is where it gets tricky. Many modern laptops, especially thin and light models from brands like Dell, ASUS, and Microsoft Surface, use soldered RAM. That means the memory is permanently attached to the motherboard and cannot be changed. OEM restrictions and design choices have made this increasingly common.
Before buying RAM for a laptop, check the manufacturer’s product page or look up your specific model number on a RAM compatibility site. If your RAM is soldered, the only option left is managing software-side optimization, which we will cover later.
Choosing the Right RAM: DDR4 vs DDR5

RAM comes in generations. The two you will encounter most in Windows 11 systems today are DDR4 and DDR5.
DDR4 memory is the more established standard. It is affordable, widely compatible, and still performs well for everyday tasks and gaming. Most mid-range systems built before 2023 use DDR4.
DDR5 is the newer generation. It offers higher memory transfer rates and better efficiency, but it requires a compatible motherboard and processor. If you have a newer Intel 12th/13th/14th gen or AMD Ryzen 7000 series system, you likely support DDR5.
The key thing: you cannot mix the two. Your motherboard determines which type you need, and using the wrong one simply will not work.
RAM Speed and What MHz Actually Means
RAM speed is measured in MHz or MT/s (mega transfers per second). Common speeds are 3200MHz and 3600MHz for DDR4, and 4800MHz to 6000MHz+ for DDR5. Faster RAM helps with gaming performance and multitasking, but the gains are sometimes modest unless you pair it with an XMP or EXPO profile in your BIOS.
XMP (for Intel) and EXPO (for AMD) are profiles stored on the RAM stick that tell your motherboard to run the memory at its advertised speed. Without enabling these, your RAM might default to a slower base frequency.
Dual-Channel RAM Configuration Explained
If your motherboard has four RAM slots, do not put both sticks in adjacent slots. Install them in alternating slots, usually slots 1 and 3, or 2 and 4, as marked in your motherboard manual. This enables dual-channel mode, which effectively doubles the memory bandwidth and noticeably improves performance, especially in gaming and creative workloads.
How to Check Motherboard Compatibility Before Buying
Buying the wrong RAM is a frustrating and avoidable mistake. Here is how to confirm what your system supports:
- Search your motherboard model number on the manufacturer’s website (ASUS, MSI, Gigabyte, etc.) and check the memory compatibility list (QVL list).
- Use tools like CPU-Z to identify your current RAM type and motherboard model.
- Check your system manual or spec sheet for maximum RAM capacity and supported speeds.
Getting this right before you buy saves you from a RAM-not-detected-in-BIOS headache later.
Step-by-Step Guide: How to Upgrade RAM on a Desktop PC
Here is how to physically install new RAM in a desktop:
- Shut down and unplug your PC. Never work on a live system.
- Ground yourself. Touch a metal part of the case or use an anti-static wrist strap to avoid static damage.
- Open the side panel of your PC case.
- Locate the DIMM slots on your motherboard. They are the long thin slots near the CPU.
- Press the retention clips at the ends of the slot outward to release any existing RAM sticks if you are replacing them.
- Line up the new RAM stick with the slot. Note the notch on the bottom of the stick, it only fits one way.
- Press down firmly on both ends until the clips snap back into place. You should hear a click.
- Repeat for the second stick if you are doing a dual-channel setup, making sure to use the correct slots.
- Close the case, plug everything back in, and power on.
When Windows 11 boots up, go back to Task Manager and confirm the new memory size is showing correctly.
Step-by-Step Guide: How to Upgrade RAM on a Laptop
If your laptop has removable SO-DIMM slots, the process is similar but more compact:
- Power off completely and unplug the charger.
- Remove the back panel using a small Phillips screwdriver. Some laptops require prying clips.
- Locate the memory slots. On most notebooks, they are clearly visible once the back is open.
- Remove existing RAM by pushing the side clips outward. The stick will pop up at an angle. Pull it out gently.
- Insert the new RAM at a 45-degree angle, aligning the notch, then press it flat until the clips engage.
- Reassemble the laptop and power it on.
Check Task Manager after booting to verify the upgrade worked.
How to Increase Virtual Memory in Windows 11

If upgrading your physical RAM is not an option right now, you can manually increase the paging file size in Windows 11 to give your system more room to breathe. It will not be as fast as real RAM, but it reduces crashes and slowdowns.
Here is how to do it:
- Press Windows + S and search for “Adjust the appearance and performance of Windows.”
- Go to the Advanced tab and click Change under Virtual Memory.
- Uncheck “Automatically manage paging file size for all drives.”
- Select your system drive (usually C:) and choose Custom size.
- Set the Initial size to around 1.5x your RAM in MB, and the Maximum to about 3x your RAM.
- Click Set, then OK, and restart your PC.
This is not a long-term solution, but it buys you some relief while you plan a proper memory upgrade.
How to Fix High RAM Usage in Windows 11
Sometimes the issue is not the amount of RAM, but what is eating it up. High RAM usage in Windows 11 is often caused by background apps, memory leaks, or misconfigured startup programs.
Finding Memory-Hungry Apps
Open Task Manager and go to the Processes tab. Click the Memory column header to sort apps by usage. Common offenders include Google Chrome (each tab eats a chunk of memory), Microsoft Teams, antivirus software, and various system processes. If you spot a process consuming an unusual amount of memory, that could be a memory leak worth investigating.
Disabling Startup Programs
Many apps load themselves at startup and quietly consume RAM all day. To fix this:
- Open Task Manager.
- Click the Startup apps tab.
- Right-click anything you do not need immediately at boot and click Disable.
This alone can free up several hundred megabytes of standby memory and noticeably improve how fast your PC feels after logging in.
How to Test RAM After Installation Using Windows Memory Diagnostic
After a RAM upgrade, it is smart to run a quick memory test to rule out faulty memory or installation errors.
Windows 11 has a built-in tool for this:
- Press Windows + R, type mdsched.exe, and hit Enter.
- Choose Restart now and check for problems.
Your PC will reboot into the diagnostic tool and run a full memory scan. If it finds errors, your RAM may be faulty, improperly seated, or incompatible.
For a more thorough test, MemTest86 is a free tool you can boot from a USB drive. It runs a comprehensive series of memory tests and is particularly useful when diagnosing BSOD errors or random system crashes that could be memory-related.
Troubleshooting: RAM Not Detected in BIOS
If your computer boots but does not show the correct amount of RAM, do not panic. Here is what to check:
- Reseat the RAM. Power down, remove the sticks completely, and firmly reinsert them. Loose contact is the most common culprit.
- Try different slots. Some motherboards have finicky slots. Try the sticks in alternate positions.
- Check BIOS for XMP/EXPO. Entering your BIOS (usually by pressing Delete or F2 at startup) and enabling the XMP or EXPO profile can help the system correctly identify and use faster RAM kits.
- Update your BIOS. Some RAM types require a firmware update to be recognized, especially DDR5 on newer boards.
- Test one stick at a time. If one stick works and the other does not, you may have a defective module.
Common RAM Upgrade Mistakes to Avoid
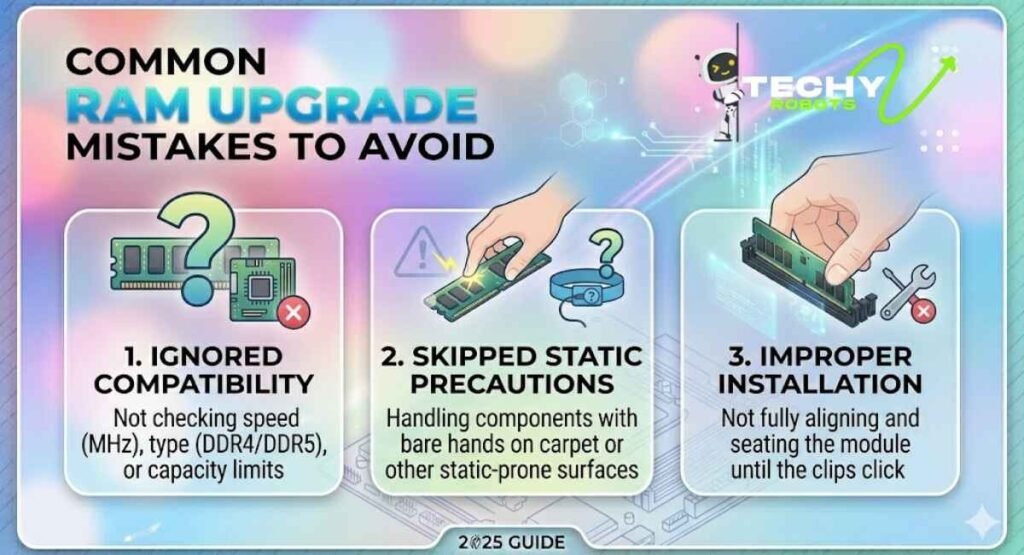
Even experienced users make these mistakes. Keep these in mind:
- Mixing RAM kits from different manufacturers or speeds can cause instability.
- Not enabling XMP/EXPO means you are paying for fast RAM but running it at a slower speed.
- Forgetting to check the maximum supported RAM capacity on your motherboard.
- Buying DDR4 for a DDR5 system or vice versa.
- Not grounding yourself before handling hardware risks can cause static damage.
Does RAM Upgrade Help Gaming FPS?
Yes, but the impact depends on your starting point. If you are gaming with 8GB of RAM and running into memory-related FPS drops, upgrading to 16GB will make a meaningful difference. Games like open-world titles and simulation games are especially RAM-hungry.
Beyond 16GB, the gains for gaming become smaller. Pairing a RAM upgrade with an SSD upgrade gives you the best all-around performance boost for the cost, since both fast storage and adequate memory work together to reduce load times and improve frame pacing.
Conclusion
Upgrading your RAM is one of those improvements that you feel immediately. A computer that was stuttering through basic tasks suddenly handles multitasking with ease, games run smoother, and Windows 11 stops leaning on that slow virtual memory paging file. Whether you go from 8GB to 16GB or step all the way up to 32GB, the difference in day-to-day use is real and lasting.
If you cannot upgrade physically due to soldered RAM, the software-side optimisations around virtual memory settings and startup programs still make a genuine impact. Every improvement counts.
The best part is that RAM is affordable right now. There has never been a better time to give your system the memory it deserves.
FAQs
1. Can I upgrade RAM in any Windows 11 laptop?
Not always. Many modern thin laptops have soldered RAM that cannot be replaced. Check your laptop’s spec sheet or open it up to see if SO-DIMM slots are present before buying anything.
2. How do I know if my RAM upgrade was successful?
Open Task Manager in Windows 11, go to the Performance tab, and click Memory. The new total should reflect your upgraded amount. If it does not, the stick may not be seated properly.
3. Is 16GB RAM enough for Windows 11 gaming in 2025?
Yes, 16GB is the recommended sweet spot for gaming in 2025. It handles most modern titles comfortably alongside background apps. Only heavy content creators or those running virtual machines would benefit from going higher.
4. Can mixing different RAM brands cause problems?
It can. While mixing brands is not always catastrophic, mismatched speeds and latencies can cause instability. For best results, buy a matched dual-channel kit from the same manufacturer and the same product line.
5. What should I do if my PC restarts repeatedly after a RAM upgrade?
First, reseat the RAM sticks and make sure they are fully clicked in. Then enter the BIOS and enable the XMP or EXPO profile. If it still restarts, try running Windows Memory Diagnostic or MemTest86 to check for faulty memory.